4.1 Mounting ST 3000 Transmitter, Continued
Remote seal
mounting, continued
Table 10 Mounting Remote Diaphragm Seal Transmitter, continued
Step Action
3
If Transmitter Model Then Connect Remote
Number is… Seal on…
STR93D or STR12D low pressure (LP) side of
transmitter to upper flange
mounting on tank wall for
fixed or constant head H2.
STR13D high pressure (HP) side of
transmitter to upper flange
mounting on tank wall for
fixed or constant head H2.
*
ATTENTION
On insulated tanks, remove enough insulation to
accommodate the flange extension.
4
It is the End User’s responsibility to provide a flange gasket and
mounting hardware that are suitable for the transmitter’s service
condition
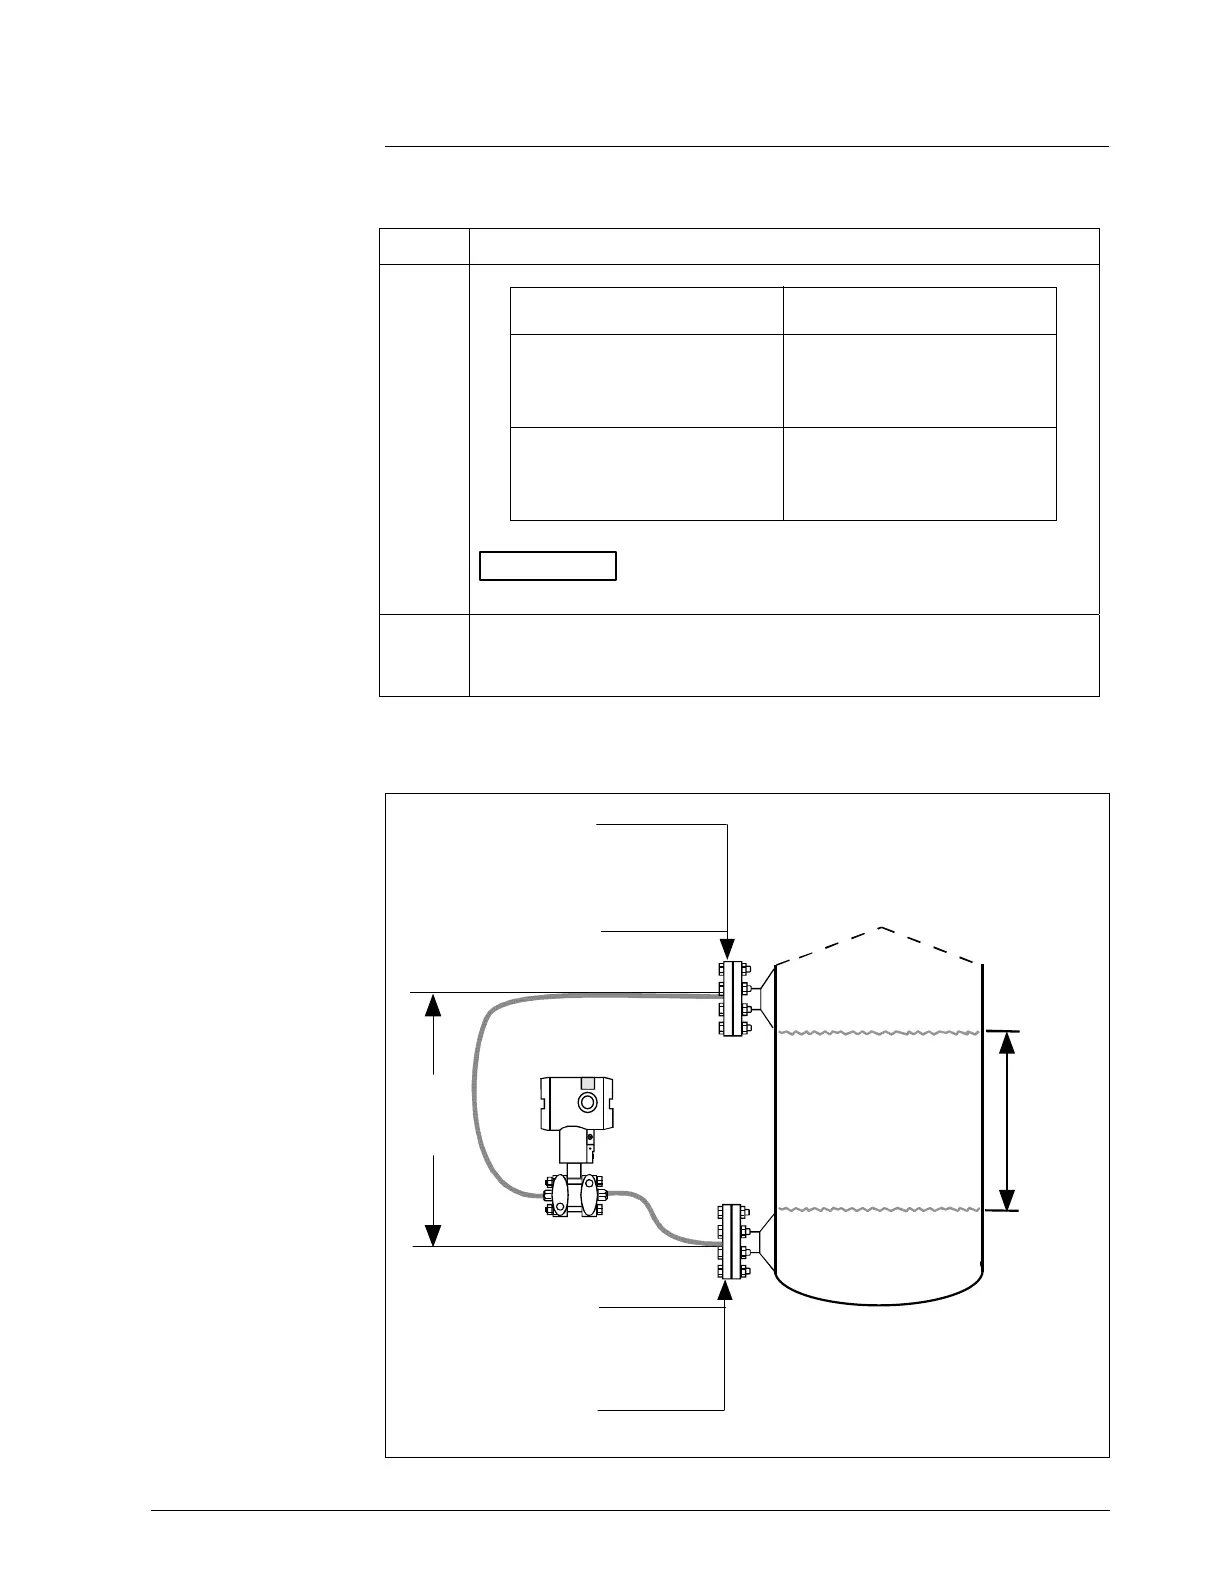
Figure 10 Typical Remote Diaphragm Seal Transmitter Installation.
Variable
Head H1
HP Side
- Model STR93D
- Model STR12D
LP Side
- Model STR13D
Minimum Level
Maximum Level
LP Side
- Model STR93D
- Model STR12D
HP Side
- Model STR13D
H2
Fixed
Ref. Leg
2/05 ST 3000 Release 300 Installation Guide
33

 Loading...


