VISTA-128BPT/VISTA-250BPT Installation and Setup Guide
3-4
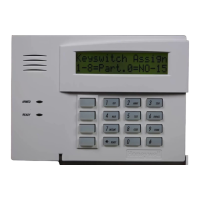
Addressing the Keypads
The keypads will not operate until they are physically addressed and enabled in the system's Device Programming
in the #93 Menu Mode.
Set each keypad for an individual address (00-30) according to the keypad's instructions. Set an alpha keypad for
address 00 and other keypads for higher addresses (00 and 01 are enabled in the system's default program). Any
keypads set for address 02 and above will appear blank until they are enabled in the system's program. Each keypad
must be set for a different address.
• Do not set any keypads to address 31 (nonaddressable mode). They will interfere with other keypads (as well as
other devices) connected to the keypad terminals.
• If an “OPEN CIRCUIT” message is present on a keypad, data from the control is not reaching the keypad. Check
your wiring.
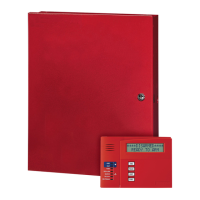
Supplementary Power Supply for Additional Keypads
When the control’s auxiliary power load for all devices exceeds 750mA, you can power additional keypads from a
regulated 12VDC power supply (e.g., ADEMCO AD12612 (1.2A)). Use a UL Listed, battery-backed supply for UL
installations.
Connect the additional keypads as shown in Figure 3-5, using the keypad wire colors shown. Be sure to observe the
current ratings for the power supply used.
• Make connections directly to the screw terminals as shown in Figure 3-5.
• Be sure to connect the negative (–) terminal on the power supply unit to terminal 7 (–) on the control.
+
–
+
6 7 8 9
SUPPLEMENTARY
POWER SUPPLY
–
CONTROL TERMINAL STRIP
AUX.
AUX. DATA
IN
DATA
OUT
IMPORTANT:
MAKE THESE
CONNECTIONS
DIRECTLY TO
SCREW
TERMINALS AS
SHOWN.
RED WIRE
BLACK WIRE
YELLOW WIRE
GREEN WIRE
BLACK WIRE
RED WIRE
GREEN WIRE
YELLOW WIRE
pwr_supply-002-V0
TO
MAIN
KEYPAD
TO
SECONDARY
KEYPAD
Figure 3-5: Using a Supplementary Power Supply

 Loading...