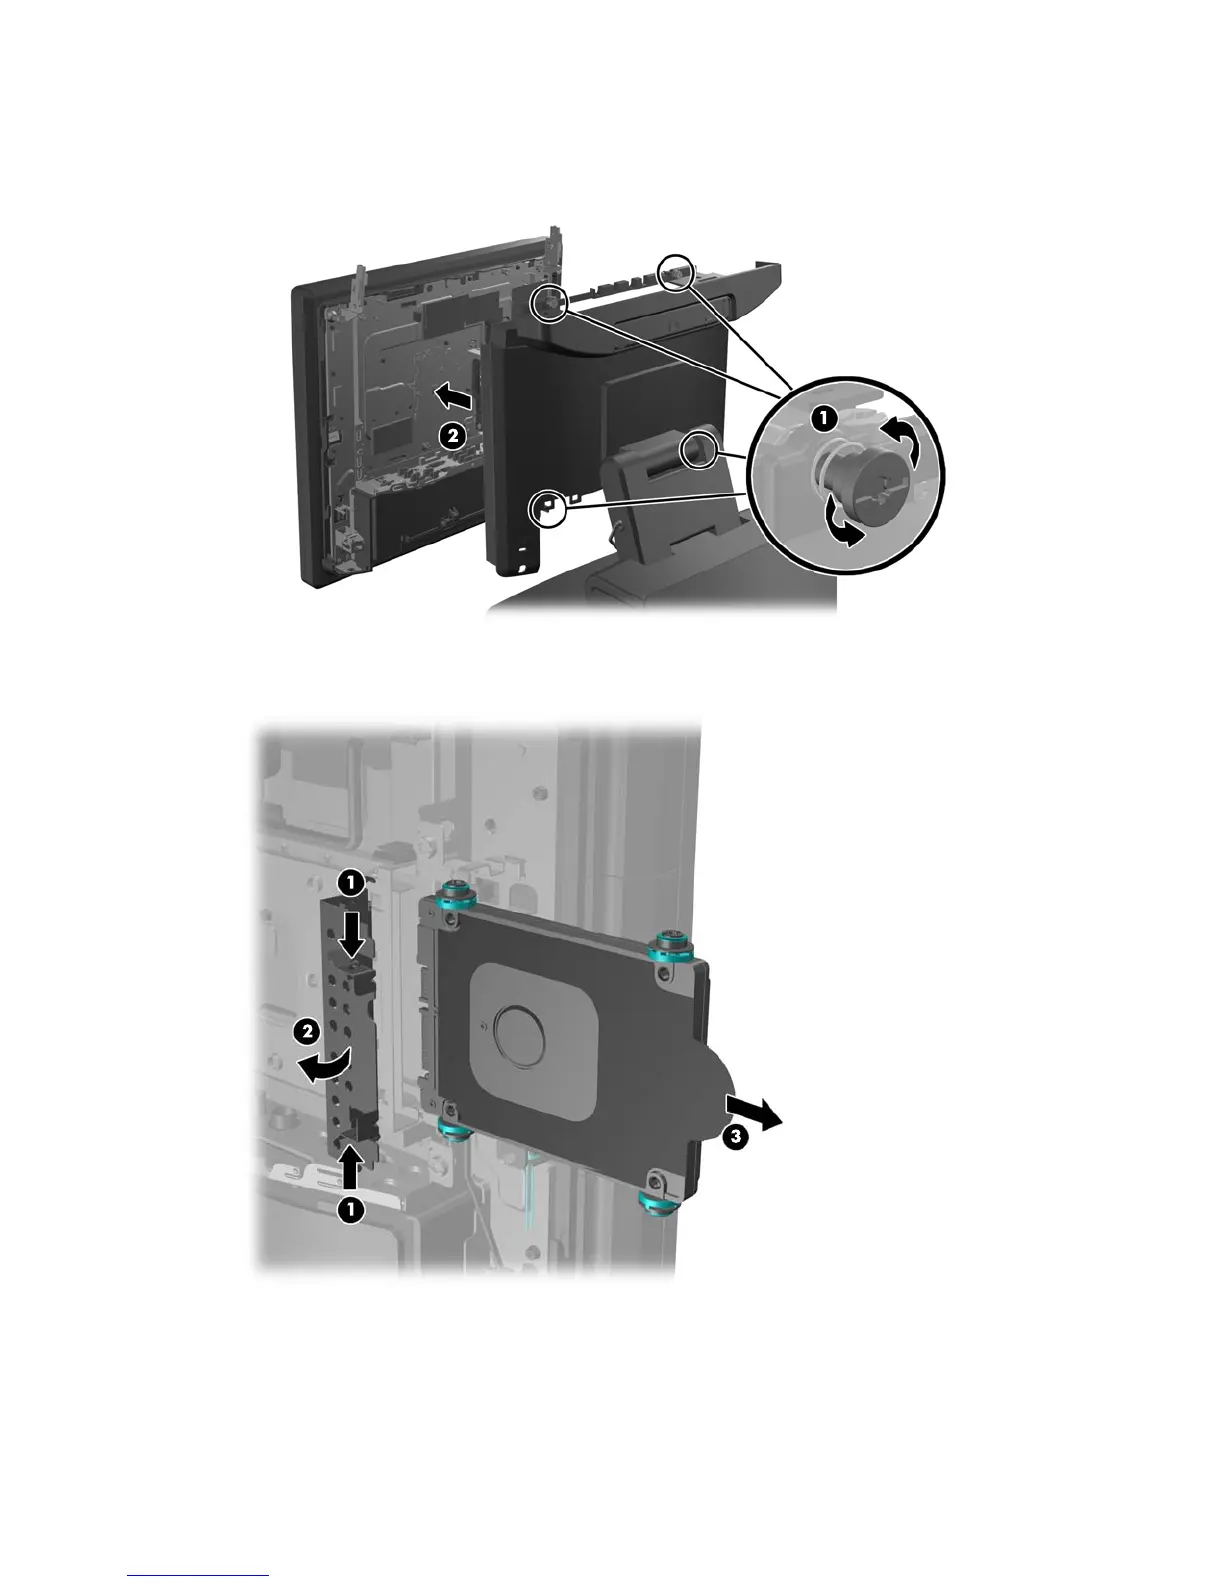
5. Loosen the four captive screws that secure the computer panel to the back plate (1) and pull the
computer panel off the back plate (2).
6. Pinch the two tabs together on the hard drive door (1) and rotate it open (2), then grasp the pull
tab on the side of the hard drive and pull the hard drive out of the drive bay (3).
50 Chapter 4 Removal and replacement procedures