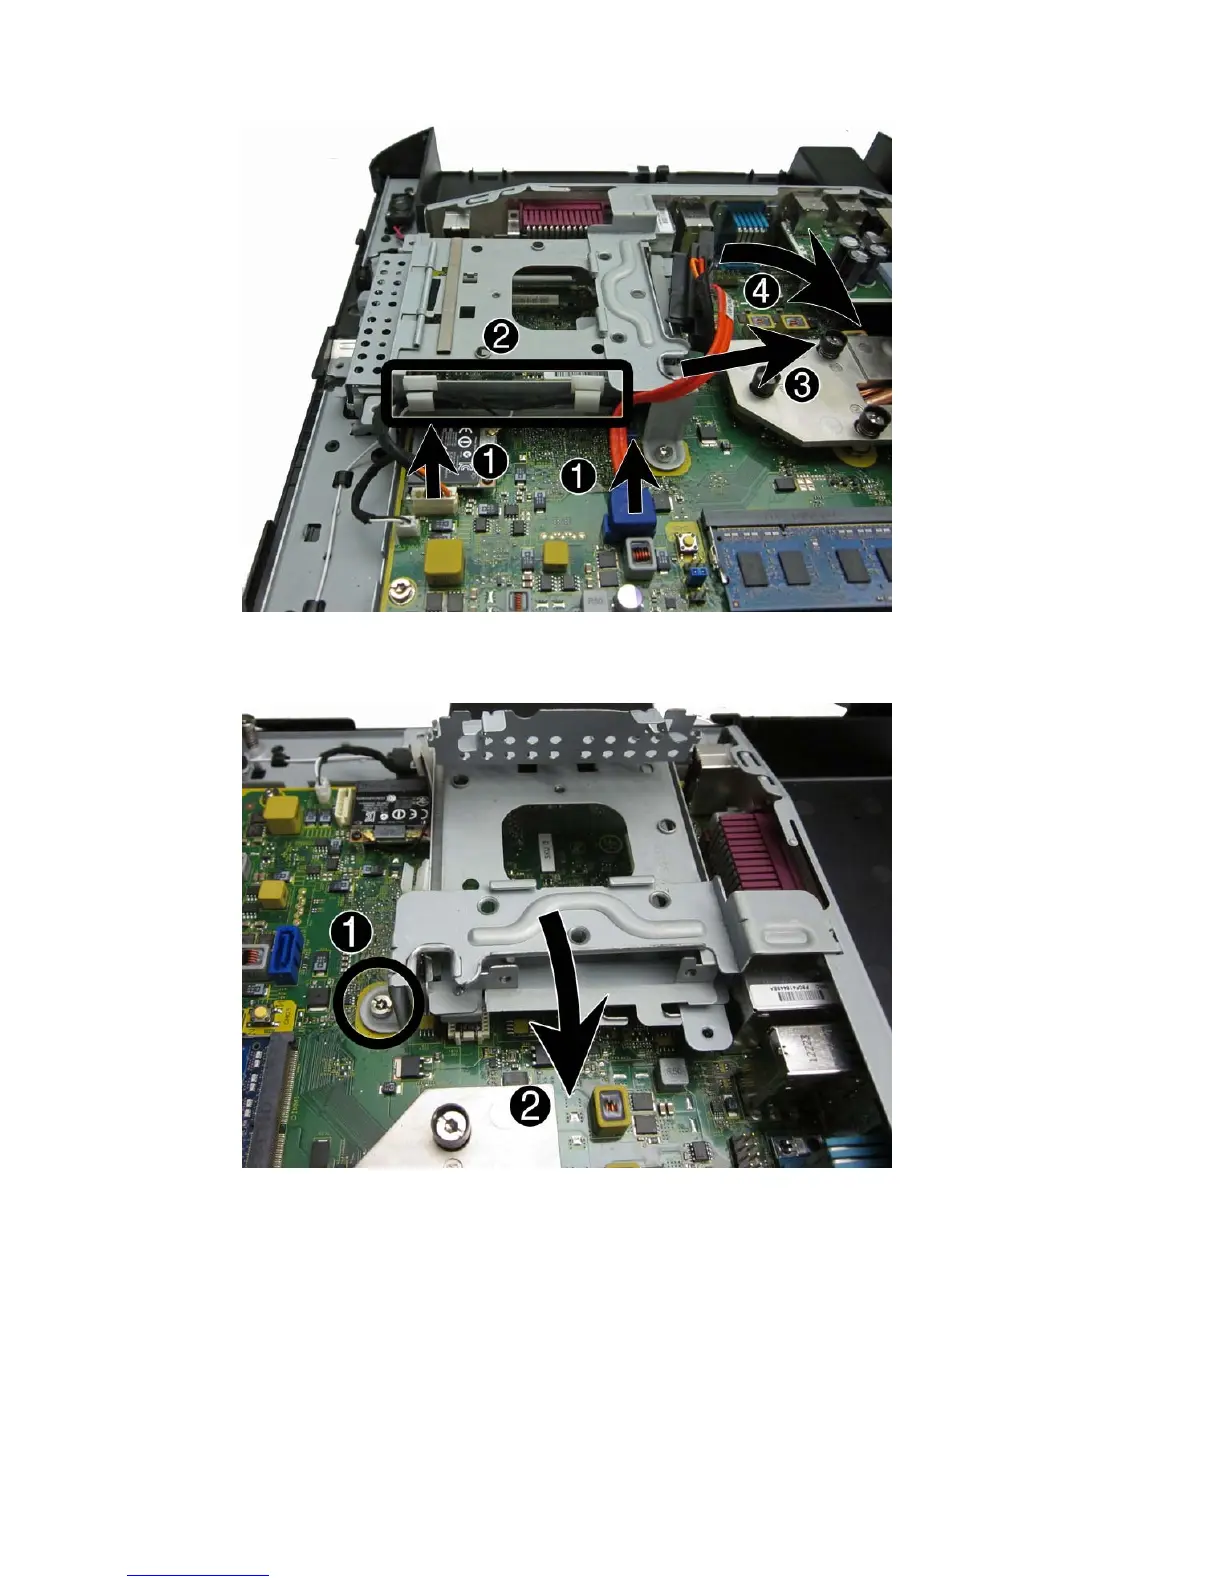
8. Remove the Torx screw (1) that secures the drive cage to the computer, and then rotate the
drive cage up and lift it from the computer (2).
To reinstall the drive cable assembly and drive cage, reverse the removal procedure.
When installing the drive cage, be sure to insert the tabs from the cage into the correct slots in the
computer.
56 Chapter 4 Removal and replacement procedures