Server Installation
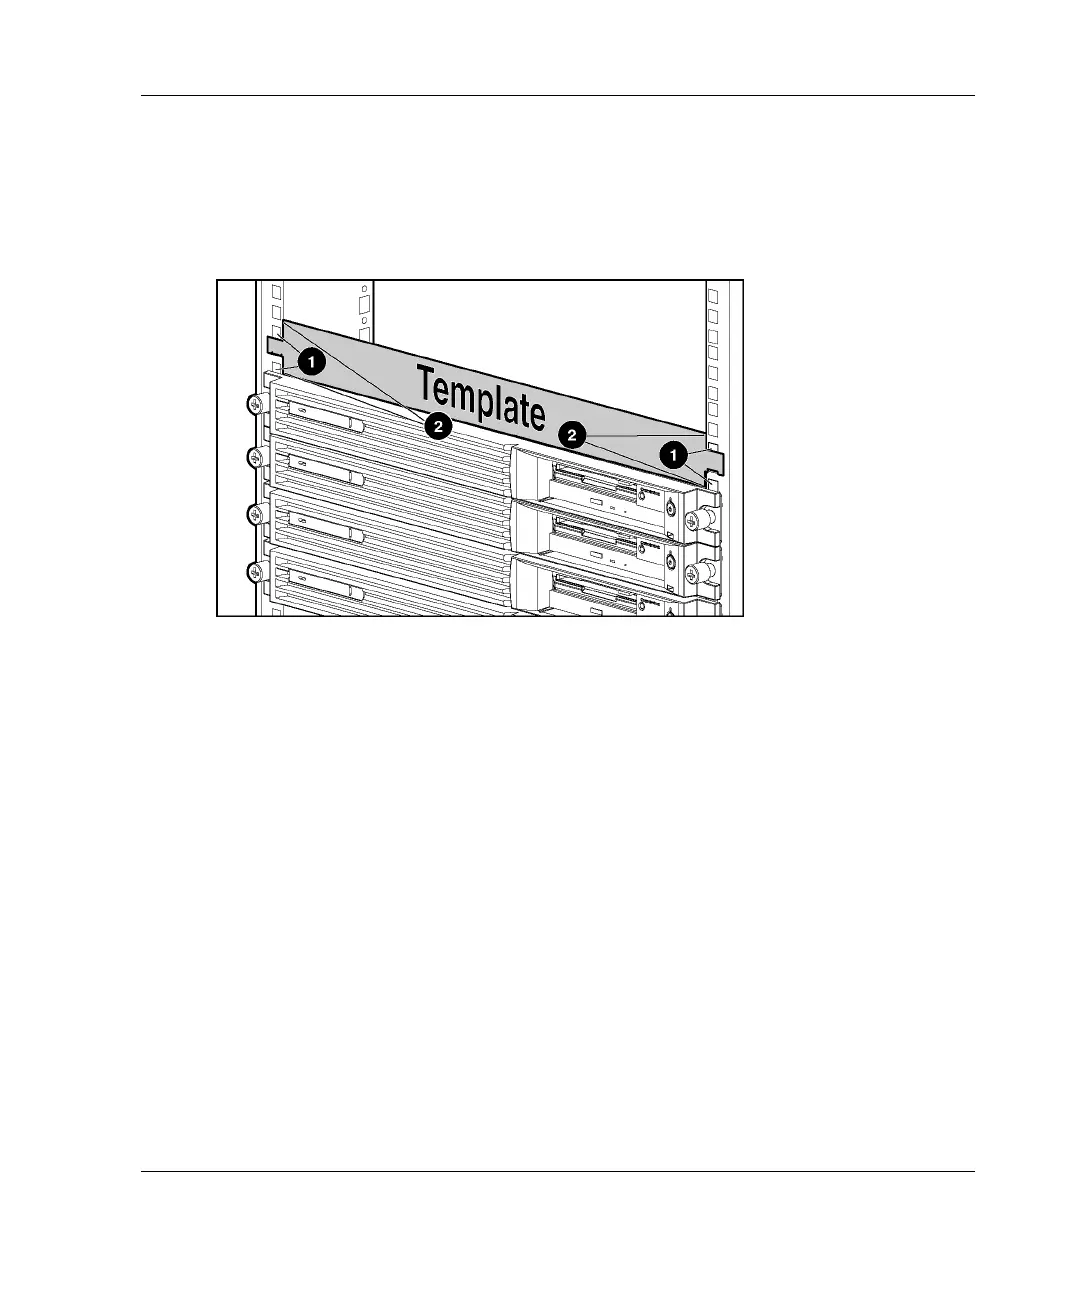
3. Using a pencil, mark the locations on the rack where the fixed rack rail tabs will
be inserted (1).
4. On the rack, mark the top and bottom edges of the template (2). This step helps
align the template for the next component.
Figure 4-2: Marking the rack for server installation
5. Move to the rear of the rack. Turn the template over and use the back side of the
template.
6. Repeat steps 1 through 4 with the back of the template on the rear of the rack.
7. After marking the front and rear of the rack, remove the template from the rack.
Attach the fixed rack rails to the rack. Refer to the “Installing the Fixed Rack
Rails” section in this chapter.
Installing the Fixed Rack Rails
Use the following procedures to install the fixed rack rails to the rack:
1. Measure with the template. Refer to “Measuring with the Template” earlier in
this chapter.
2. From the rear of the rack, identify the inside front holes that will be used to
secure the front tabs of the fixed rack rail.
HP ProLiant DL320 Generation 2 Server Setup and Installation Guide 4-3
HP CONFIDENTIAL
Writer: Anna Roberts File Name: e-ch4 Server Installation.doc
Codename: MoonStar Part Number: 293166-002 Last Saved On: 1/31/03 11:17 AM

 Loading...