EasyManuals Logo

HP dx7400 - Microtower PC User Manual

HP dx7400 - Microtower PC
199 pages
To Next Page IconTo Next Page
To Previous Page IconTo Previous Page
Page #110 background imageLoading...
Page #110 background image
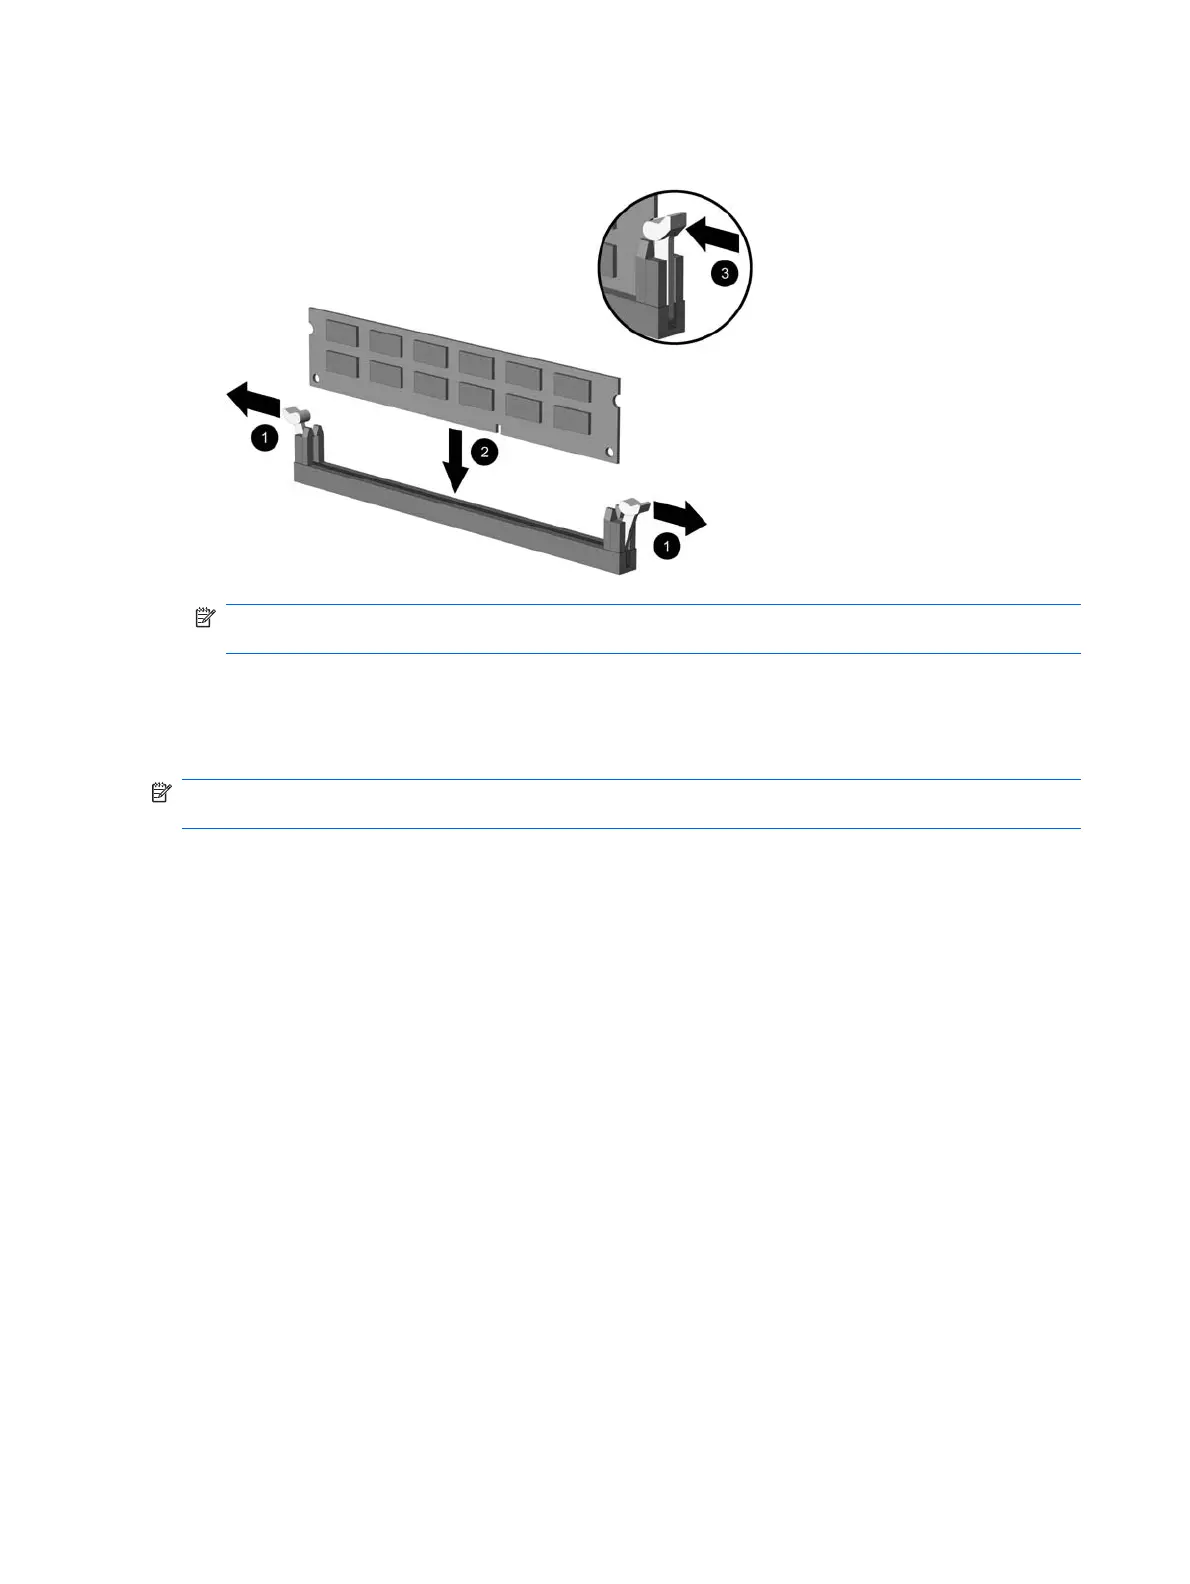
4. Open both latches of the memory module socket (1), and insert the memory module into the socket
(2).
NOTE: A memory module can be installed in only one way. Match the notch on the module with
the tab on the memory socket.
5. Push the module down into the socket, ensuring that the module is fully inserted and properly
seated. Make sure the latches are in the closed position (3).
6. Repeat steps 4 and 5 for any additional modules that you want to install.
NOTE: The computer automatically recognizes the additional memory when the computer is turned
on.
100 Chapter 8 Removal and Replacement Procedures Small Form Factor (SFF) Chassis

Table of Contents

Other manuals for HP dx7400 - Microtower PC

Questions and Answers:

Question and Answer IconNeed help?

Do you have a question about the HP dx7400 - Microtower PC and is the answer not in the manual?

HP dx7400 - Microtower PC Specifications

General IconGeneral
MemoryUp to 8 GB DDR2 SDRAM
AudioIntegrated High Definition Audio
Power Supply300W
ProcessorIntel Core 2 Duo, Pentium Dual-Core, or Celeron
StorageSATA Hard Drive
Optical DriveDVD-ROM, DVD+/-RW
GraphicsIntegrated Intel Graphics Media Accelerator 3100
NetworkingIntegrated Gigabit Ethernet
Expansion Slots1 PCI Express x16
Ports1 serial, 1 parallel, audio in/out
Operating SystemWindows XP Professional

Related product manuals