EasyManuals Logo

HP dx7400 - Microtower PC User Manual

HP dx7400 - Microtower PC
199 pages
To Next Page IconTo Next Page
To Previous Page IconTo Previous Page
Page #93 background imageLoading...
Page #93 background image
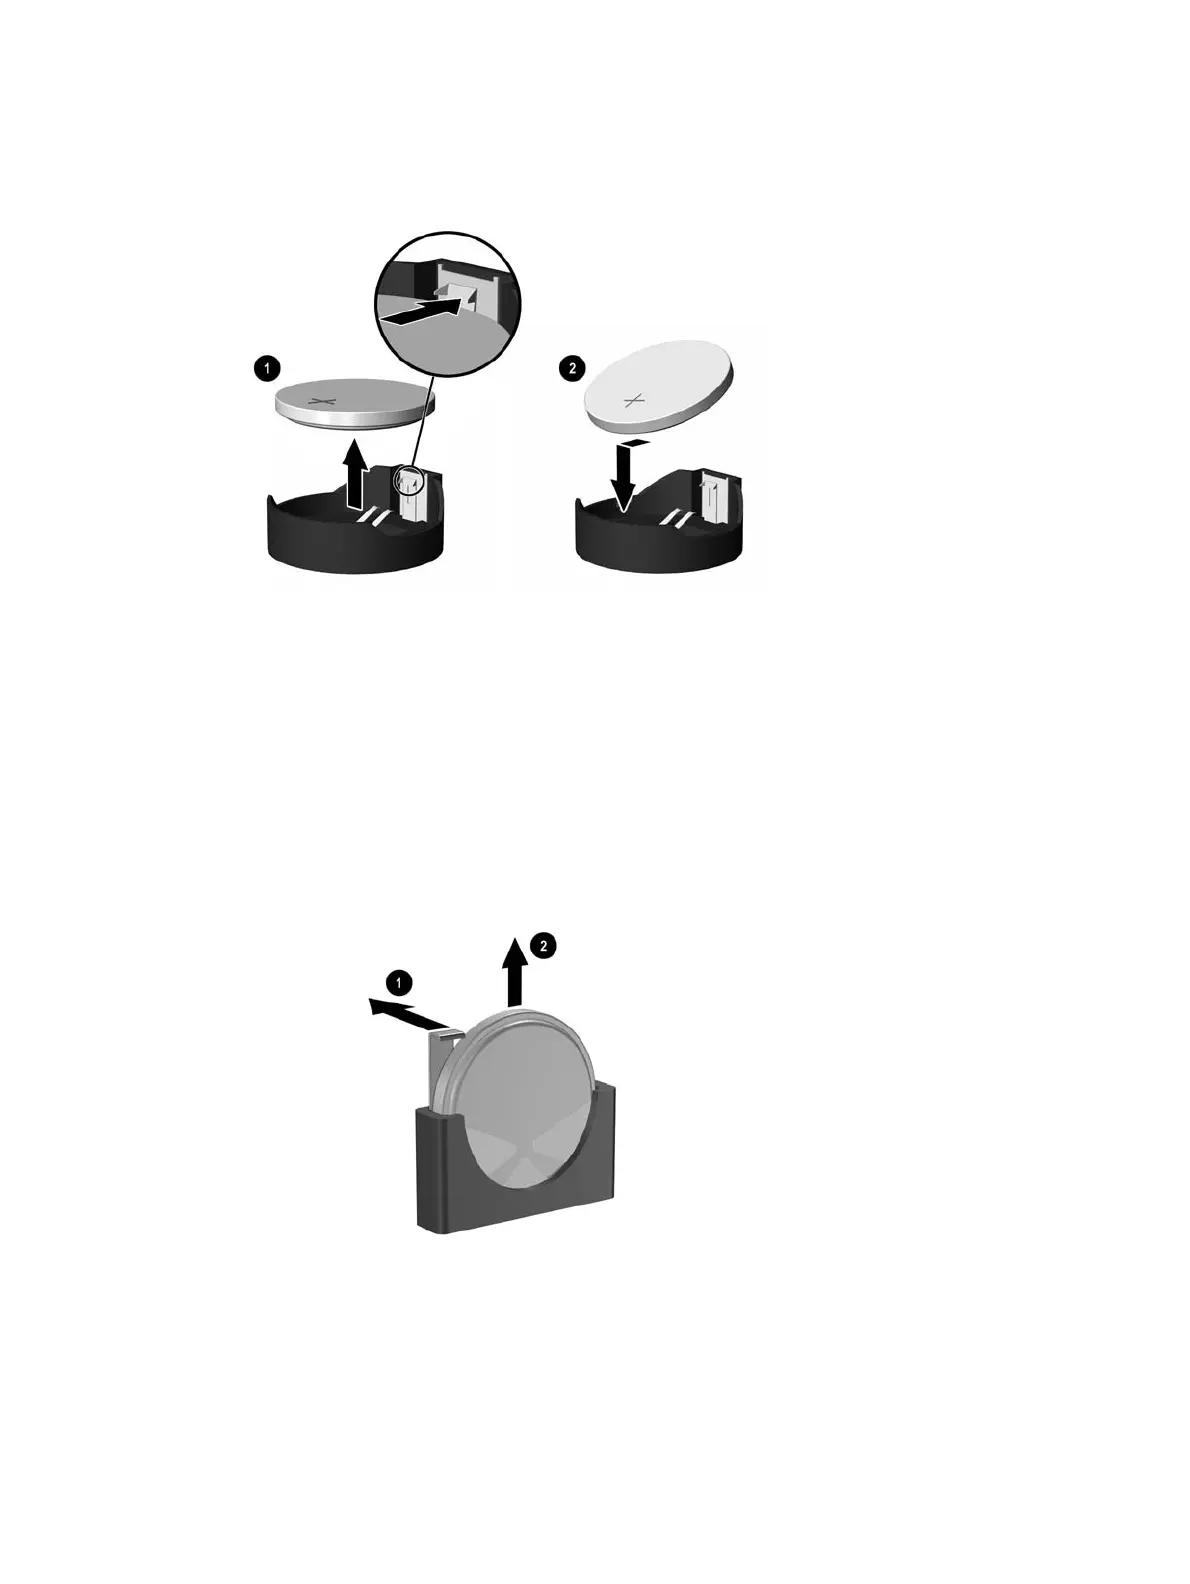
2. To insert the new battery, slide one edge of the replacement battery under the holder’s lip with the
positive side up (2). Push the other edge down until the clamp snaps over the other edge of the
battery.
3. Replace the computer access panel.
4. Plug in the computer and turn on power to the computer.
5. Reset the date and time, your passwords, and any special system setups, using Computer Setup.
Refer to the Computer Setup (F10) Utility Guide.
Type 3 Battery Holder
1. Pull back on the clip (1) that holds the battery in place, then remove the battery (2).
2. Insert the new battery and position the clip back in place.
3. Replace the computer access panel.
4. Plug in the computer and turn on power to the computer.
5. Reset the date and time, your passwords, and any special system setups, using Computer Setup.
Refer to the Computer Setup (F10) Utility Guide.
Battery 83

Table of Contents

Other manuals for HP dx7400 - Microtower PC

Questions and Answers:

Question and Answer IconNeed help?

Do you have a question about the HP dx7400 - Microtower PC and is the answer not in the manual?

HP dx7400 - Microtower PC Specifications

General IconGeneral
MemoryUp to 8 GB DDR2 SDRAM
AudioIntegrated High Definition Audio
Power Supply300W
ProcessorIntel Core 2 Duo, Pentium Dual-Core, or Celeron
StorageSATA Hard Drive
Optical DriveDVD-ROM, DVD+/-RW
GraphicsIntegrated Intel Graphics Media Accelerator 3100
NetworkingIntegrated Gigabit Ethernet
Expansion Slots1 PCI Express x16
Ports1 serial, 1 parallel, audio in/out
Operating SystemWindows XP Professional

Related product manuals