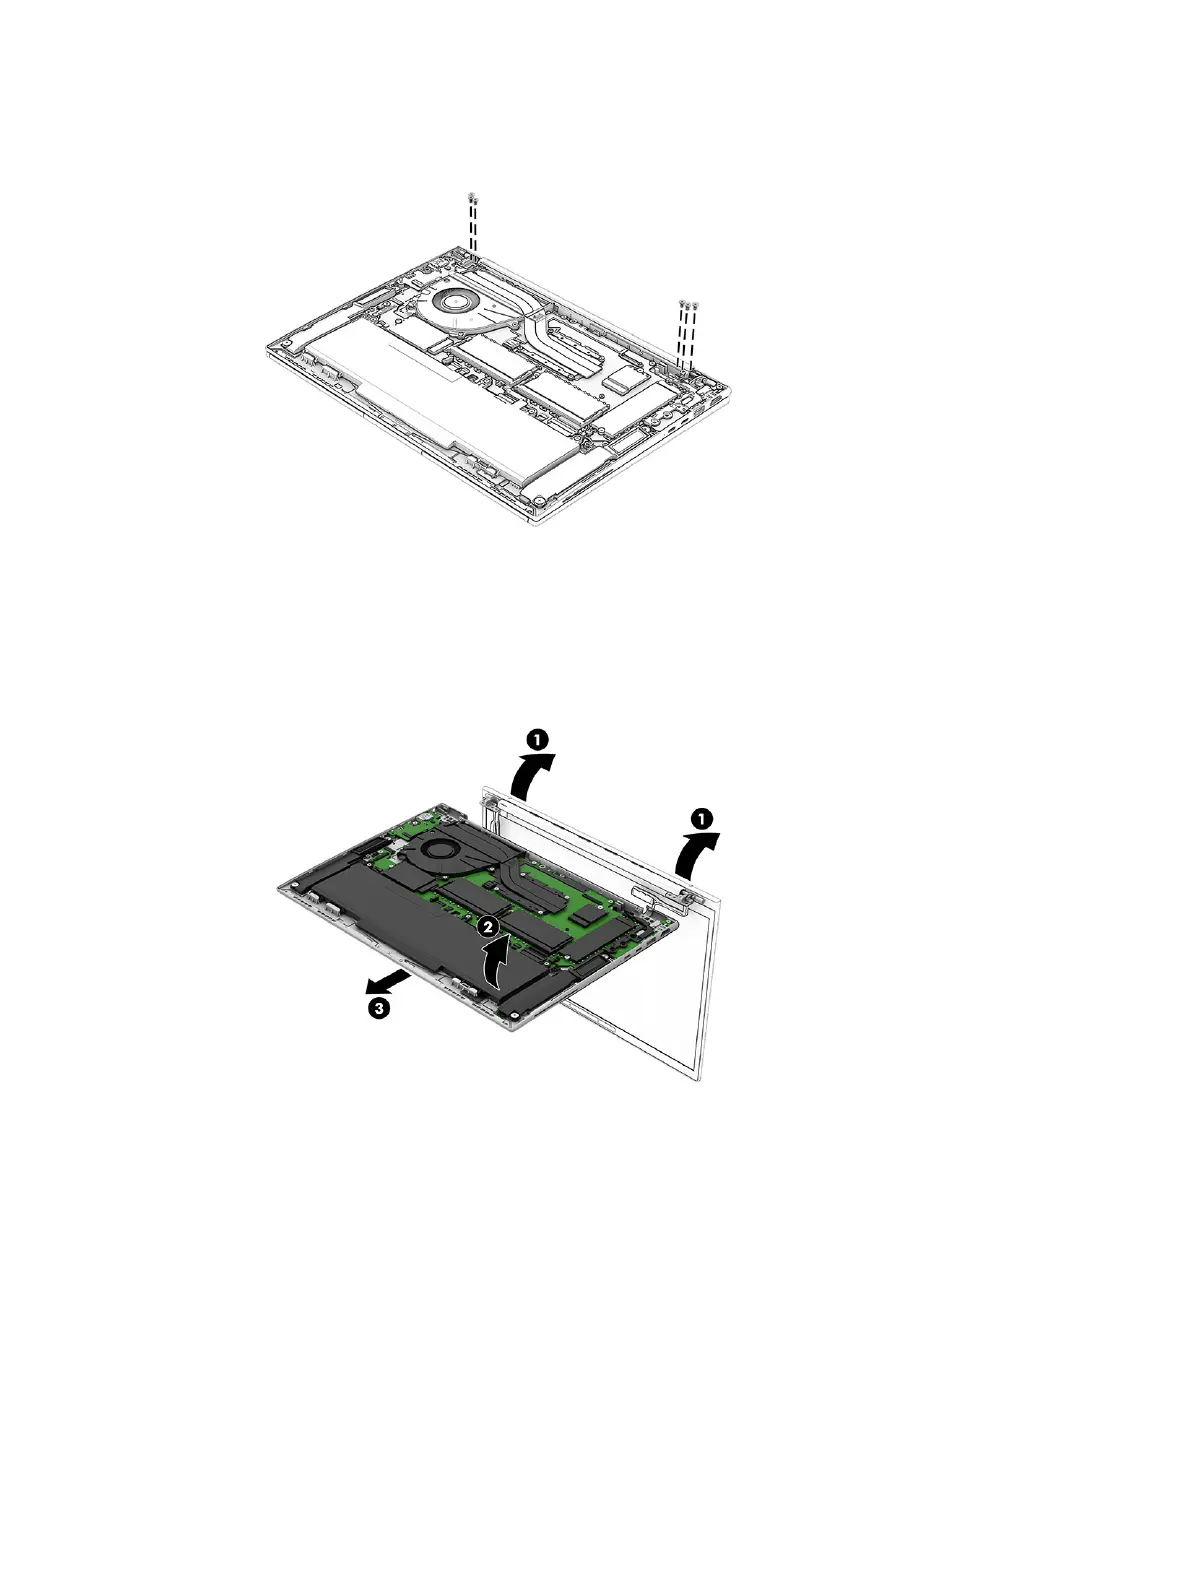
7. Remove the six Phillips M2.5 × 4.7 screws that secure the display assembly to the computer.
8. Swing the display hinges (1) up and back as far as they will go.
9. Open the display assembly (2) to a 90-degree angle.
10. Separate the computer (3) from the display assembly.
11. If you need to remove the display bezel or any of the internal display components, follow these steps.
a. Remove the display assembly.
b. Flex the left (1) and right inside edges of the bezel to release them from the display assembly.
c. Flex the bottom (2) inside edge of the bezel to release it from the display assembly.
d. Flex the top (3) inside edge of the bezel to release it from the display assembly.
e. Remove the bezel (4).
The display bezel is available using the following spare part numbers:
Display assembly
57
 Loading...