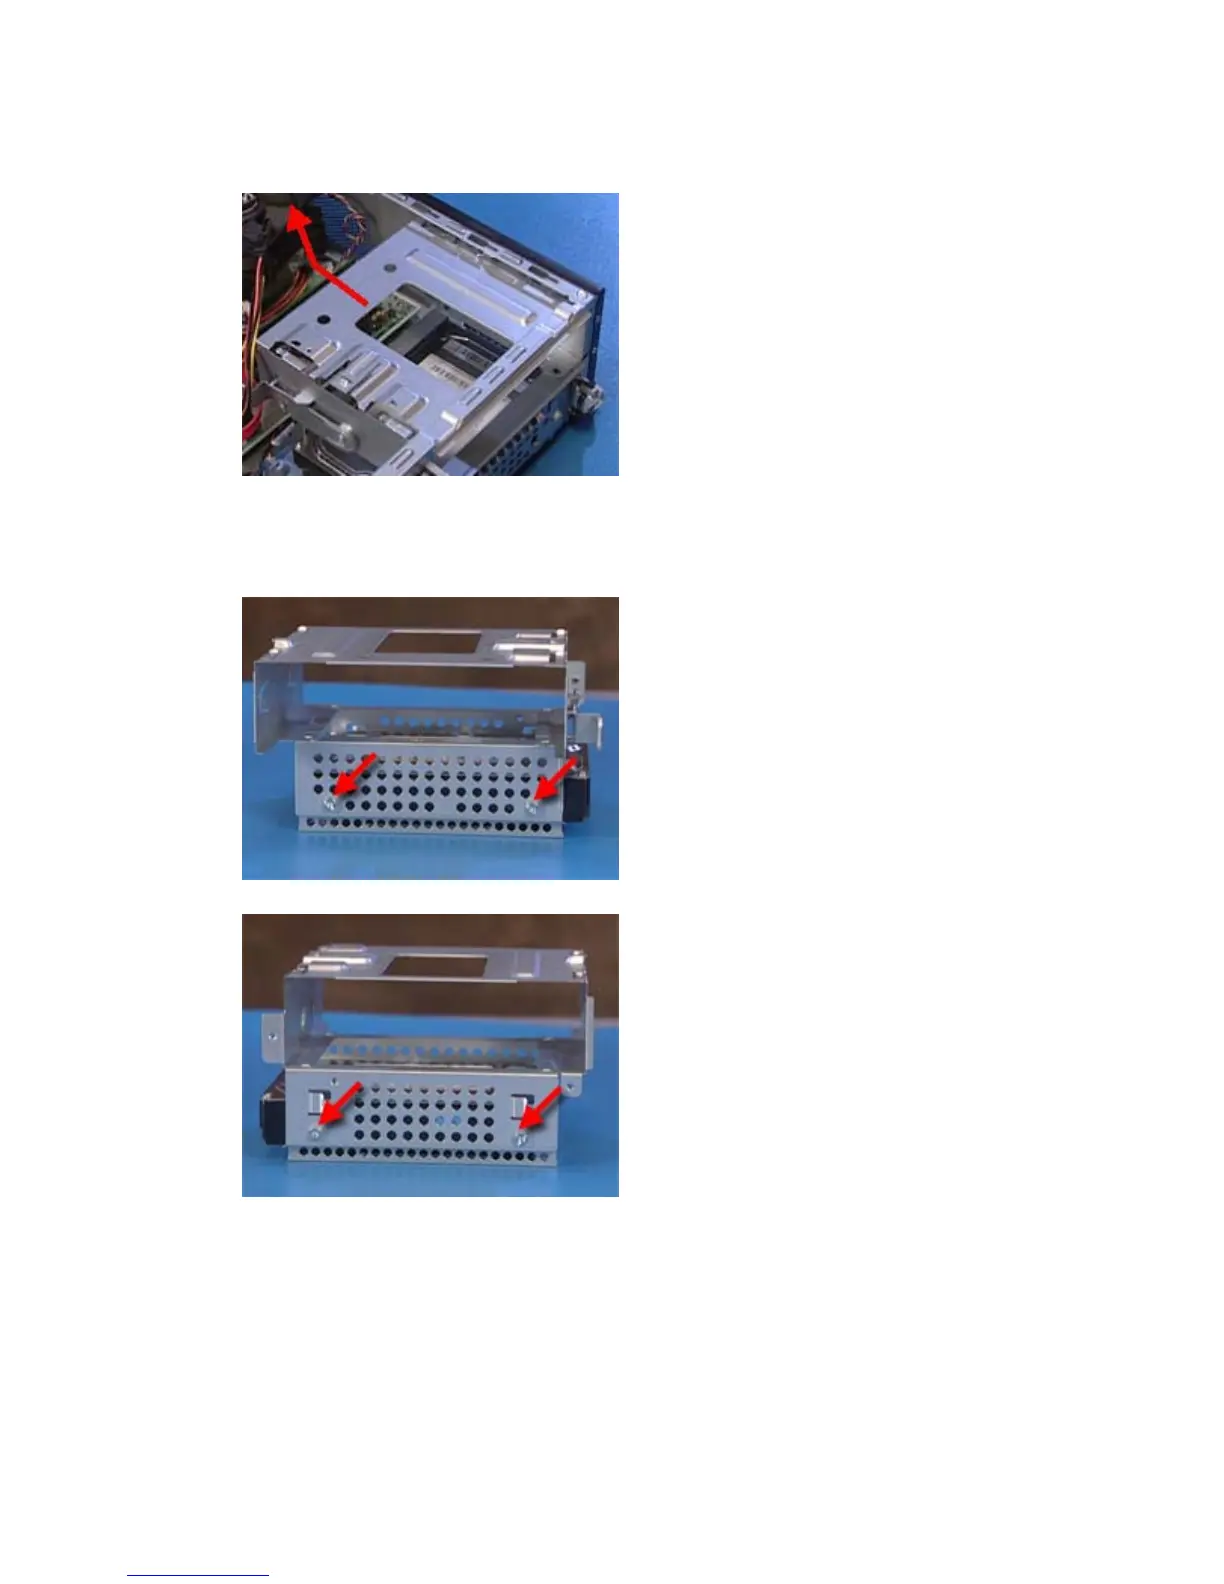
8.
Slide the cage down and pull the assembly out of the computer.
Figure 6-27 Removing the drive cage
9.
The hard drive is secured to the drive cage by four screws, two on each side. Remove the screws,
and then slide the hard drive out of the drive cage assembly.
Figure 6-28 Hard drive screws
Figure 6-29 Hard drive screws
10.
Slide the hard drive out of the drive cage assembly.
To install a hard drive, reverse the removal procedures.
When installing the hard drive into the drive cage, slide the drive into the cage so that the connector
edge of the drive is on the side of the cage with the optical drive retaining latch.
116 Chapter 6 Removal and Replacement Procedures Small Form Factor (SFF) Chassis
 Loading...