Installing the switch
CAUTION: Keep the tamper-proof seal on a mounting screw on the chassis cover intact, and if you want to open the
chassis, contact Hewlett Packard Enterprise for permission. Otherwise, Hewlett Packard Enterprise shall not be liable for
any consequence caused thereby.
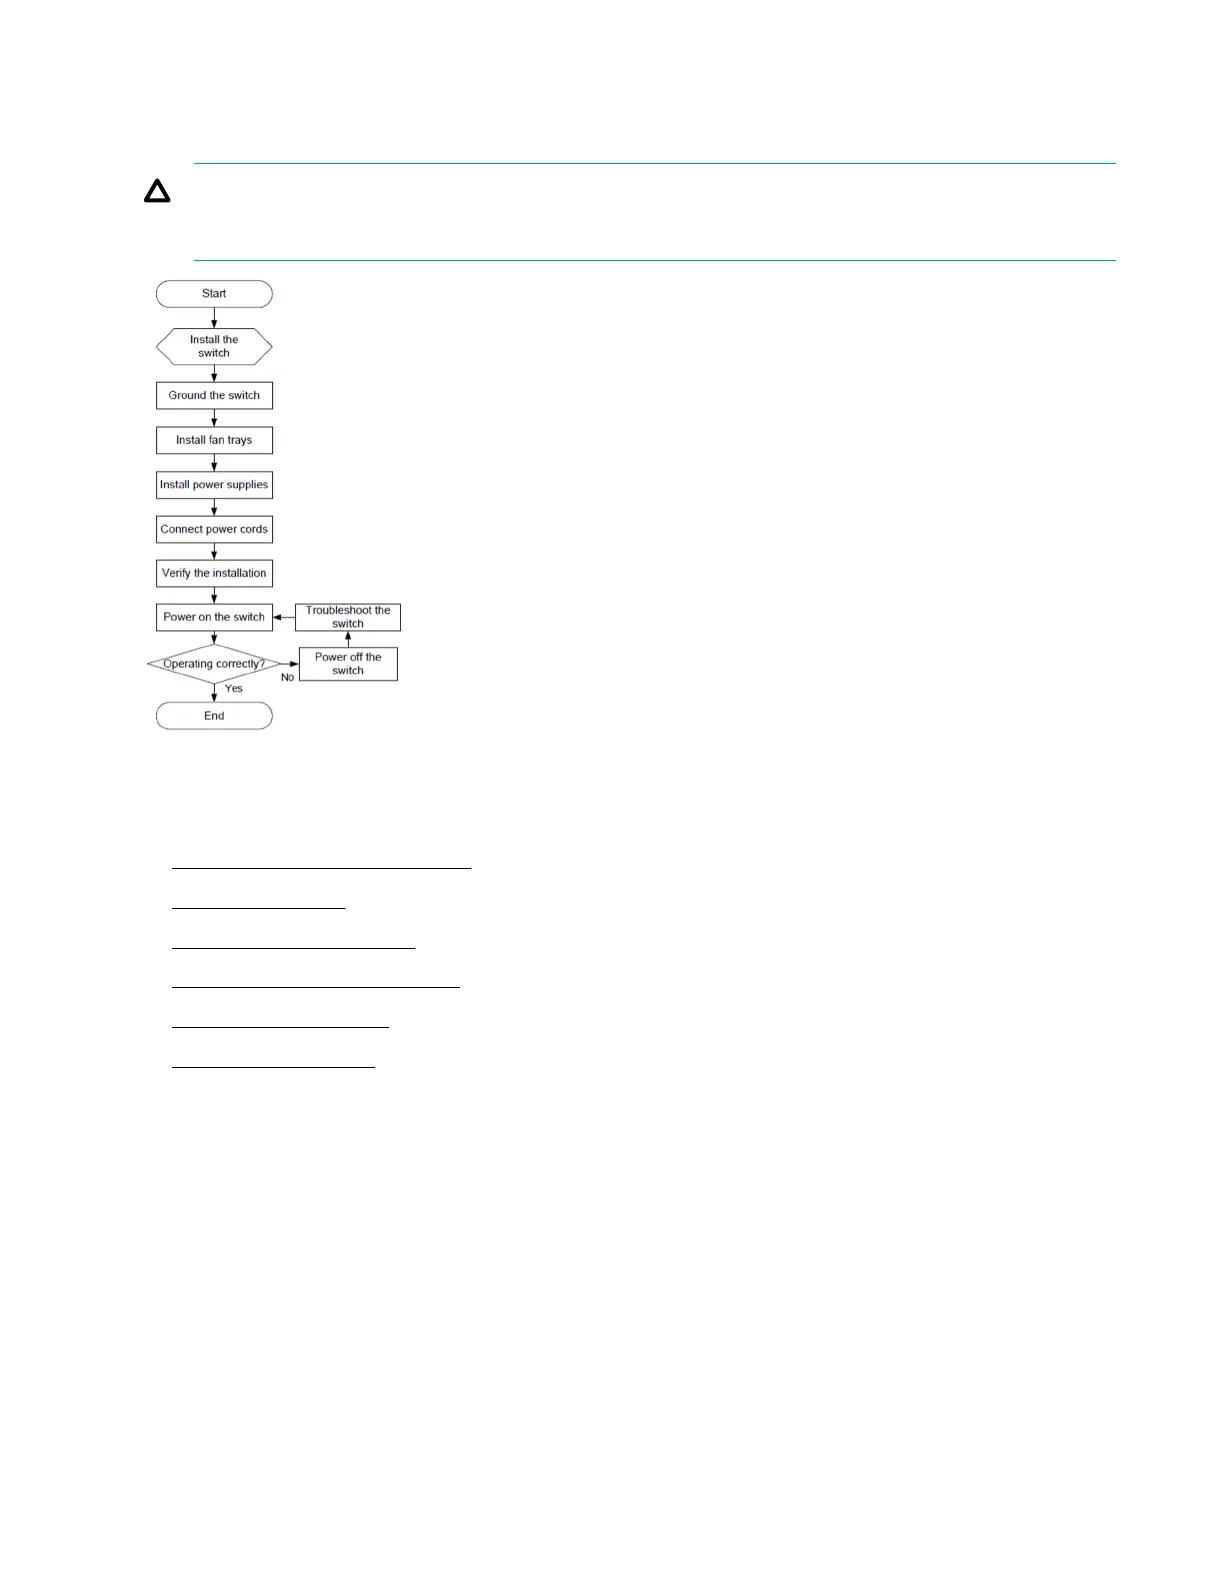
Figure 1: Hardware installation flow
Procedure
1.
Installing the switch in a 19-inch rack
2.
Grounding the switch
3.
Installing/removing a fan tray
4.
Installing/removing a power supply
5.
Connecting the power cord
6.
Verifying the installation
Installing the switch in a 19-inch rack
Procedure
1. Review the following:
12 Installing the switch
 Loading...