3. Focus on the vertical lines at the center of view.
4. Use the volume control buttons or select + or - until the lines are clear. Note the number
for future reference.
5. If the image is clearer for one eye than it is for the other, adjust the headset position.
Repeat until the image is clear for both eyes.
Pairing controllers
Controllers are paired automatically during the setup process. If you need to change controllers
or pair controllers again, you can pair them in Settings. You can do the following to manage
controller pairing:
§ To change to a different set of controllers, you can choose go to Settings Inputs
Controllers, and then select Pair new for each controller you want to change.
§ You can also choose to pair new controllers from VIVE Manager.
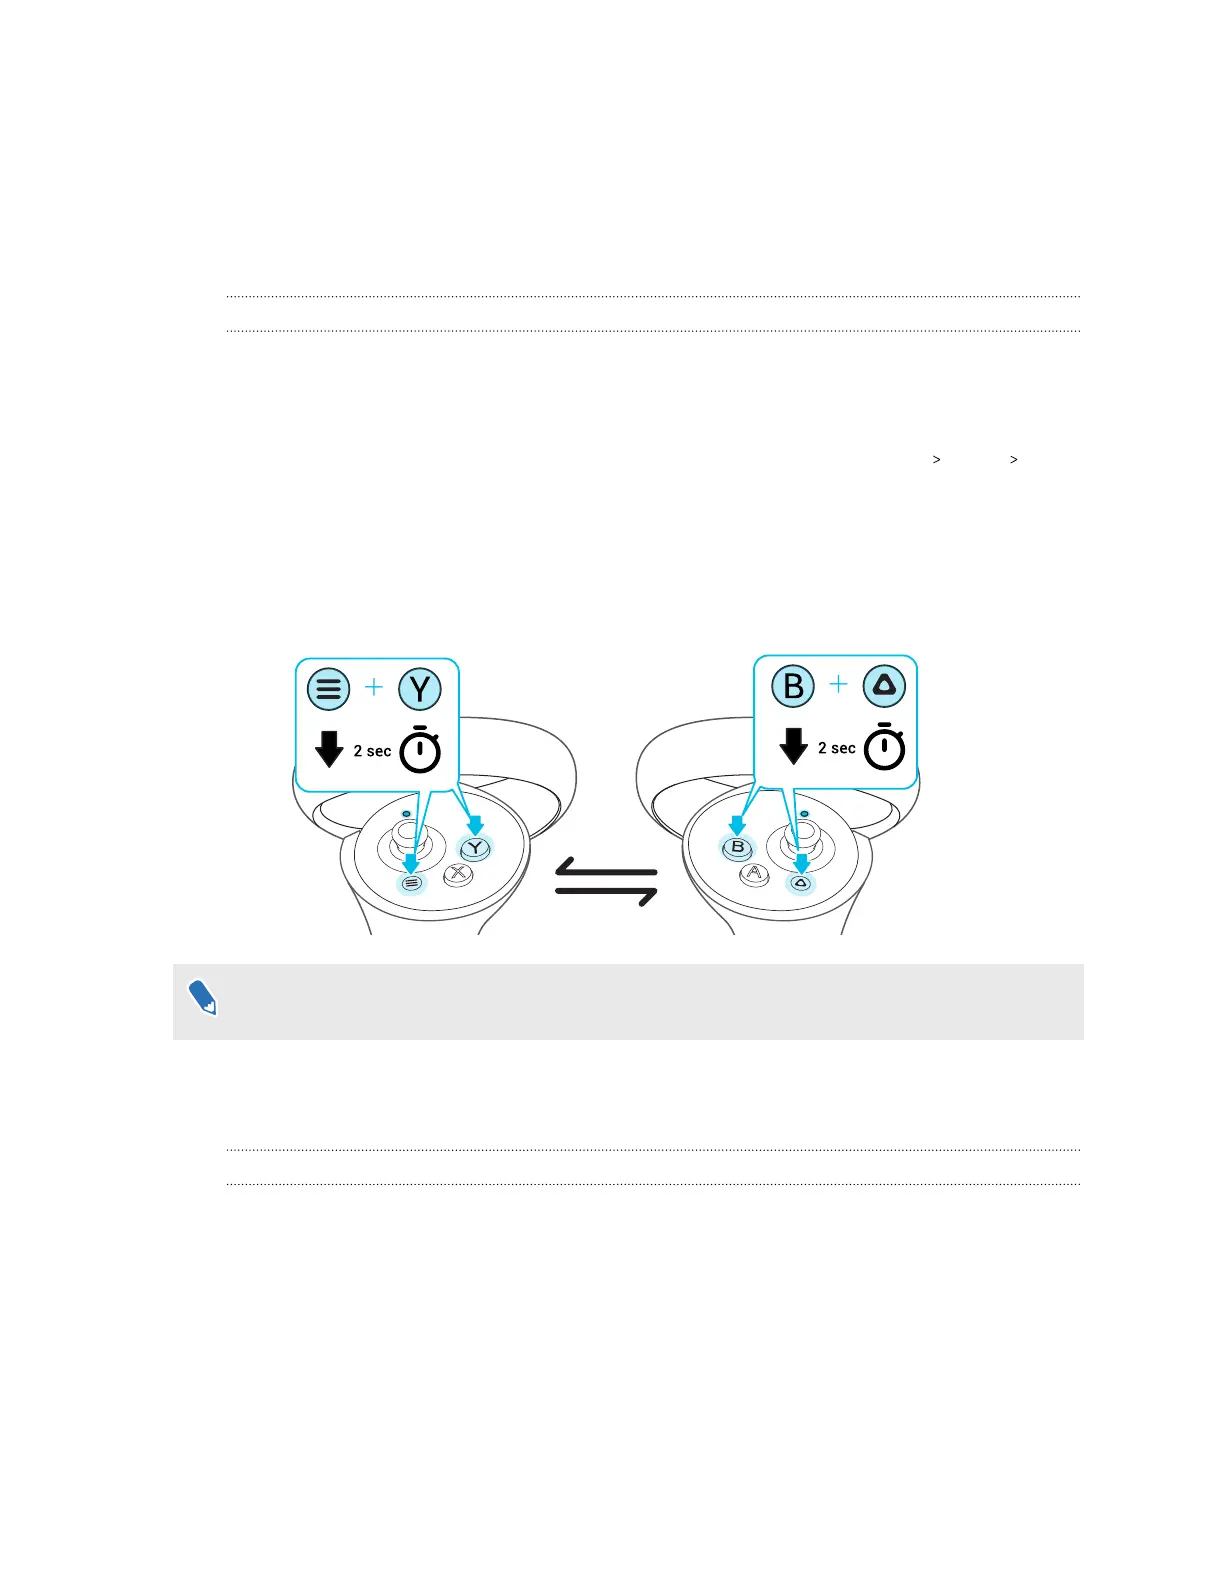
§ If your controllers aren't being detected, you can pair the controllers manually by pressing
and holding Menu + Y and VIVE + B for 2 seconds. The controller LEDs will flash blue when
in pairing mode.
If your headset has previously paired with controllers, you will need to use the headset button
or VIVE Manager to forget the controllers before you can pair them again.
Setup (play area)
Setting up your play area
The play area is a space in your environment that you designate for VR use. A safety boundary
appears when you're close to the edges of your play area.
When you set up a Room-scale play area, you'll need a space measuring 1.5 × 1.5 m that's free
from obstacles such as objects, pets, and people. If you don't have that much space, you can also
set up a Stationary play area so you can interact in VR while sitting or standing.
During setup, you'll be guided with instructions on how to use hand gestures or controllers to set
up your play area.
28 Getting started