20 hunter.direct/ICC2help
Installation Instructions
CONNECTING A HUNTER CLIK SENSOR
A Hunter weather sensor or any normally closed, micro-
switch-type sensor can be connected with the ICC2. The
purpose of this sensor is to stop automatic watering when
weather conditions dictate. The ICC2 has one sensor input
available, and is compatible with Hunter’s full line of Clik-type
sensors, including:
• Flow-Clik
• Freeze-Clik
• Mini-Clik
• Rain-Clik (wired and wireless, including Rain/Freeze-Clik)
• Soil-Clik
• Solar Sync (wired and wireless)
• Wind-Clik
All Hunter Clik sensors are normally closed, and open on
alarm, which alerts the controller to suspend watering. The
ICC2 can be programmed to shut down the entire controller,
or only individual stations, once the sensor is triggered
(see Programmable Sensor Override instructions).
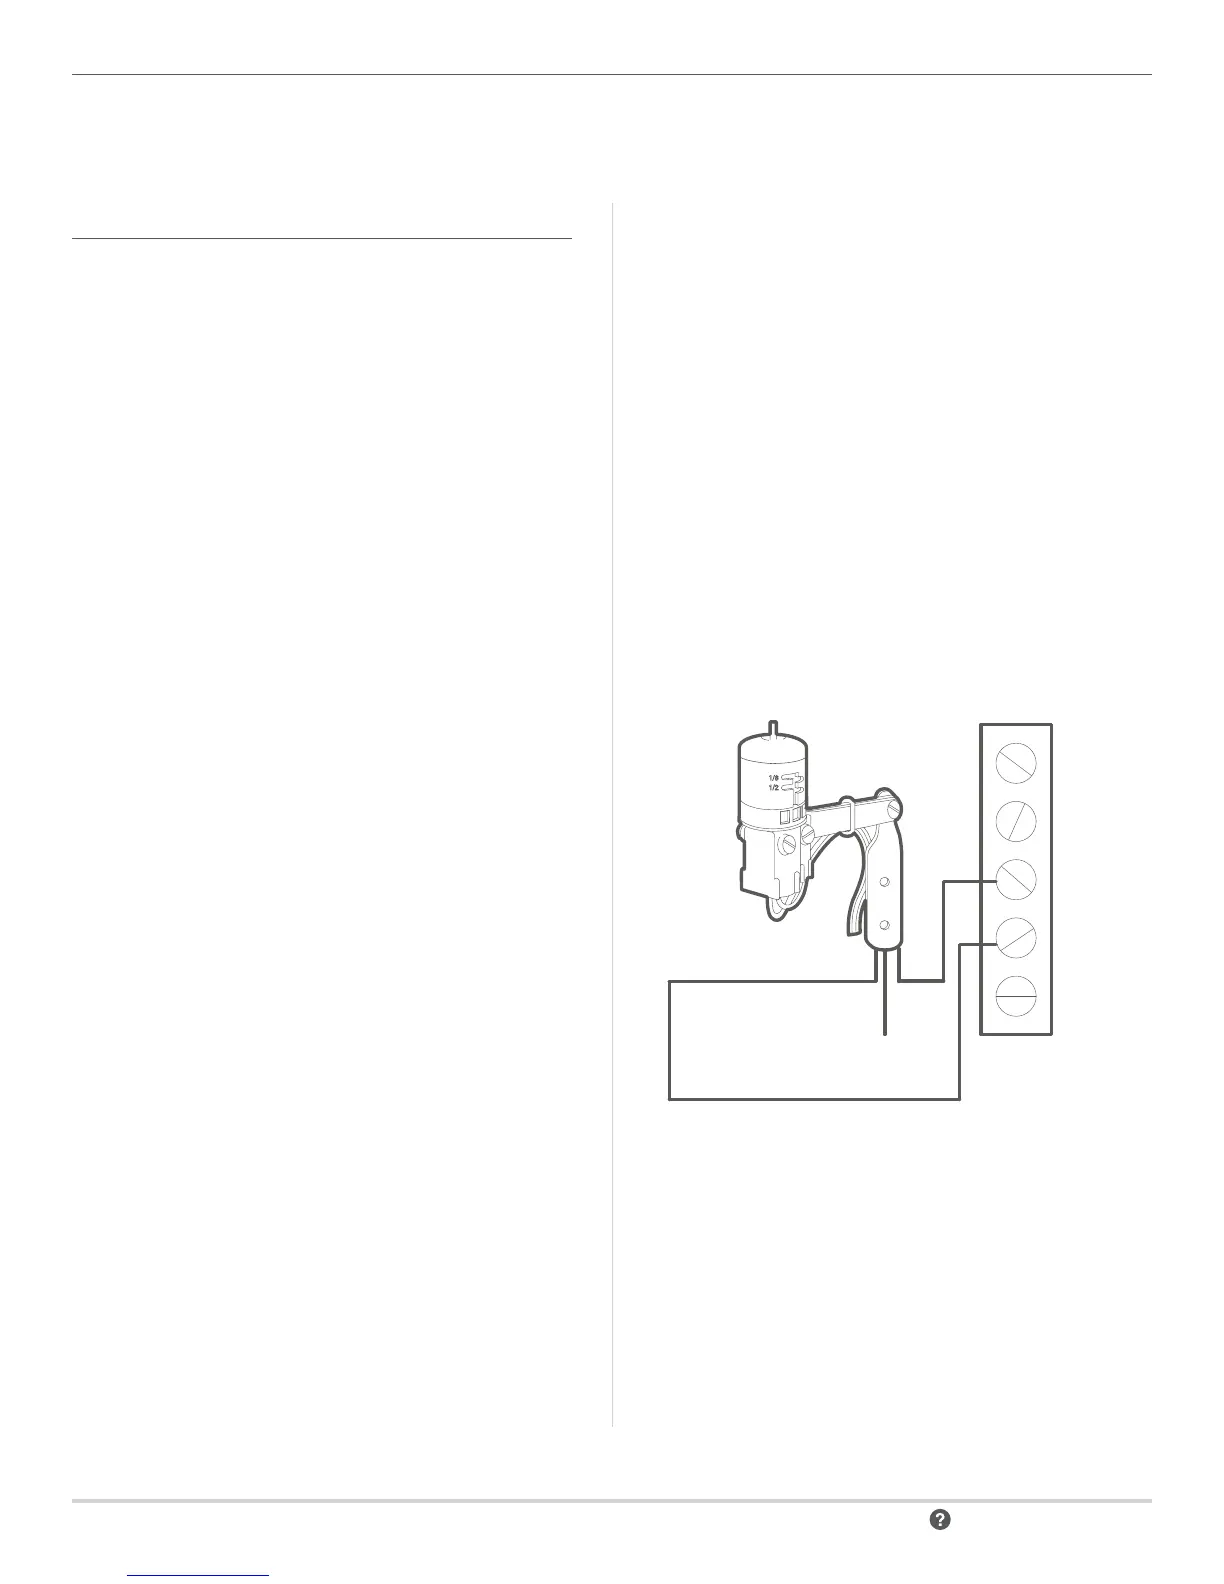
1. To connect a Hunter Clik sensor, locate the sensor inputs
labeled “SEN” on the power module.
2. Route the wires from the Clik sensor through any of the
available knockouts into the controller cabinet.
3. Remove the red jumper wire that is attached across the
two SEN terminals.
4. Connect one wire to one SEN terminal, and the other wire
to the other SEN terminal. It does not matter which wire
connects to which SEN terminal.
Note: The Sensor Bypass Switch must be set to “Active”
for the controller to react to a sensor alarm. Once an alarm
is triggered, the display will read “OFF” and show a blinking
symbol. Also, if there is no sensor installed, you must
re-insert the jumper wire on the SEN terminals, or set the
Sensor Bypass Switch to “Bypass.”
SENSOR BYPASS SWITCH
This switch will either enable or disable a weather sensor that
has been connected to the controller. When the switch is in
the “Active” position, the controller will adhere to the state of
the sensor and shut down irrigation if the sensor is triggered.
If the sensor is in a closed state, the controller will operate as
normal. If the sensor is in an open state, but you would like
your automatic irrigation to operate as normal, simply move
the switch to the “Bypass” position. The sensor will now be
overridden, and the controller will operate as programmed.
If you do not have a sensor installed, the position of the
Sensor Bypass Switch can be in either Active or Bypass mode.
This is true as long as the jumper wire connecting the two
SEN terminals remains in place. If a jumper wire has been
removed, keep the Sensor Bypass Switch in the Bypass mode.
Otherwise, no automatic irrigation will occur.
Note: The Manual Single Station function ignores any
attached sensor, and will allow manual watering to occur.
Third Normally Open Lead
(Do Not Use)
C
P MV
SEN
SEN
TEST