Installation
9
STEP 2 — INSTALL THE SHADE
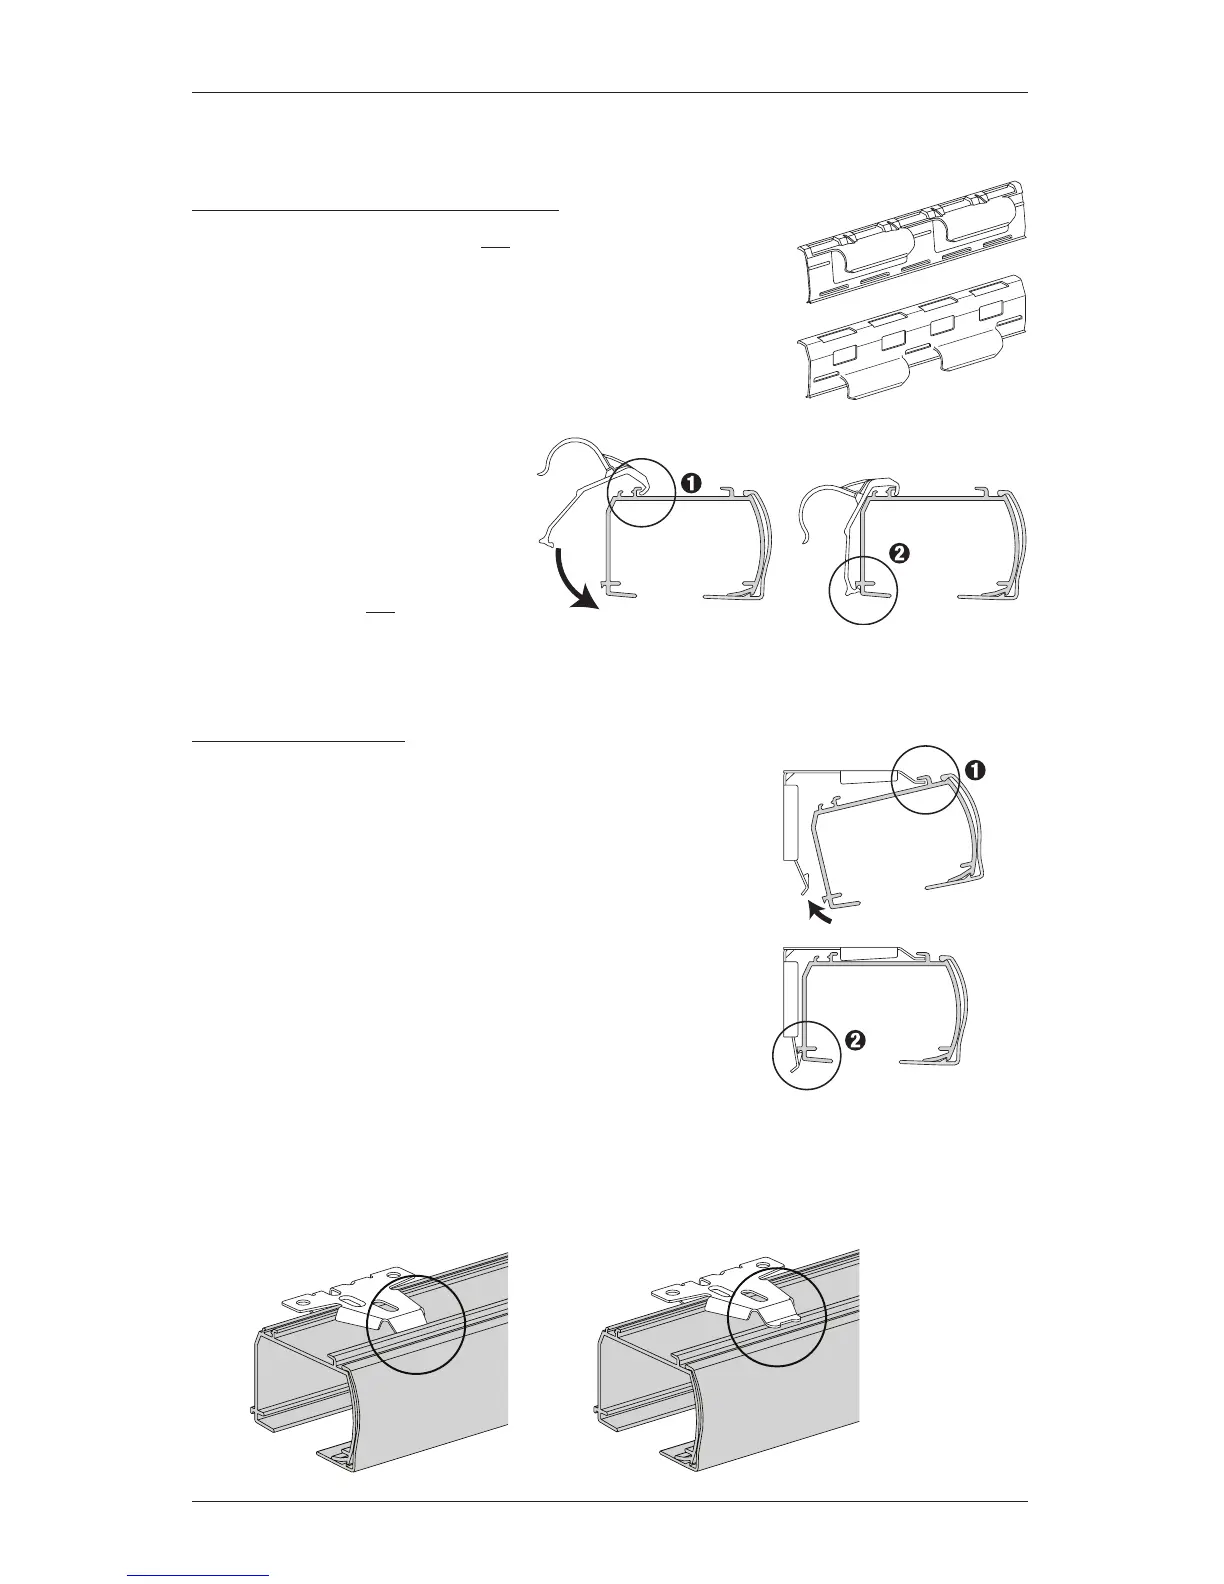
If You Have a Battery Wand Clip...
(Skip this step if your shade will not have an attached
battery wand.)
■
Attach the battery wand clip to the headrail.
IMPORTANT: Position the clip so that the battery
wand will be between installation brackets.
➤
Hook the battery wand
clip onto the back channel
ofthe headrail.
➤
Rotate the clip down until it
snaps into place.
CAUTION: Do not connect the
battery wand to the power cable
prior to installing the shade.
Mount the Headrail
CAUTION: Be sure no cables are pinched by the brackets
or headrail during installation; damage or overheating of
components couldresult.
■
Fit the front channel on top of the headrail onto the front
lip of installation brackets.
■
Push the headrail up and back until it snaps into place.
■
Check to ensure the headrail is securely in the brackets.
➤
Check that the bottom of the headrail is snapped into
the base of each bracket.
➤
Check that the front lip of each bracket is in the front
channel of the headrail.
➤
If any brackets are not installed correctly, release the shade and reinstall. See
“Removing the Shade (If Necessary)” on page21.