Installation
10
STEP 3 — CONNECT THE POWER SOURCE
NOTE: When power is connected to the motor, a green LED inside the manual control button
housing will flash to indicate the shade is ready for operation.
■
Refer to the appropriate page based on your order.
➤
For a battery wand, see below.
➤
For a satellite battery pack, see page 11.
➤
For an optional DC power supply, see page 12.
➤
For an optional DC power supply with daisy-chain connections, see page 13.
➤
For an optional C-size satellite battery wand or Large DC Power Supply, see the
instructions that came with the unit.
If You Have a Battery Wand...
Install Batteries into the Battery Wand
NOTE: Hunter Douglas recommends AA alkaline batteries for use with our battery-powered
shades. These will provide approximately one year of operation. Lithium and rechargeable
batteries are not recommended.
■
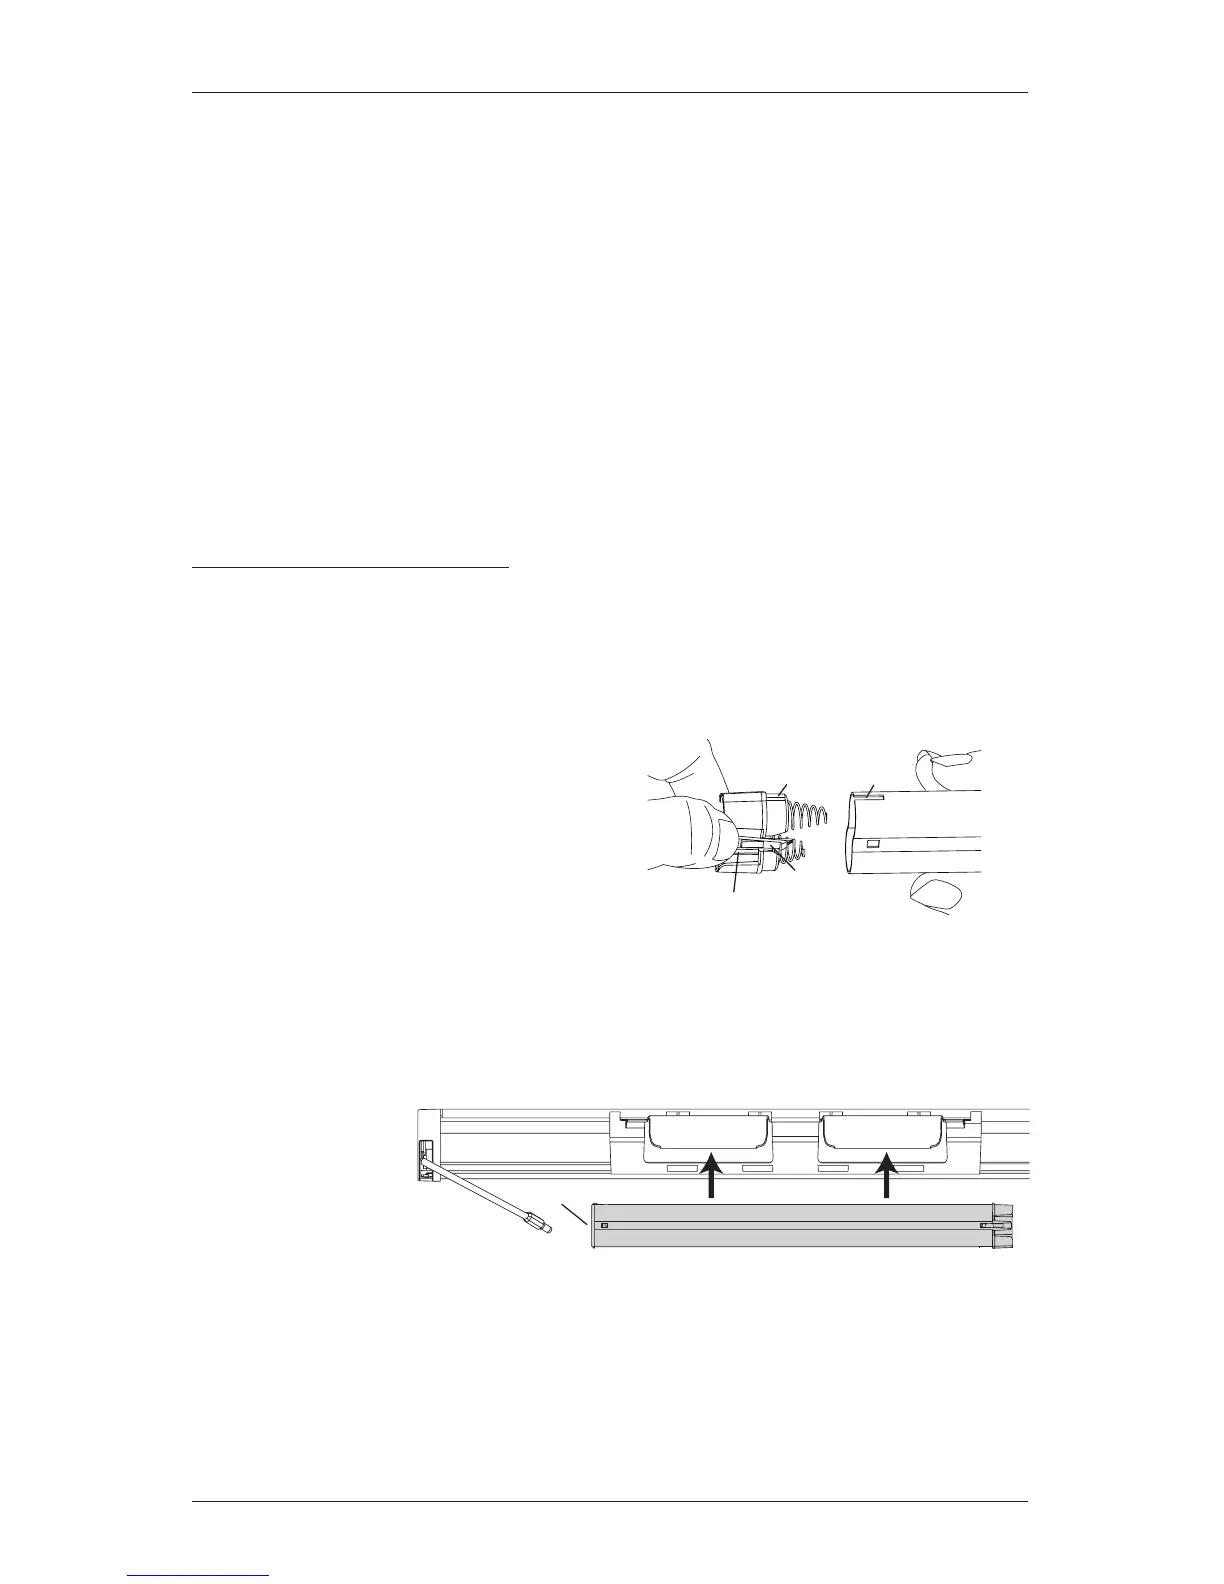
Squeeze the cap latch to release thecap.
■
Remove the cap from the battery wand.
■
Install the batteries according to the
instructions on the battery wand label.
■
Replace the cap.
➤
Align the tab with the slot on end of the wand.
➤
Press the cap on until it latches.
Mount the Battery Wand into theBatteryWandClip
■
Align the battery
wand with its
socket toward
the motor side
end cap.
■
Push the battery
wand straight up into the battery
wand clip until it snaps into place. Check to make sure the battery wand is secure.
CAUTION: Be sure the cable does not become pinched by the battery wand clip during
installation. Damage or overheating of components could result.
Tab Slot
Cap
Latch
Battery
Wand
Squeeze
Back of Shade
Socket