Installation
4
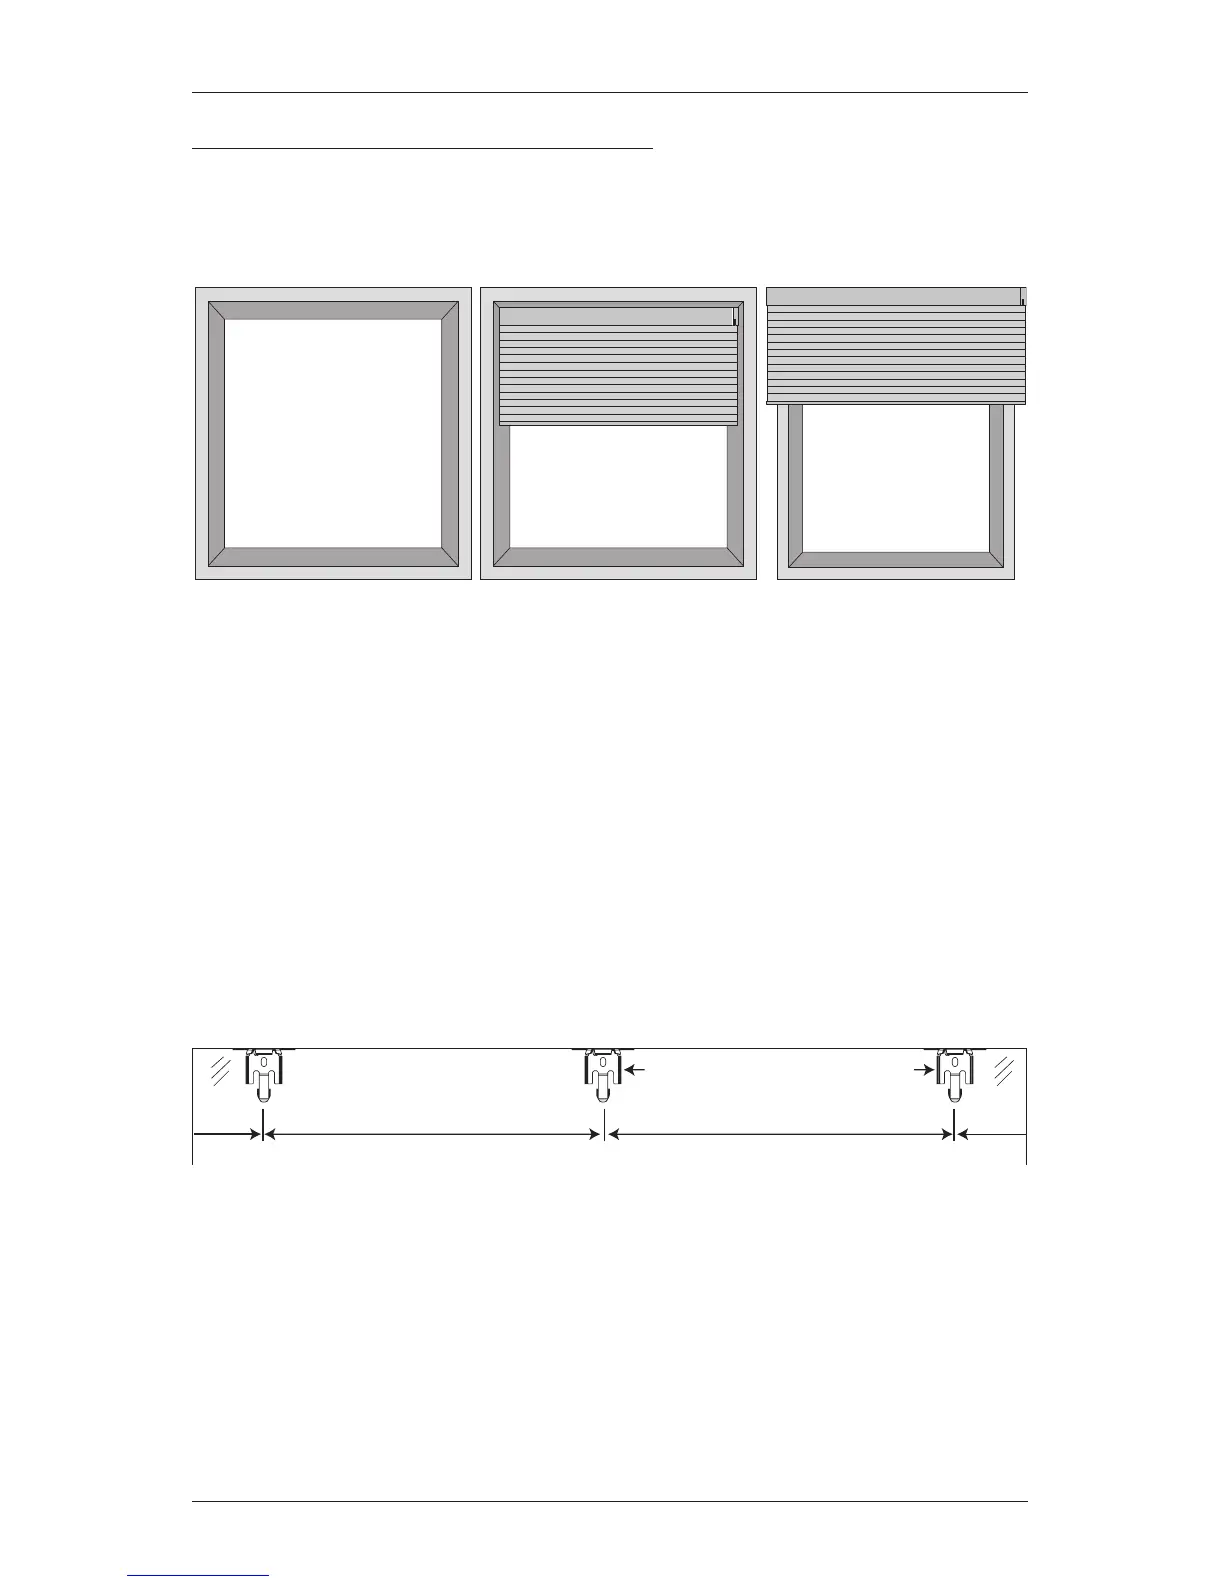
Mounting Types and Window Terminology
If the installation brackets are mounted correctly, the rest of the installation process follows
easily. To prepare for this important first step, review the mounting types and basic window
terminology illustrated below.
■
Refer to the appropriate page below based on your order:
➤
Inside Mount — Below
➤
Outside Mount — Page 6
➤
End Mount — Page 8
MOUNT THE INSTALLATION BRACKETS — INSIDE MOUNT
■
Mark 2" in from each jamb for bracket location.
➤
If more than two installation brackets came with your order, space additional bracket(s)
evenly between the two end brackets. Allow a minimum of 15" between the
brackets at the motor end for the battery wand. Mount into wood whenever
possible.
■
Center the brackets on your marks, then mark each of the screw holes.
➤
Mounting depths vary depending on the power option. See the chart on the next page
for minimum and fully recessed depth requirements.
➤
Mark both winged screwholes with shallow mounting depths.
➤
Mark the center screw hole when depth permits.
Outside Mount
Shade mounts outside
window opening.
Inside Mount
Shade fits within
window opening.
Collectively, the sill and
jambs are called the
“window casement.”
Head Jamb
Sill
Jamb Jamb
2" Space Evenly
Jamb Jamb
Space Evenly
2"
Minimum of 15" for Battery Wand