Installation
6
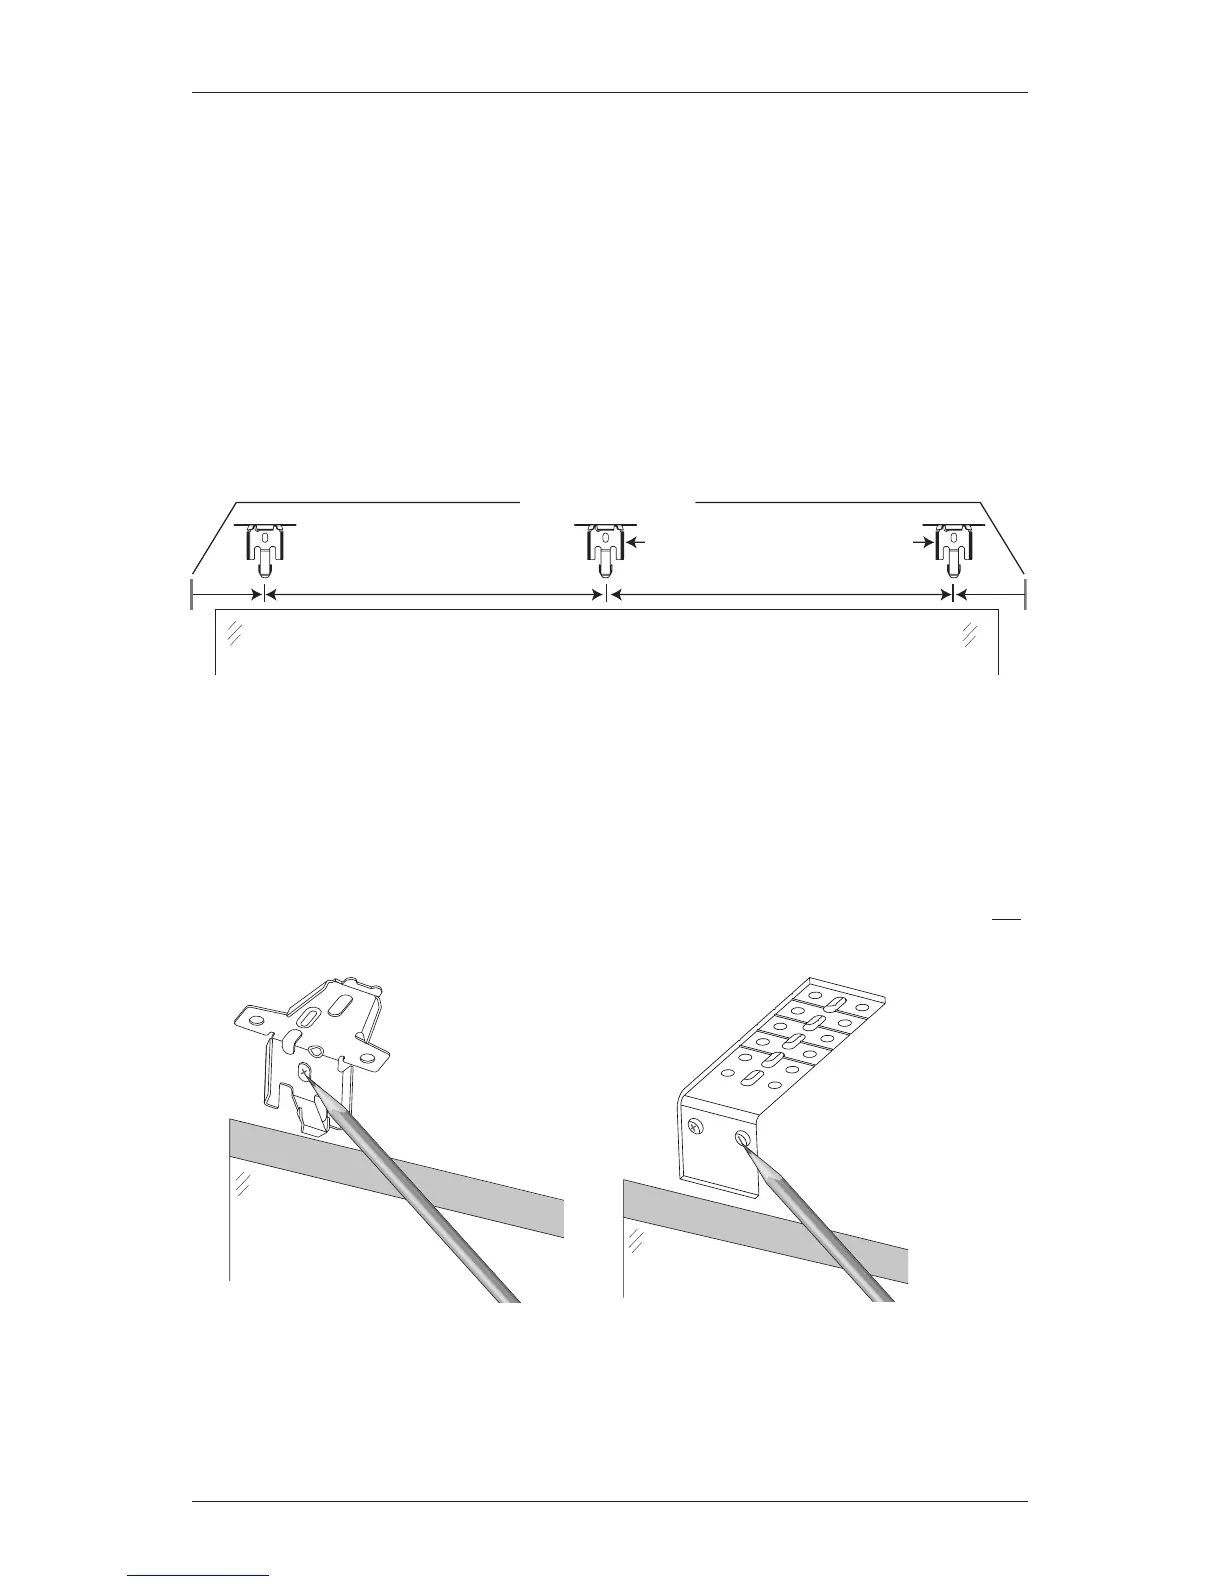
MOUNT THE INSTALLATION BRACKETS — OUTSIDE MOUNT
■
Center the headrail over the window opening at the desired height. Use a pencil to lightly
mark the wall at each end of the headrail.
➤
Alternatively, measure the width of the headrail and use that width to mark the
headrail end points over the window opening.
■
Mark 2" from each end of the headrail.
➤
If more than two installation brackets came with your order, space them evenly
between the two end brackets and mark their location. Allow a minimum of 15"
between the brackets at the motor end for the battery wand. Mount into wood
whenever possible.
■
Center the brackets on your marks, then mark each of the screwholes.
➤
A minimum of 1
1
/
4
" flat vertical surface is required to mount the brackets.
➤
The top of the installation brackets or extension brackets should be at the desired
shade height. The brackets should be level and aligned.
➤
When using extension brackets, mark two screw holes per bracket.
CAUTION: The rear of the brackets must be flush against a flat mounting surface. Do not
mount brackets oncurved molding.
■
Drill the screw holes using a
3
/
32
" drill bit.
CAUTION: Use drywall anchors when mounting into drywall.
Minimum of 15" for Battery Wand