Why does my Husqvarna Automower Lawn Mower need manual charging?
- MMichael RichardsonAug 26, 2025
If your Husqvarna Lawn Mower requires manual charging, it's because it is set in MAN operating mode. This is normal, so no action is needed.
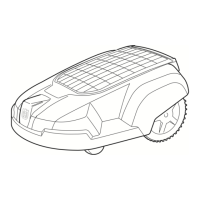
Why does my Husqvarna Automower Lawn Mower need manual charging?
If your Husqvarna Lawn Mower requires manual charging, it's because it is set in MAN operating mode. This is normal, so no action is needed.
How to fix uneven mowing results with my Husqvarna Lawn Mower?
If your Husqvarna Lawn Mower is giving uneven mowing results, there could be several reasons. It might not be mowing for enough hours each day, so try increasing the mowing time. The working area could also be too large; consider limiting it or extending the working time. Dull blades can also cause this, so replace them, along with the screws, to ensure balanced rotation. If the grass is too long for the set cutting height, increase the cutting height and then gradually lower it. If the mower seems to work more at the top of a slope, change the Garden shape setting to Open. Lastly, check for grass accumulation by the blade disc or around the motor shaft, and clean if necessary.
| Brand | Husqvarna |
|---|---|
| Model | Automower |
| Category | Lawn Mower |
| Language | English |
Warning to set the main switch to OFF when working on the mower's underframe.
Provides guidance on the ideal placement of the charging station.
Step-by-step guide to positioning and securing the charging station.
Explains the methods for installing the boundary wire (stapling or burying).
Details how to lay the boundary wire for optimal coverage and obstacle avoidance.
Specifies boundary wire placement relative to obstacles like walls or fences.
Solutions for narrow passages, including guide wires and corridor width.
Details on laying boundary wire across slopes, including limitations and exceptions.
Tips for stapling or burying the boundary wire for optimal placement.
Instructions on splicing the boundary wire using a solderless coupler.
Step-by-step guide to connecting the boundary wire to the charging station.
How to verify the boundary wire loop signal using the charging station LED.
Steps to link the Automower to the charging station and initial setup.
Explains the purpose and installation of guide wires.
Situations where a guide wire is recommended for efficient operation.
How to place and connect guide wires to the charging station.
How to route guide wires through passages for mower access.
Steps for connecting the guide wire to the boundary wire using a coupler.
Steps to start the Automower, including PIN code entry and safety checks.
Instructions on using the main ON/OFF switch for starting and safety.
Setting specific start and stop times for each day.
Adjusting how the mower leaves the charging station, including sectors and reversing distance.
Guiding the mower to remote areas using boundary or guide wires.
Controlling how the mower searches for the charging station using wires.
Defining distances from wires to create a 'corridor' for mower navigation.
Testing how the Automower finds its way into the charging station.
Testing different charge exit settings and distances to remote areas.
Advanced settings for checking loop signal and adjusting drive-past wire distance.
Settings for PIN code, time lock, stop protection, and settings lock.
How to change the mower's PIN code.
Function to prevent unauthorized use by requiring PIN after set days.
Activates an alarm if the PIN is entered incorrectly after stopping the mower.
Prevents unauthorized changes to settings or program selection.
Instructions for cleaning, charging, and storing the Automower and charging station.
How to clean the mower's underframe, blade disc, and check for free rotation.
Warning about using original parts and potential injury from incorrect replacement.
Step-by-step guide on how to replace the mower's blades.
Troubleshooting for motor blockages and blade disc issues.
