2.11
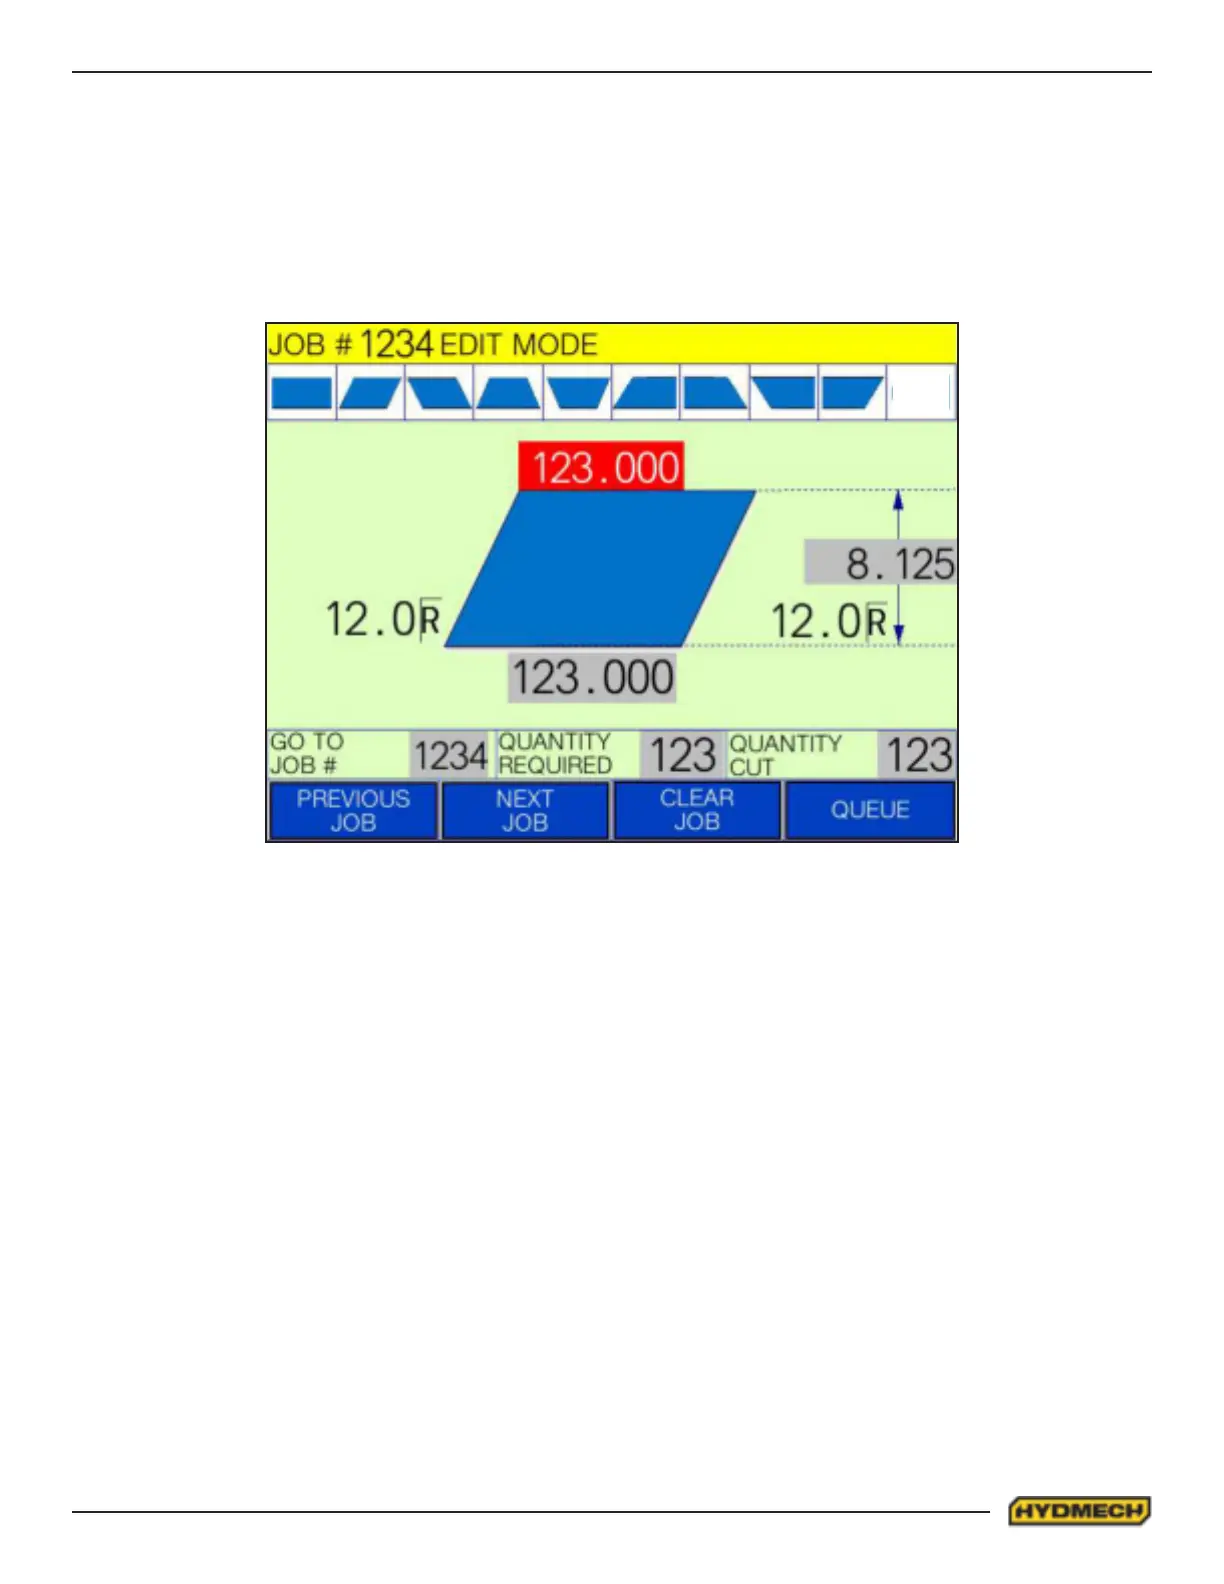
Step 2. After the job # has been assigned, select the desired cut prole from the 9 dierent cut proles provided on the
selection bar illustrated on the touch screen. Once the desired prole has been selected, the geometry and required di-
mensional inputs of the cut prole will change on the job display window to that of the selected prole.
Step 3. Input the desired dimensional properties by selecting the appropriate grey box used to dene specic dimensional
features of the selected prole. Each time a number pad display window will appear over the job display window. Key in
the desired linear and/or angular value on the touch screen and press enter. It is important to note that any values that
are beyond the capabilities of the machine will be highlighted in a red box to indicate that a correction to the dimensional
properties is required.
Note: All Length & angular inputs are always with respect to the machine datum (table). Overall height is the
actual material height (not the nominal height).
Step 4. After the dimensional properties have been assigned. The number of pieces required must be assigned. This is
done by selecting the grey input box under “QUANTITY REQUIRED” on the touch screen. A number pad display window
will appear over the job display window. Key in the desired quantity from 1 to 999 on the touch screen and press enter.
The number pad display window will disappear and the quantity required on the job display window will be adjusted to the
desired value.
Step 5. After the quantity has been assigned. The number of pieces cut must be assigned. This is done by selecting the
grey input box under “QUANTITY CUT” on the touch screen. A number pad display window will appear over the job dis-
play window. Key in the desired quantity already cut from 0 to 999 on the touch screen and press enter. The number pad
display window will disappear and the quantity already cut on the job display window will be adjusted to the desired value.
Note: Quantity cut represents the number of pieces already cut under that job. Ensure that the value for Quantity Cut
under any New Job is always “0” so the desired number of pieces cut is always the same as the Quantity required.
Step 6. The job is now ready to start its run or other jobs can now be programmed at this time. To program another job
either repeat steps 1 to 5 detailed above or select “NEXT JOB” on the touch screen and repeat steps 2 to 5. Once all de-
sired jobs have been programmed press the QUEUE key on the touch screen. The job display window will disappear and
the job queue window will appear as shown below. To return to the job display window, select the “RETURN” key on the
touch screen.