5-11: Machine Maintenance
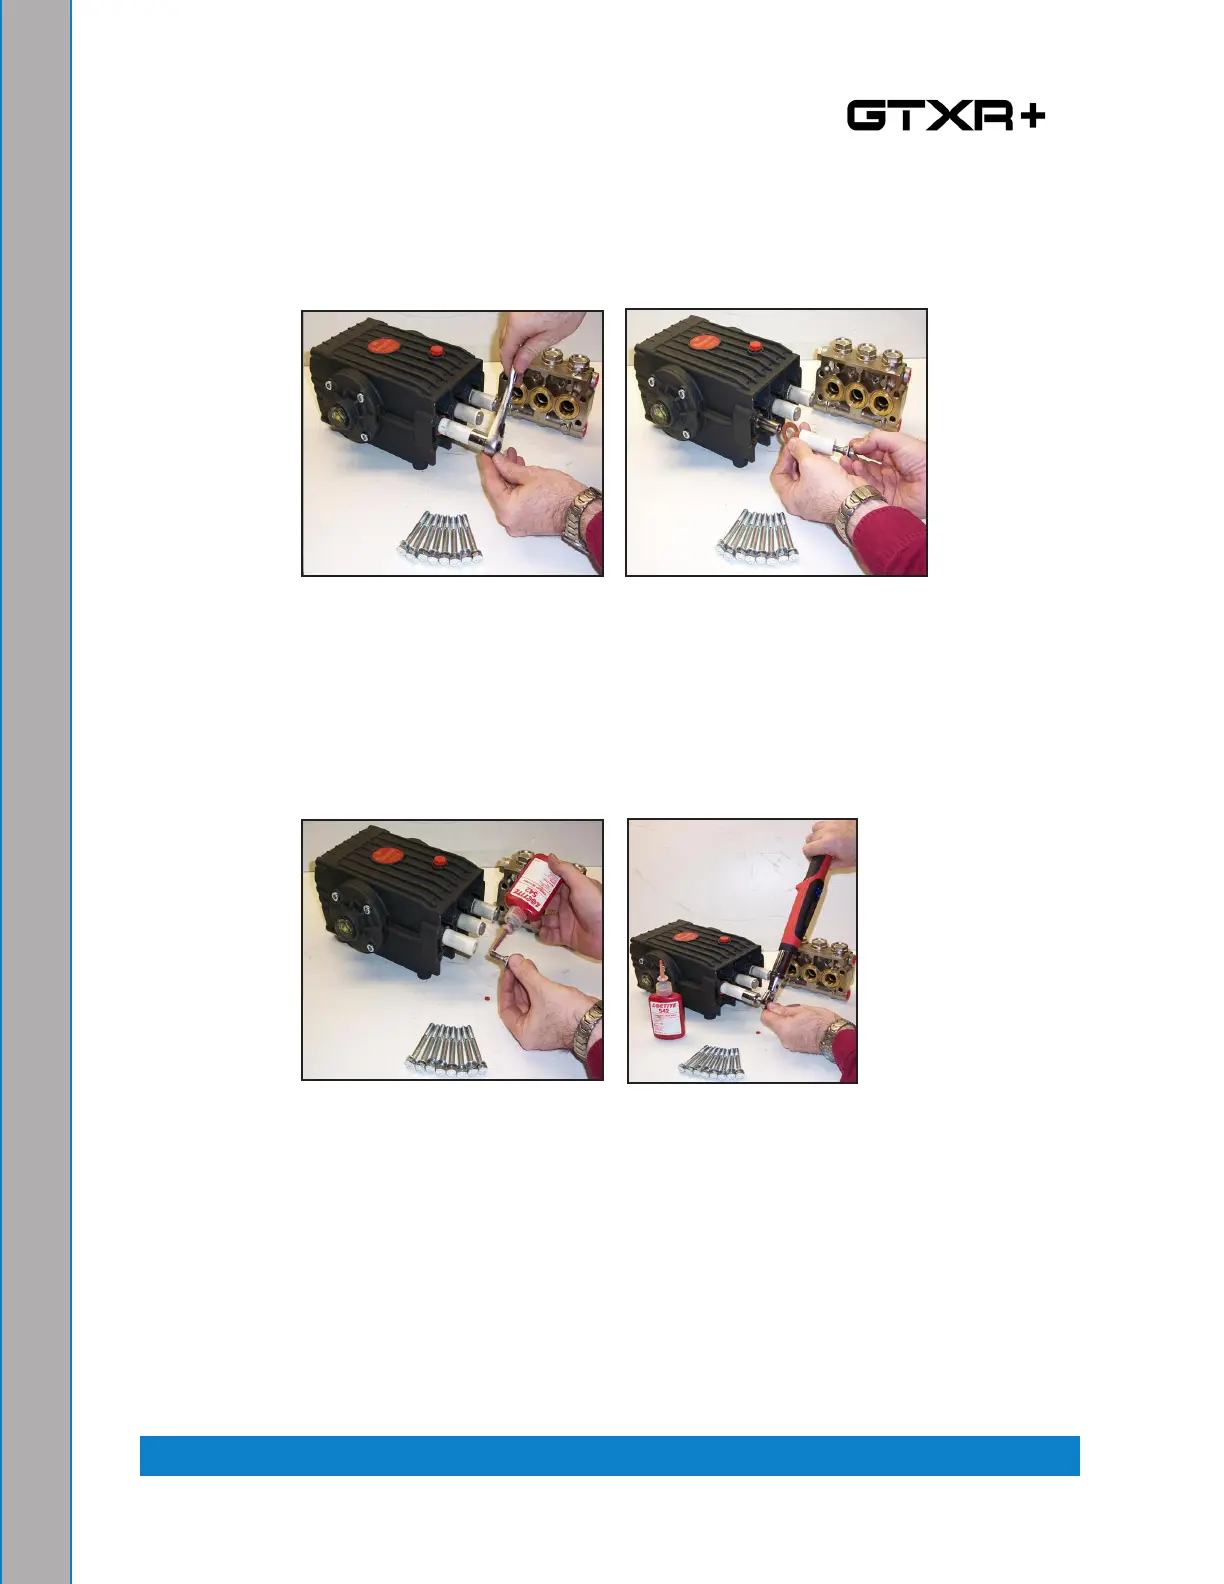
15. Remove the stainless steel plunger bolt and ceramic plunger from the plunger guide
(see Figure 5-9).
16. If the slinger washer is removed, be certain it is re-installed or replaced.
17. Separate plunger bolt from ceramic plunger (see Figure 5-9).
18. Install new Teon® back-up ring and O-ring on the plunger bolt. Apply a lm of O-ring
grease on the outside of the O-ring (see Figure 5-10).
19. Apply removable anaerobic thread sealant (Loctite
®
542) to the threads of the plunger
bolt, carefully pressing the plunger bolt into ceramic plunger (see Figure 5-10).
20. Slide new ceramic plunger over the plunger guide (see Figure 5-10).
21. Torque plunger to 14.5 ft lbs
Figure 8-9. Remove Stainless Steel Plunger Bolt and Ceramic Plunger
Figure 8-10. Install O-ring, Apply Sealant and Slide Plunger over Plunger Guide