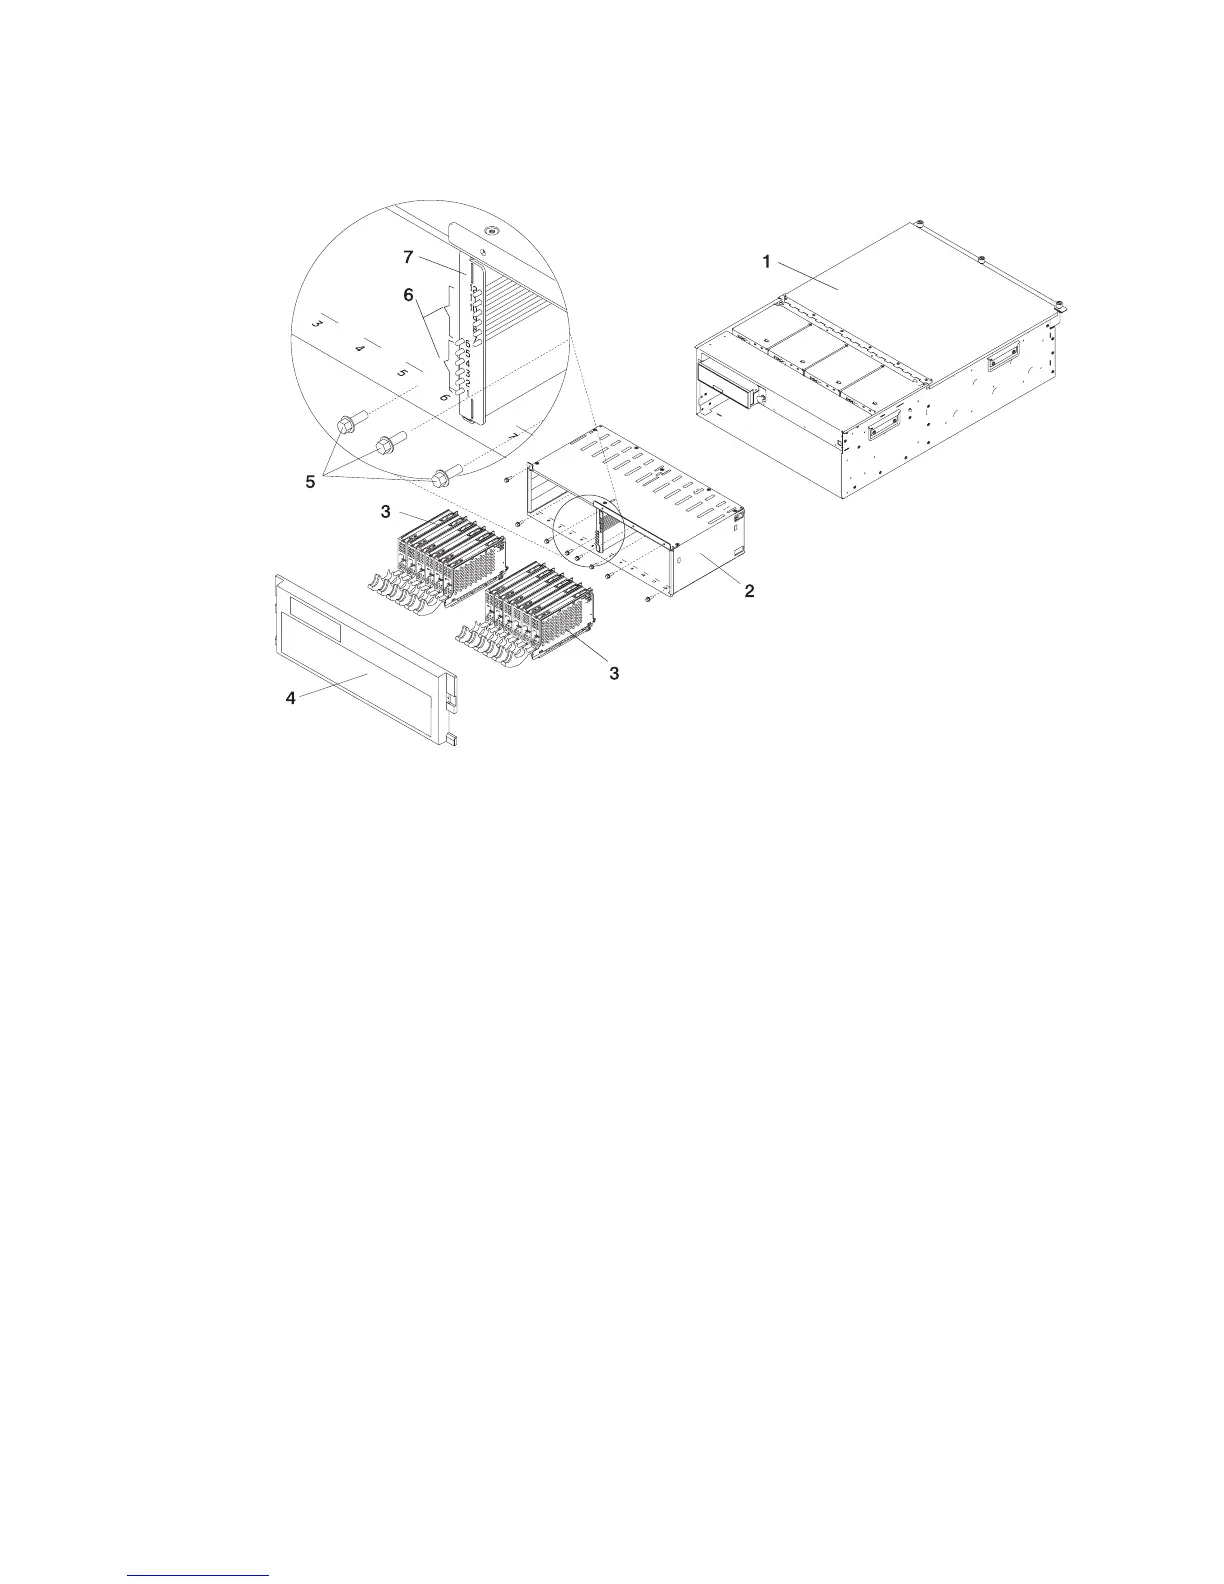
1 Model D20 5 Retaining Screws (Quantity 8)
2 Disk Drive Cage 6 Light Pipes
3 Disk Drives 7 Light Pipe Support Bracket
4 Front Bezel
Disk Drive Cage Replacement
To replace the disk drive cage, go the following:
1. Insert the disk drive cage assembly into the subsystem.
2. Insert the 8 retaining screws that secure the disk drive cage to the front of the
system chassis. See the following illustration.
3. Replace all hot-plug disk drives as described in “Hot-Plug Disk Drive Replacement”
on page 164.
4. Replace the front bezel as described in “Front Bezel Replacement” on page 130.
5. Reconnect the power source to the system. If the system has two power supplies,
two power cables need to be reconnected.
6. Push the system back to the operating position as described in “D20 Operating
Position” on page 126.
7. Start the system as described in “Starting the System” on page 55.
8. Close the rack door.
166 Eserver pSeries 7311 Model D10 and Model D20 Service Guide