5. Lift the handle all the way up and towards you.
6. Remove the power supply by sliding it out of the system.
7. Install the power supply by reversing this procedure, ignoring step 1. After exchanging an item, go to
Verify the repair.
This ends the procedure.
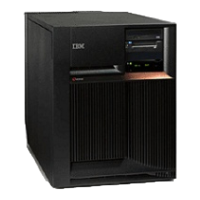
Model 825 - Removable media - D17 and D18
For use by authorized service providers.
Use this procedure to remove or replace the removal media - D17 and D18 on the Model 825.
Laser safety information
CAUTION:
This product may contain a CD-ROM which is a class 1 laser product. (RSFTC240)
CAUTION:
This
product may contain a DVD which is a class 1 laser product. (RSFTC245)
To remove or replace removable media - D17 and D18:
1. Remove media (if any) from the device.
Attention: Damage to DVD-RAM devices can result if the manual ejection function is used while
device is powered on. For DVD-RAM devices, it is recommended that you remove the device prior to
manually ejecting the media.
Notes:
v If you need to remove a tape from the old tape unit, go to Tape cartridge - manual removal.
v If you need to remove optical media, go to Optical media - manual removal.
2. In some cases you do not need to power down the system to change a removable media unit.
Are you removing a unit by using device concurrent maintenance?
v Yes: Continue with the next step.
v No: Perform the following:
a. Power off the system. See Power on/off the system and logical partitions.
b. Disconnect the power cord from the system.
c. Open the front cover. See Model 825 - Covers.
d. Pull the handles which are located on each side of the unit, and remove the unit from the
system frame.
Note: If the unit is DVD-RAM and manual removal of optical media is required, go to Optical
media - manual removal.
e. Reverse these steps to install the new device.
This
ends the procedure.
3. If you are removing a unit by device concurrent maintenance, ensure that the unit is not in use and is
varied off.
Note: If you are removing an optical storage unit, you must ensure that all of the removable media
units in the system frame are not in use and are varied off.
4. Use the figure to determine the location of the internal removable media unit. Record this location for
later use.
Figure 1. Internal removable media locations
Analyze hardware problems 43