v Hot-swap hardware: The DS5020 contains hardware that enables you to
replace a failed E-DDM without turning off the storage subsystem. You can
continue to operate your system while an E-DDM is removed or installed. These
E-DDMs are known as hot-swap E-DDMs.
Installing hot-swap E-DDMs
With the exception of the DS5020 storage subsystem initial power on, add E-DDMs
while the storage subsystem is turned on and running.
Before you begin, ensure that you wear an anti-static wrist strap.
Complete the following steps to install hot-swap E-DDMs in the storage subsystem:
Attention:
v After you remove an E-DDM CRU, wait 70 seconds before replacing or reseating
it to allow it to properly spin down. Failure to do so might cause undesired
events.
v The DS5020 and EXP810 E-DDMs and FRUs are not compatible with the
DS4200 Express and EXP420 EV-DDMs and FRUs.
1. Read the documentation that comes with the E-DDM.
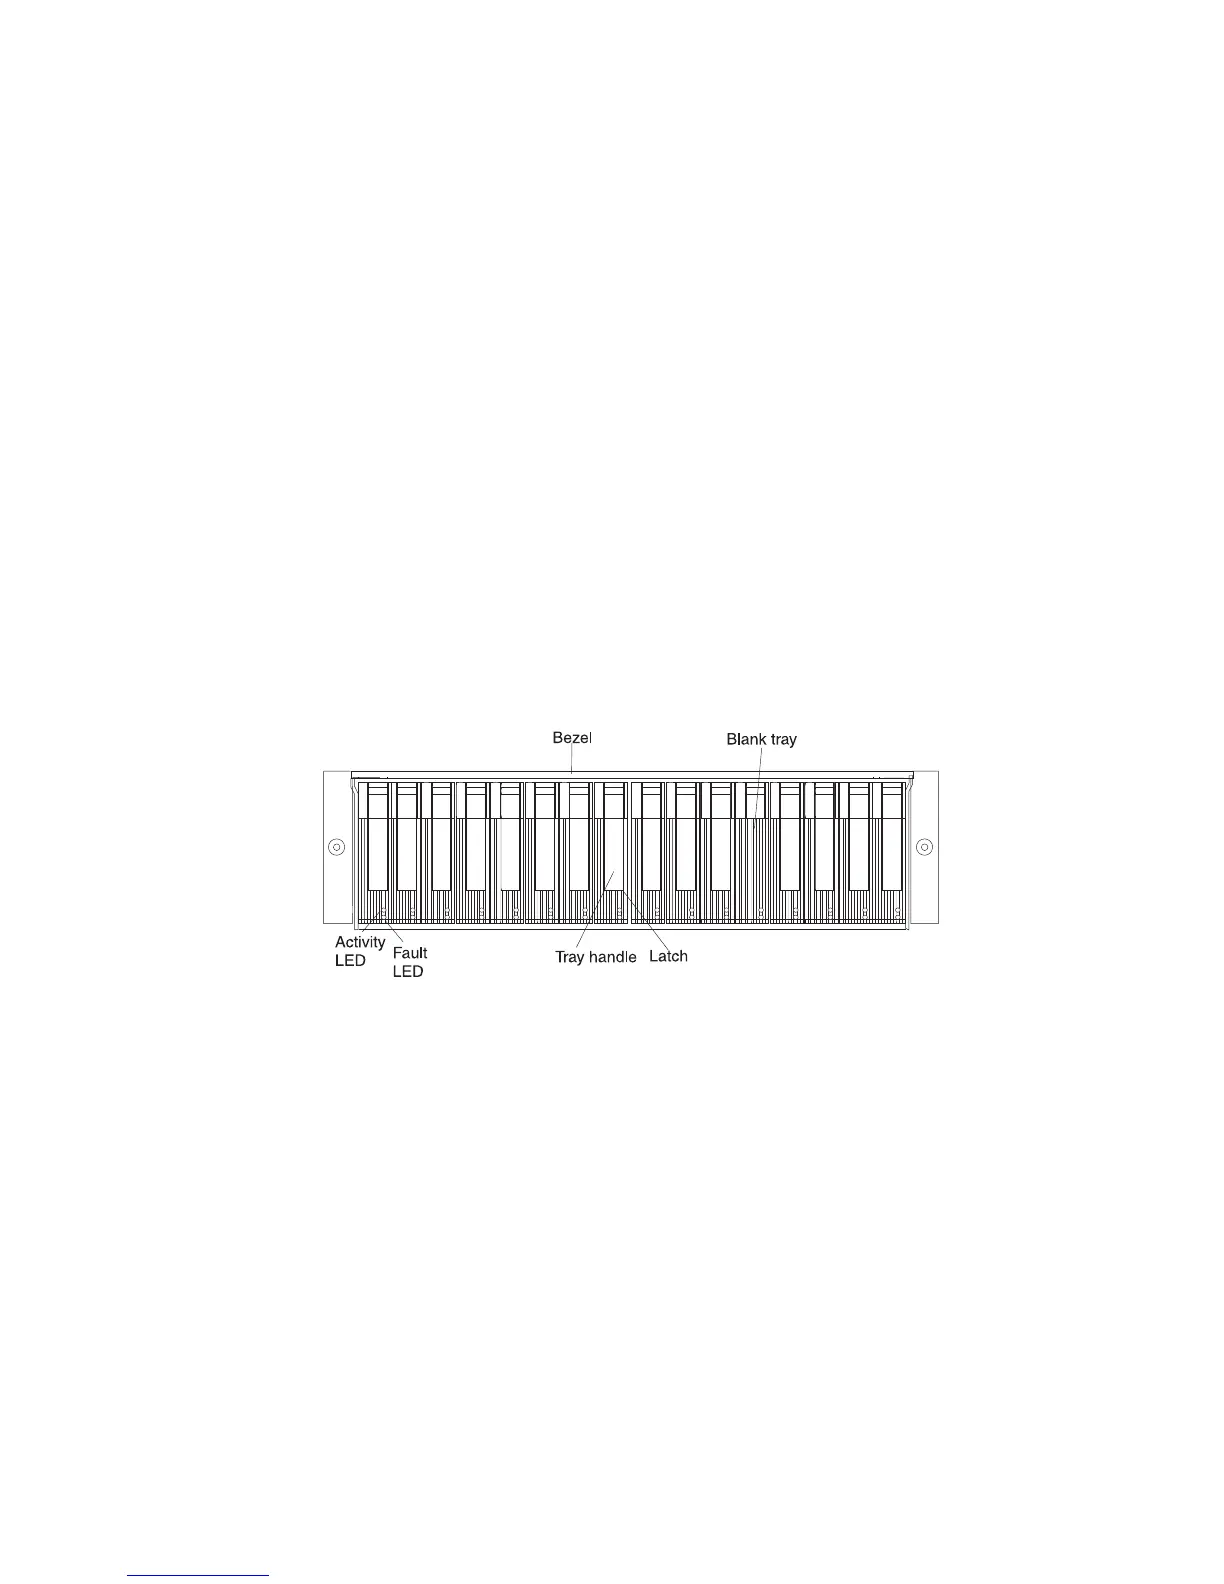
2. Check for Fault LEDs shown in Figure 81. If any amber LEDs are lit, see
“Solving problems” on page 157.
3. Determine the bay into which you want to install the E-DDM.
4. Remove the blank tray by doing the following:
a. Release the latch on the E-DDM CRU by pressing on the inside of the
bottom of the tray handle.
b. Lift the closed latch to its open position. (The latch is at a 90° angle to the
front of the E-DDM when open.)
c. Pull the blank tray out of the bay.
d. Save the blank tray for later use.
5. Install the E-DDM by doing the following:
Note: The hard disk drive comes installed in a drive tray. Do not attempt to
detach the drive from the tray.
a. Release the latch on the drive CRU by pressing on the inside of the bottom
of the tray handle.
b. Pull the handle on the tray out so that it is in the open position, as shown in
Figure 82 on page 133.
Figure 81. Hot-swap E-DDM LEDs
132 IBM System Storage DS5020 Storage Subsystem: Installation, User’s, and Maintenance Guide