Hot-swap fan
The server comes with three 120 mm x 38 mm hot-swap fans in the fan support
bracket at the front of the server. The following removal and replacement
instructions can be used to remove and replace any hot-swap fan in the server.
Complete the following steps to remove a hot-swap fan.
Hot-swap fan
1. Read the safety information that begins on page vii and “Handling
static-sensitive devices” on page 57.
Attention: Static electricity that is released to internal server components
when the server is powered-on might cause the server to halt, which might
result in the loss of data. To avoid this potential problem, always use an
electrostatic-discharge wrist strap or other grounding system when you work
inside the server with the power on.
2. Remove the left-side cover (see “Removing the left-side cover and bezel” on
page 57).
Attention: To ensure proper system cooling, do not leave the top cover off the
server for more than 2 minutes.
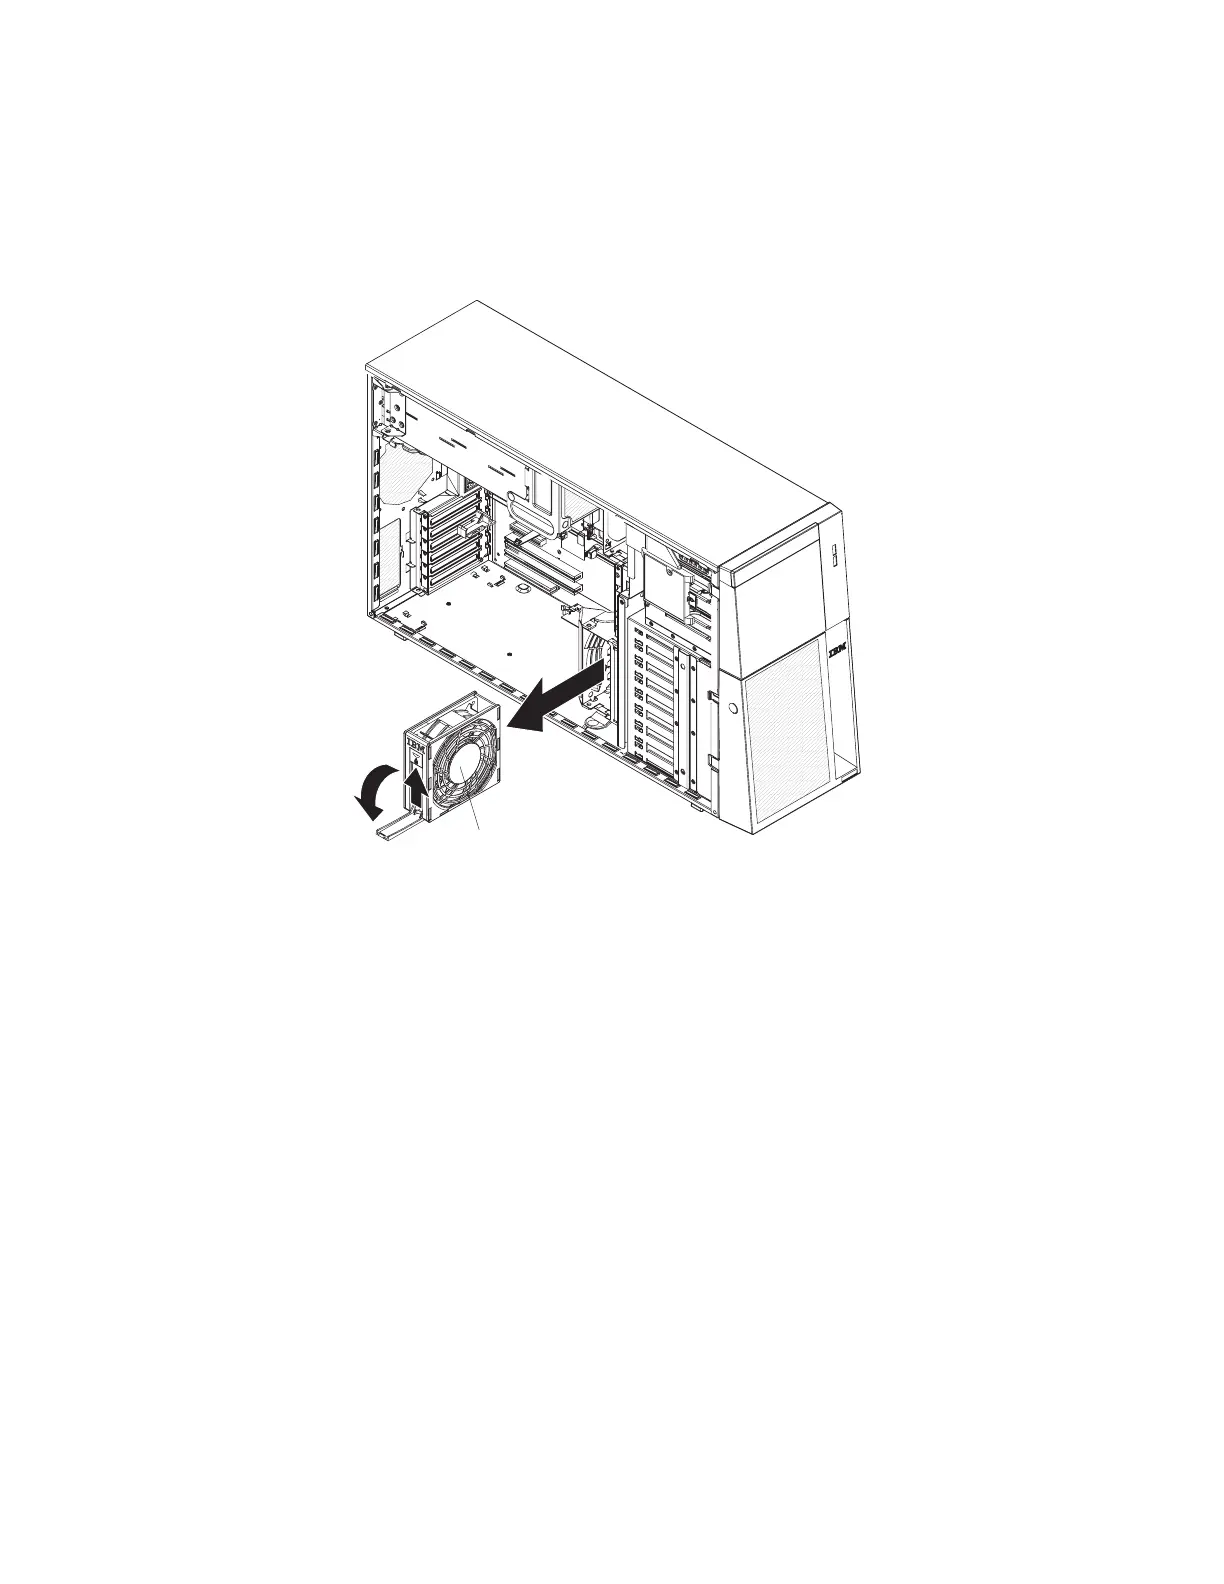
3. Open the fan-locking handle by sliding the orange release latch in the direction
of the arrow.
4. Pull upward on the free end of the handle to lift the fan out of the server.
Complete the following steps to install a hot-swap fan:
1. Open the fan-locking handle on the replacement fan.
2. Lower the fan into the socket and close the handle to the locked position.
3. Replace the left-side cover.
Chapter 4. Removing and replacing server components 63

 Loading...


