New2001
82
8
INSTALLATION AND CONNECTIONS
8
INSTALLATION AND CONNECTIONS
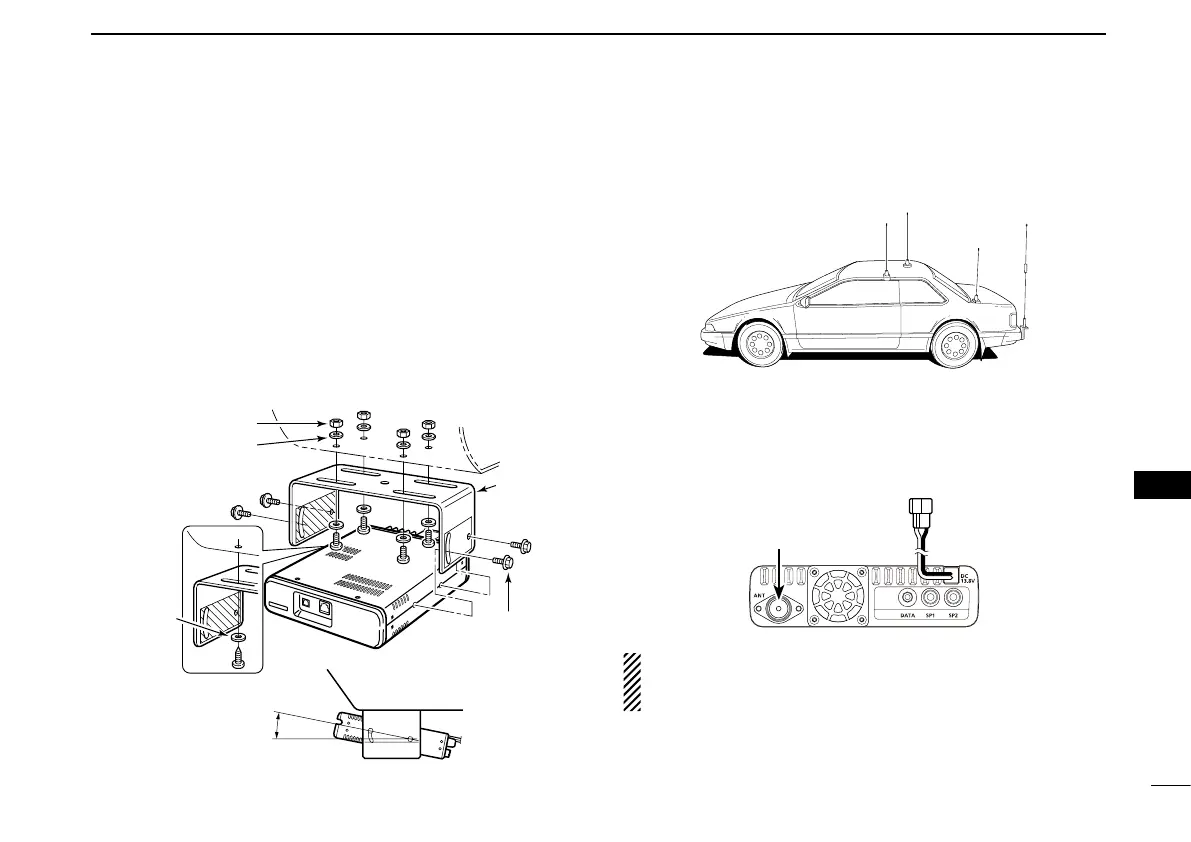
Using the mounting bracket D
You can install the main unit on the dashboard or the console
of your vehicle with the optional MBF-4
m o b i l e b r a c k e t .
Drill 4 holes where the mounting bracket is to be installed. q
• Approximately 5.5–6 mm(d) when using nuts; approximately 2–3
mm(d) when using self-tapping screws.
Insert the supplied screws, nuts and washers through the w
mounting bracket and tighten.
Adjust the angle for your suitable position. e
Nut
Spring washer
When using
self-tapping
screws
Flat washer
Mounting
nut
Mounting
bracket
25˚
■
Antenna installation
•Antennalocation
To obtain maximum performance from the transceiver, select
a high-quality antenna and mount it in a good location.
Connect the antenna to the antenna connector on the rear ➥
panel of the main unit.
Antenna connector
NOTE:
• Make the coaxial cable as short as possible.
• Be sure to seal the antenna connection.

 Loading...


