3
1
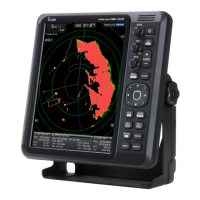
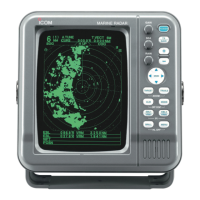
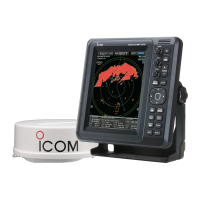
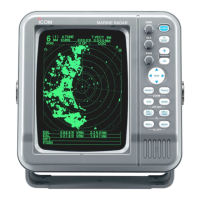
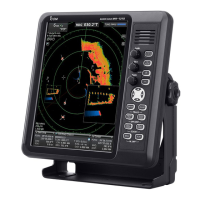
PANEL DESCRIPTION
q HEADING INDICATOR
Shows the heading readout.
• HDG: When the “Bearing Input” item in the Initial menu
is set to “NMEA,” “N+1,” or “AUX.”
• COG: When the “Bearing Input” item in the Initial menu
is set to “GPS” or “GPS-L.”
• The HDG readout indicates the bow of the vessel’s
heading in a clockwise direction from north.
• T: True Bearing, M: Magnetic bearing
w FIXED RING RANGE READOUT (p. 25)
Shows the interval range of the fixed ring.
• This readout is displayed when the “Ring Brill” item in
the Color menu is set to ON (1 to 3).
e SCREEN RANGE READOUT (p. 25)
Shows the range of the displayed screen.
• Nautical miles (NM), kilometers (km), or miles (SM) can
be selected as the distance unit in the Initial menu.
r MODE INDICATOR
Head-up, Stabilized Head-up, Course-up, North-up
and True motion screens are selectable.
• N-UP, SH-UP, and C-UP screens require external bear-
ing data.
• The TM screen requires bearing data and position data.
• Move the cursor on the indicator, then push [ENTER]/
[
] to select the Head-up (H-UP), Stabilized Head-up
(SH-UP), Course-up (C-UP), North-up (N-UP) or True
motion (TM) screens.
t VECTOR INDICATOR (p. 7)
➥ Shows the ATA, AIS and Own vector type.
• T: True vector, R: Relative vector
➥ Shows the vector time. Select the vector time in
the “Vector Time” item of the Target menu.
y TRAILS INDICATOR (p. 21)
Shows the trail time.
• The echo remains, with gradation, during the trail time
period on the screen. (Except for the trail time; ∞)
• Progressing time counter starts counting until the timer
reaches the trail time.
• R: Relative trail
u RAIN CONTROL ICON (p. 18)
Displayed when the RAIN function is used.
i AUTO SEA ICON (p. 18)
➥ Displayed when the SEA control function is used.
➥ “AUTO” is displayed below this icon when the au-
tomatic SEA control function is used.
o AIS ICON (p. 36)
Displayed when a valid VDM sentence is input from
the [NMEA1] (AIS) port.
The indicator disappears if the AIS signal is not re-
ceived for 6 minutes and 40 seconds.
q
w
e
r
t
y
i
u
o
!0
!2
!1
!3
!5
!6
!7
!8
!9
@0
@2
@5
@6
@4
@1
@3
@7
@8
@9
#0
!4
■ Screen
This Display example is
set to Wide in the “PPI
Area” item of the Display
menu.
 Loading...