2
WHEN CONNECTING TO THE NETWORK THROUGH A PC
42
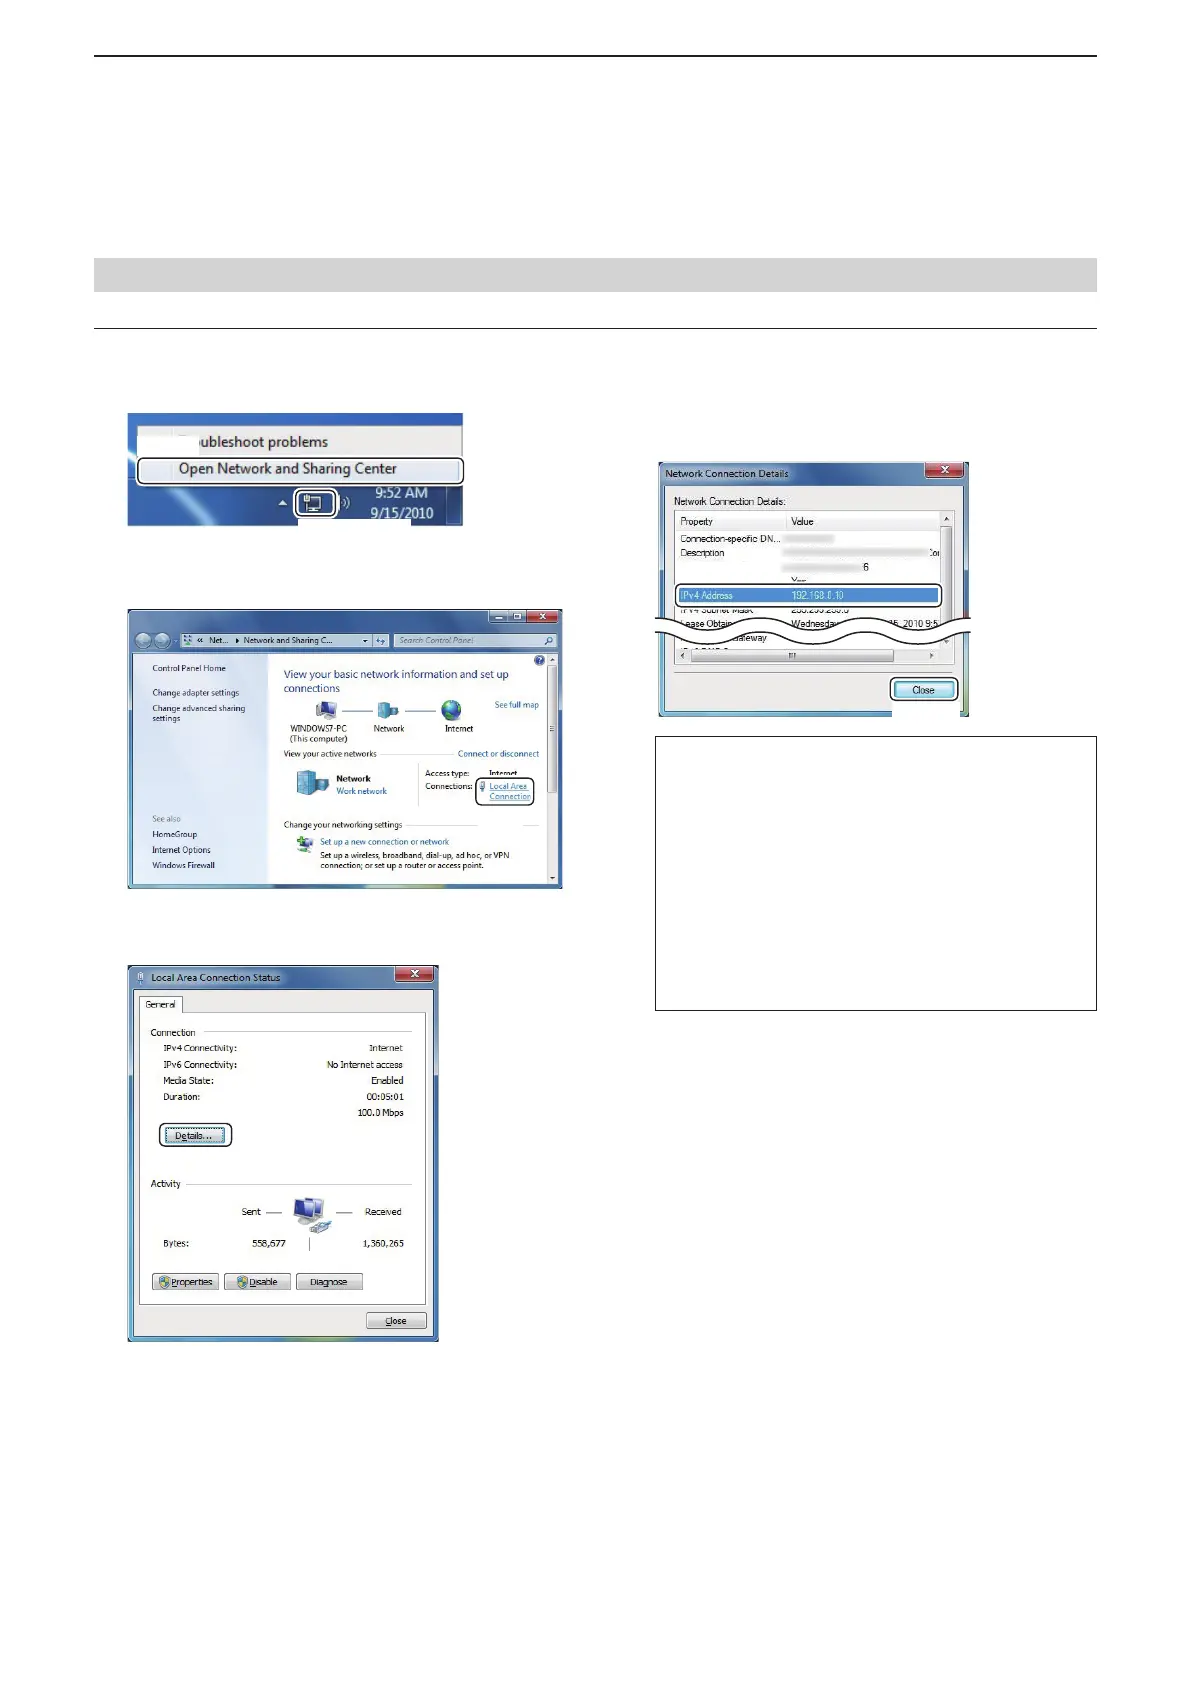
1. Right-click the Network icon on the taskbar, and
then click [Open Network and Sharing Center].
q Right-click
w Click
2. The “Network and Sharing Center” screen
appears, then click [Local Area Connection].
Click
3. The “Local Area Connection Status” screen
appears, then click <Details...>.
Click
4. The “Network Connection Details” screen
appears, then con rm the IP address that is
displayed in the Address eld.
Click <Close> to close the window.
q Confi rm
w Click
When the DHCP Enabled eld is set to “Yes” in
the “Network Connection Details” window, the
DHCP server assigns a dynamic IP address to
your PC.
Because of this, Remote stations will have to
match the IP address each time to access the
Server.
If the DHCP Enabled eld is set to “Yes,”
we recommend that you let Remote stations
access the Server using its computer name. (p.
38)
Windows 7
■ Confi rming Server Address or Network Name
D When con guring the remote control system through a LAN
To let Remote stations access the Server using its IP address (continued)