3
WHEN CONNECTING TO THE NETWORK DIRECTLY
47
Congure the network environment of your radio (IC-7610, IC-7700 with rmware version 2.00 or later, IC-7800
with rmware version 3.00 or later, IC-7850, or IC-7851) in the Others set mode.
The settings will take effect after rebooting the radio.
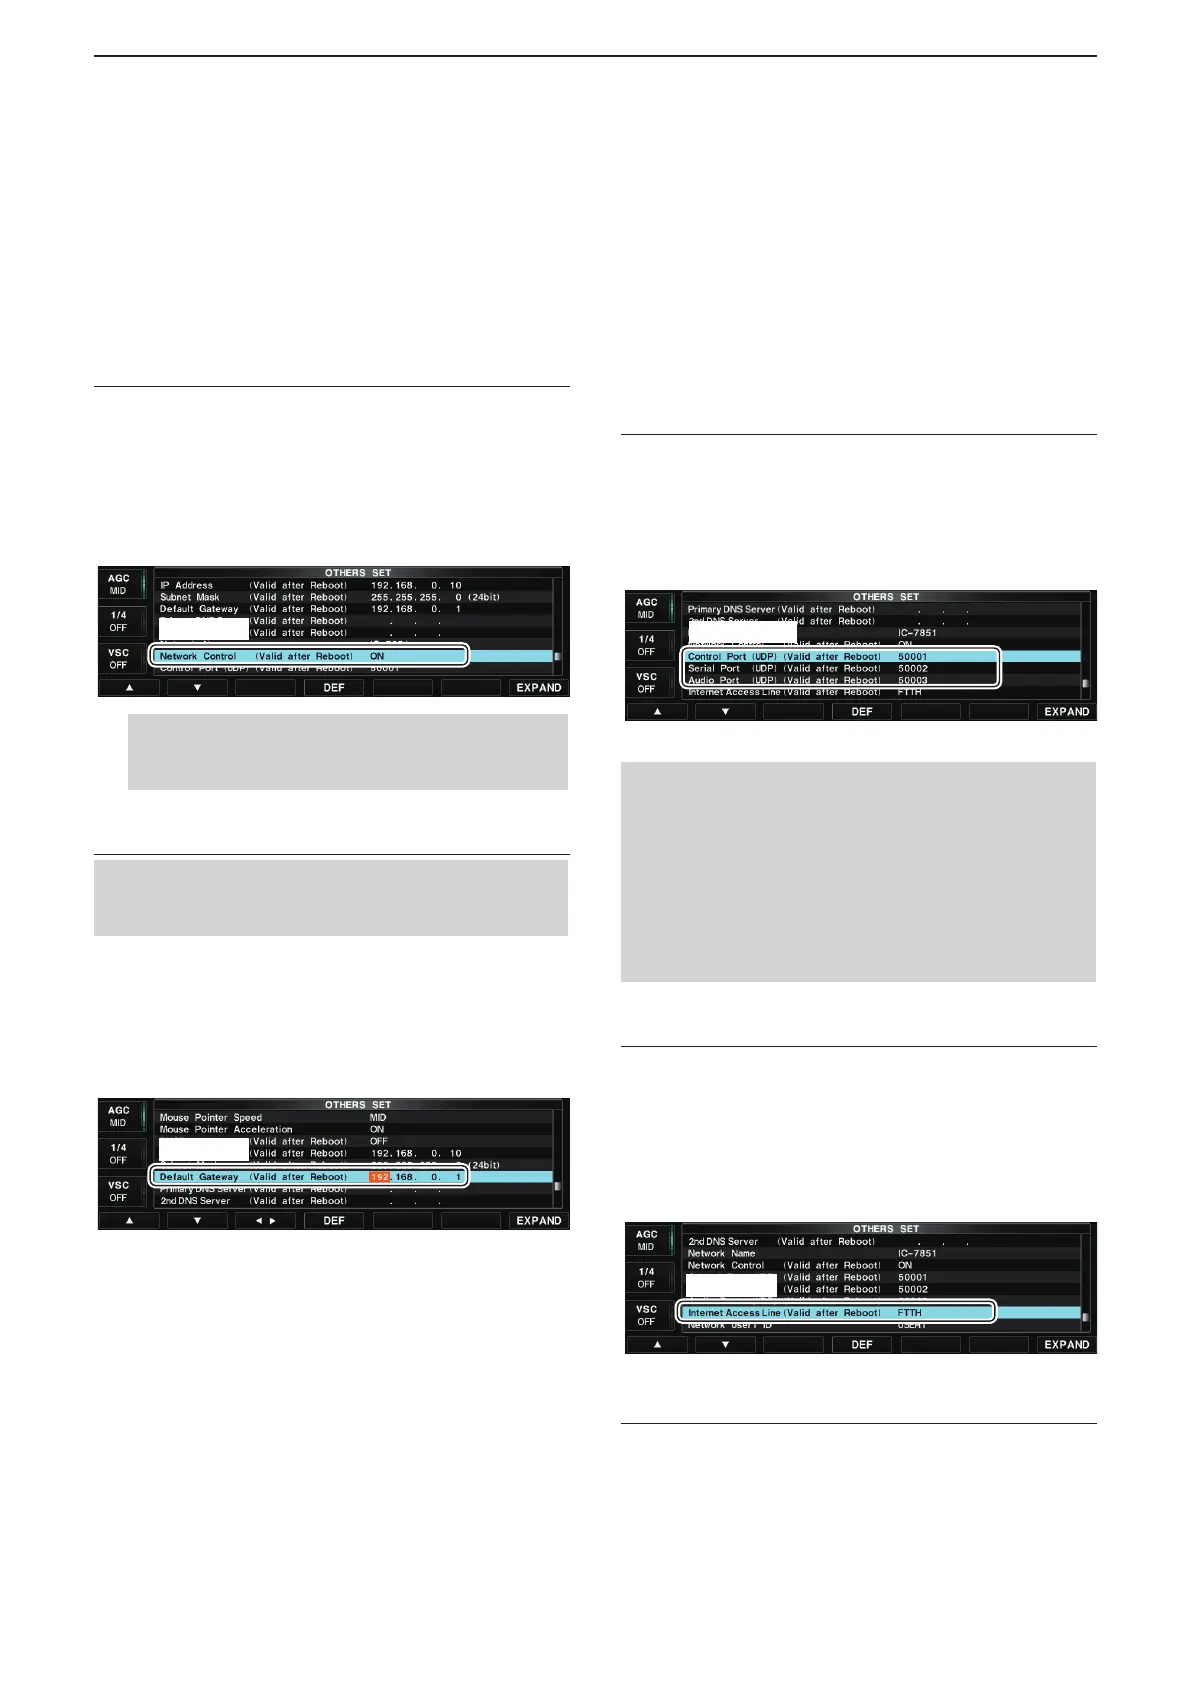
■ Network setting
• Except for the IC-7610
1. “Network Control” setting
1. Hold down [EXIT/SET] for 1 second to select the
Set mode menu screen.
2. Push [OTHERS](F-5) to enter the Others set
mode.
3. Push [▲](F-1) or [▼](F-2) to select “Network
Control.”
4. Rotate the main dial to select “ON.”
q Select
NOTE:
If you select “OFF,” the Remote station cannot
access the radio.
2. “Default Gateway” setting
NOTE:
This setting is necessary when the remote control
system is congured through the Internet.
5. Push [▲](F-1) or [▼](F-2) to select “Default
Gateway.”
6. Push [◀▶](F-3) to select the desired address
part, then rotate the main dial to set the IP
address of the LAN side on the router.
(Example: 192.168.0.1)
w Set
3. “Control Port (UDP)”
“Serial Port (UDP)”
“Audio Port (UDP)” conrmation
7. Push [▲](F-1) or [▼](F-2) to show “Control Port
(UDP),” “Serial Port (UDP)” or “Audio Port (UDP).”
8. Conrm the port numbers of the Control, Serial
and Audio ports.
You should use the default port numbers for these
ports.
e Confirm
NOTE:
If you congure the remote control system through
the Internet, and change the port number of the
Control, Serial or Audio port, you should congure
the port forwarding settings and the IP lter settings
on your router once again. (p. 12)
If you change the port number, you can hold down
[DEF](F-4) for 1 second to return them to their
default value.
4. “Internet Access Line” setting
9. Push [▲](F-1) or [▼](F-2) to select “Internet
Access Line.”
10. Rotate the main dial to select your internet
access line type in the Internet Access Line
item.
• FTTH: Fiber To The Home
• ADSL/CATV: ADSL or Cable television
r Select
5. Saving the settings
11. Reboot the radio.
The settings will take effect after rebooting.