Basic Settings – Sensor Settings
135
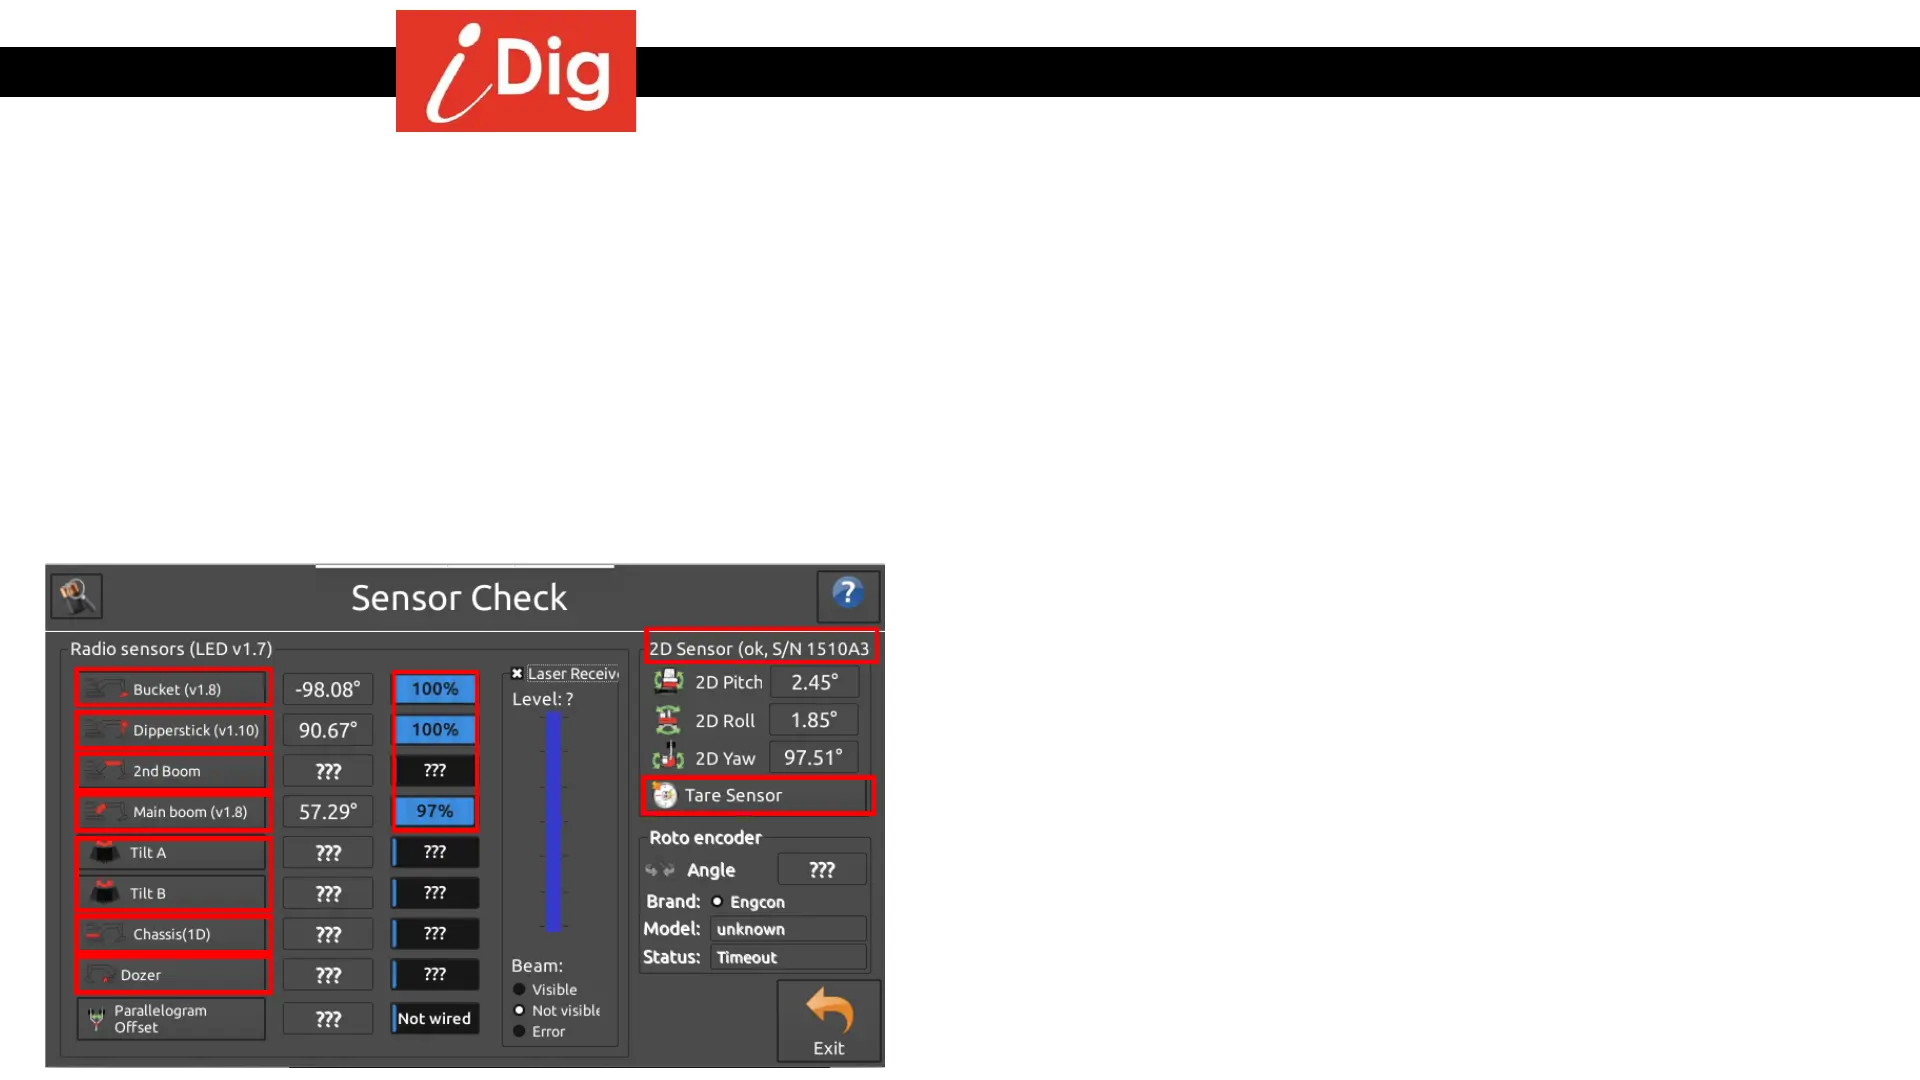
Sensor Check
The Sensors shipped with your iDig have already been paired with the system during production. It is therefore possible to use multiple systems on the same job
site without any interference. Each sensor has a label on the back of the sensor indicating which element it is assigned to:
• Bucket Sensor
• Combo Sensor with built in Laser Receiver
• 2
nd
Boom Sensor (for articulated machines that have a 2
nd
boom)
• Main Boom Senor
• 1D Chassis Sensor for Pitch (optional)
• Dozer Sensor (optional, requires Big Combo Sensor)
• 2D Chassis Sensor for Pitch, Roll & Rotation (optional)
• Tilt Bucket Kit (2 sensors, optional)
The Sensor Check page gives you a summary of all Sensors that are paired to your system:
• The blue box shows the battery strength for each sensor. When you click on a blue
box the indicated value will be the voltage that sensor is emitting.
• Sensors marked as non-visible are either not switched on (not attached to the
support plate or out of battery), or nor paired to the system. You can pair these
missing sensors to your system with a click on the name of the sensor. A pairing
procedure will then start (see the pairing procedures in the next pages).
• The 2D Sensor does not require any special configuration. The “Tare Sensor”
button resets the rotation sensor to zero. Click this button multiple times when
the sensor is stable for at least 4 seconds. The rotation sensor is sensitive to high
accelerations and shocks. In this situation a yellow triangle with an exclamation
point is flashing to indicate the error.