Installation Procedures – Laser Receiver Calibration
Laser Receiver Calibration - Automatic
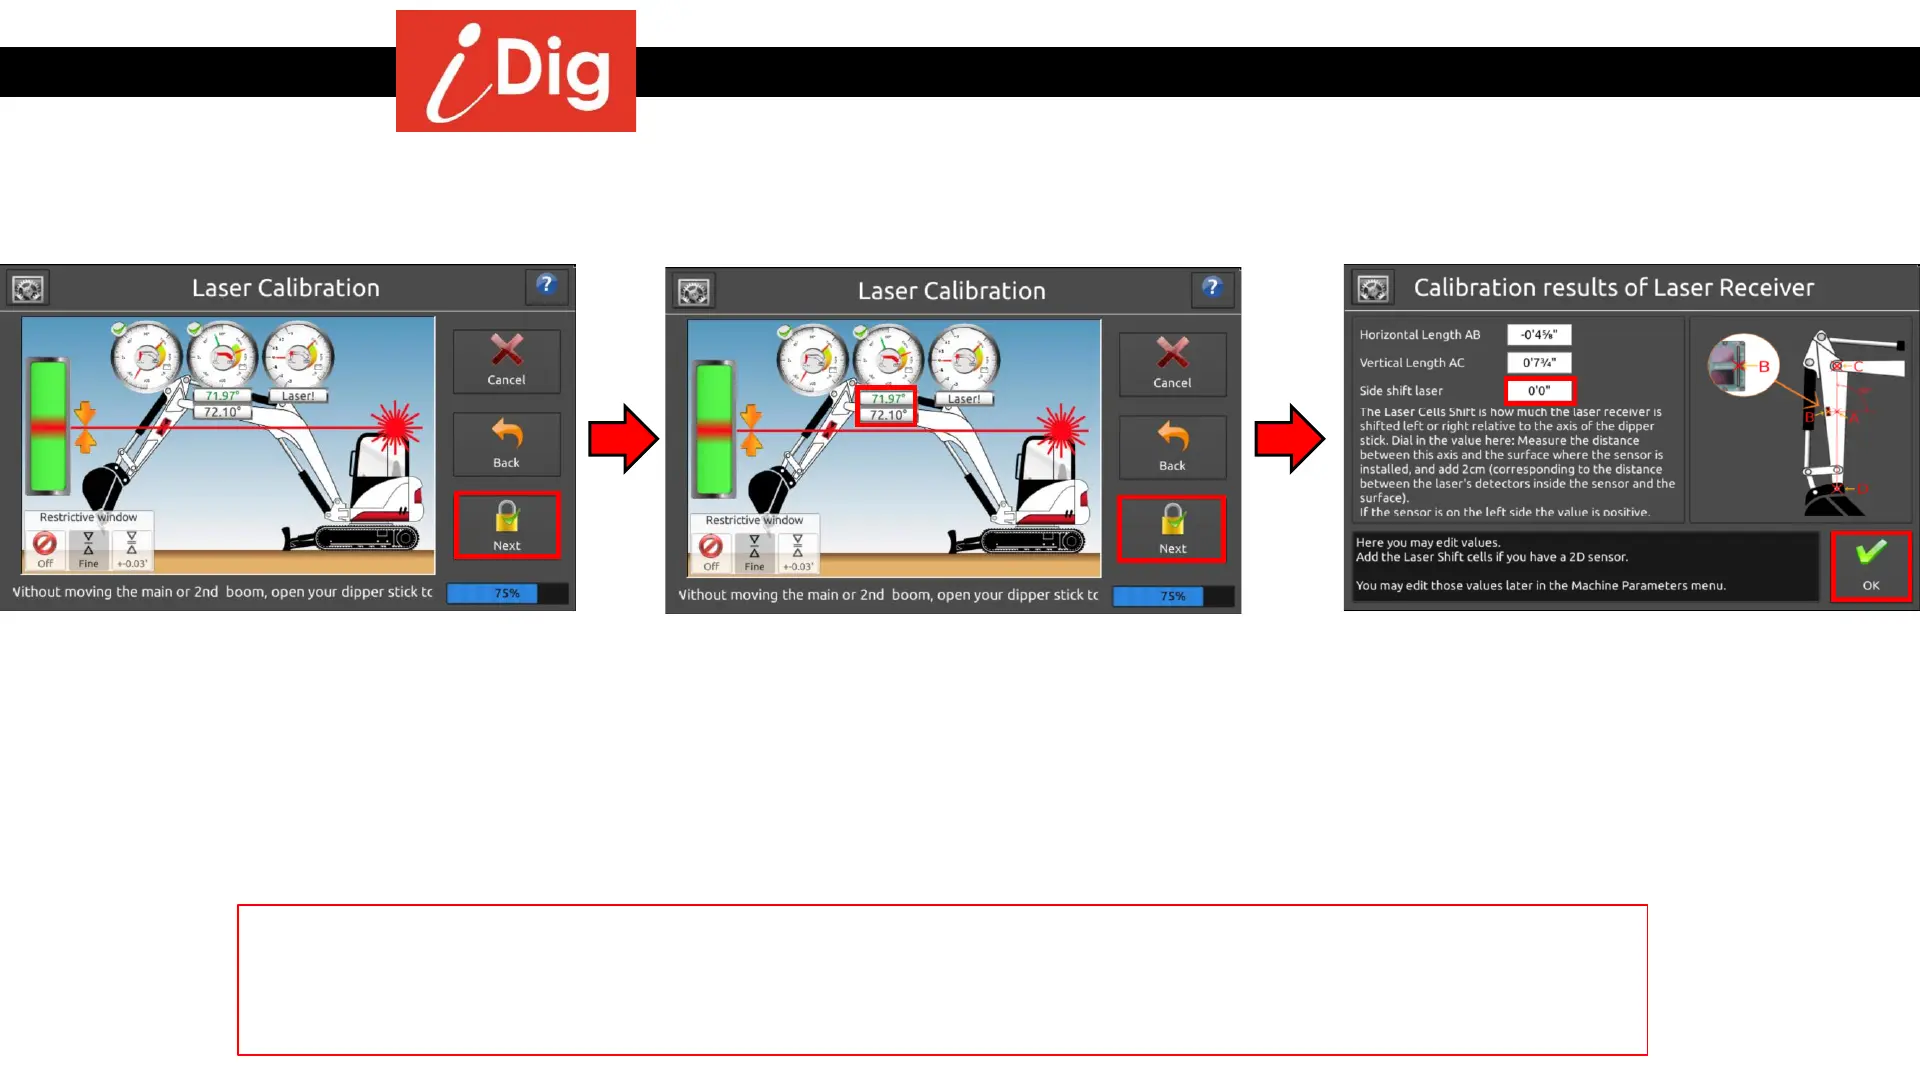
• Without moving the main boom, extend
the dipper stick away from the machine
until you get an on-grade signal from the
system. Press “Next”
• The final screen for your Laser Receiver
calibration shows the calculated
dimensions for your Laser Receiver. Press
“Done”.
If you are using the 2D sensor, you may input the Side Shift Laser information on the Calibration results of the Laser
Receiver screen. Measure the width of the dipper stick and divide in half. Then add ¾” (.062 for Imperial) to this value
and input on the screen. If your Combo Sensor is located on the left side of the Machine then this value will be
positive. If located on the right side of the machine this value will be negative.
• If you should move the main boom
between steps 2 and 3, the 2
nd
angle
bubble with the frozen value helps you to
adjust the main boom angle for the 3
rd
shot. Adjust the boom so that the moving
angle is green. Then by only moving the
dipper stick catch the laser beam. Press
“Next”.
35