32
3. Adjust WIDTH so that the inner size of the 4:3
area marker becomes the size in the following table.
<HDTV4:3 SCAN Sizes>
HTM-1517R
ASPECT HEIGHT WIDTH
4 : 3 203mm 270mm
* This table shows the 4:3 marker size.
HTM-1917R
ASPECT HEIGHT WIDTH
4 : 3 263mm 350mm
* This table shows the 4:3 marker size.
(10) Adjusting the moiré effect
a) Moiré effect
Adjust the moiré effect that is caused by the corre-
lation between the screen size and the CRT dot
pitch. Press the EXPAND switch and the adjust-
ment item will show up.
The preset data varies from format to format. It is
also different between 4:3 and 16:9 as well as be-
tween NORMAL and UNDERSCAN.
b) Precaution
The moiré effect is also saved in the data for each
signal format. During the setting, therefore, do not
do the following switchings. Otherwise a different
data from the previously set one may be called and
the data in progress will be cleared.
Channel selection
Input signal format switching
Scan switching
Aspect ratio switching
c) Procedure
①Input signal
Make sure the MENU 1 format is properly set for
a desired signal format. The format settings are
referred to in Item 4.7(3).
Feed the 50% full white signal. Or select the 50%
full white signal out of the built-in test signals.
②Adjusting the moiré effect
1. Readjust the setting so that the streaking pat-
tern should be minimized.
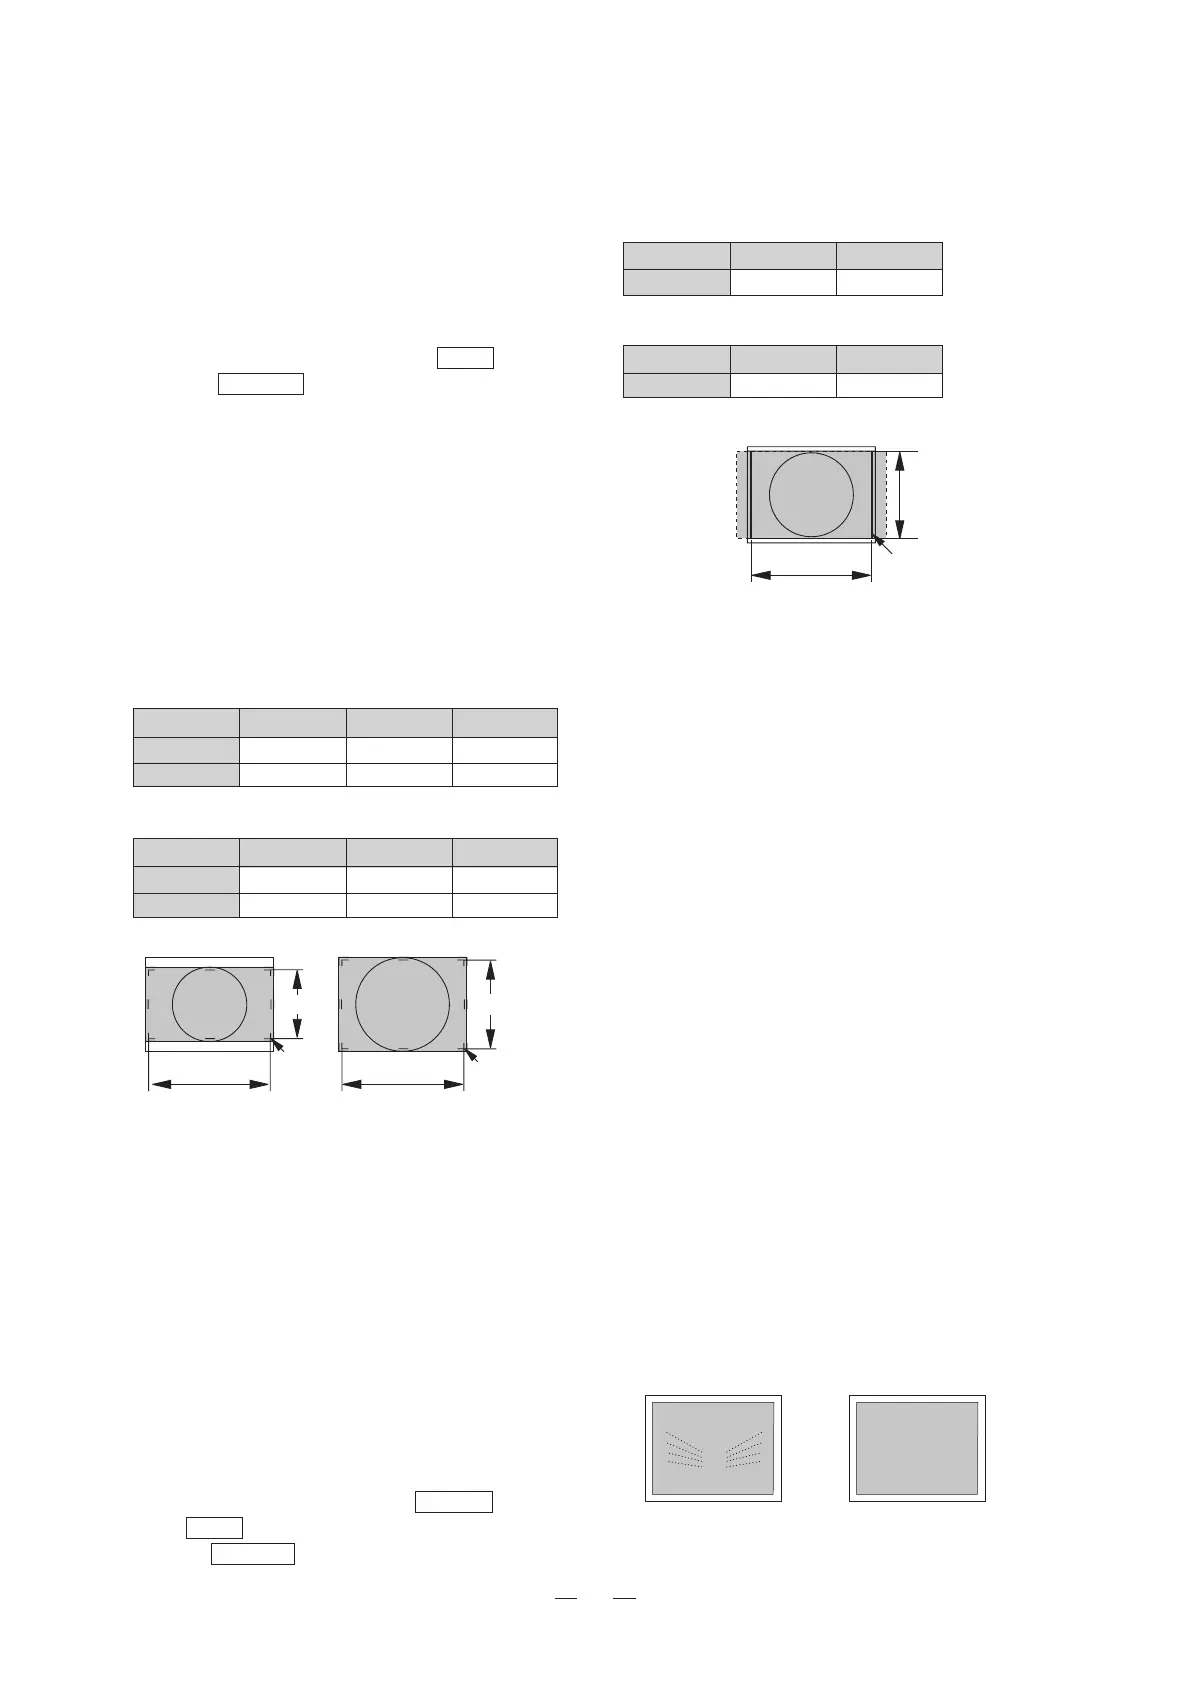
HEIGHT
WIDHT
〈HDTV4:3Size〉
4:3Marker
① Input signal
Check the MENU 1 format is set properly to the
signal format to be changed.
For details of the format setting, refer to 4.7(3) in
this manual.
Input a crosshatch signal or select the crosshatch
internal TEST signal.
② Adjusting HEIGHT and WIDTH
1. Set the desired aspect using the ASPECT switch,
and set NORMAL SCAN using the SCAN switch.
2.
Set the MARKER switch to ON, and select the
100%+93% marker.
3. Adjust WIDTH so that the 93% marker size be-
comes the NORMAL SCAN size in the following
table.
4. Adjust HEIGHT so that the vertical diameter be-
comes identical to the horizontal diameter. If you
are working with a signal not having a circle pat-
tern, adjust the 93% marker size so that it becomes
identical to the size shown below as a guide.
<NORMAL SCAN Sizes>
HTM-1517R
ASPECT FORMAT HEIGHT WIDTH
4 : 3 SD 203mm 270mm
16 : 9 HD/SD 152mm 270mm
* This table shows the 93% marker size.
HTM-1917R
ASPECT FORMAT HEIGHT WIDTH
4 : 3 SD 257mm 343mm
16 : 9 HD/SD 193mm 343mm
* This table shows the 93% marker size.
* Before proceeding to adjust another SCAN size,
be sure to press the CHANGE PRESET switch
now to store the current data.
e) Adjustment procedure 3 (HDTV 4:3 SCAN)
Adjust HEIGHT and WIDTH for HDTV 4:3 SCAN
as follows.
① Input signal
Check the MENU 1 format is set properly to the
signal format to be changed.
For details of the format setting, refer to 4.7(3) in
this manual.
Input a crosshatch signal or select the crosshatch
internal TEST signal.
② Adjusting HEIGHT and WIDTH
1.
Set the desired aspect using the ASPECT switch.
The SCAN switch does not function.
2.
Set the MARKER switch to ON, and select the 4:3
marker.
HEIGHT
WIDHT
HEIGHT
WIDHT
〈SDTV4:3(NORMAL)Size〉〈16:9(NORMAL)Size〉
93%area
93%area
<
NG
><
OK
>
 Loading...