Chapter 3 Crane Reference 23
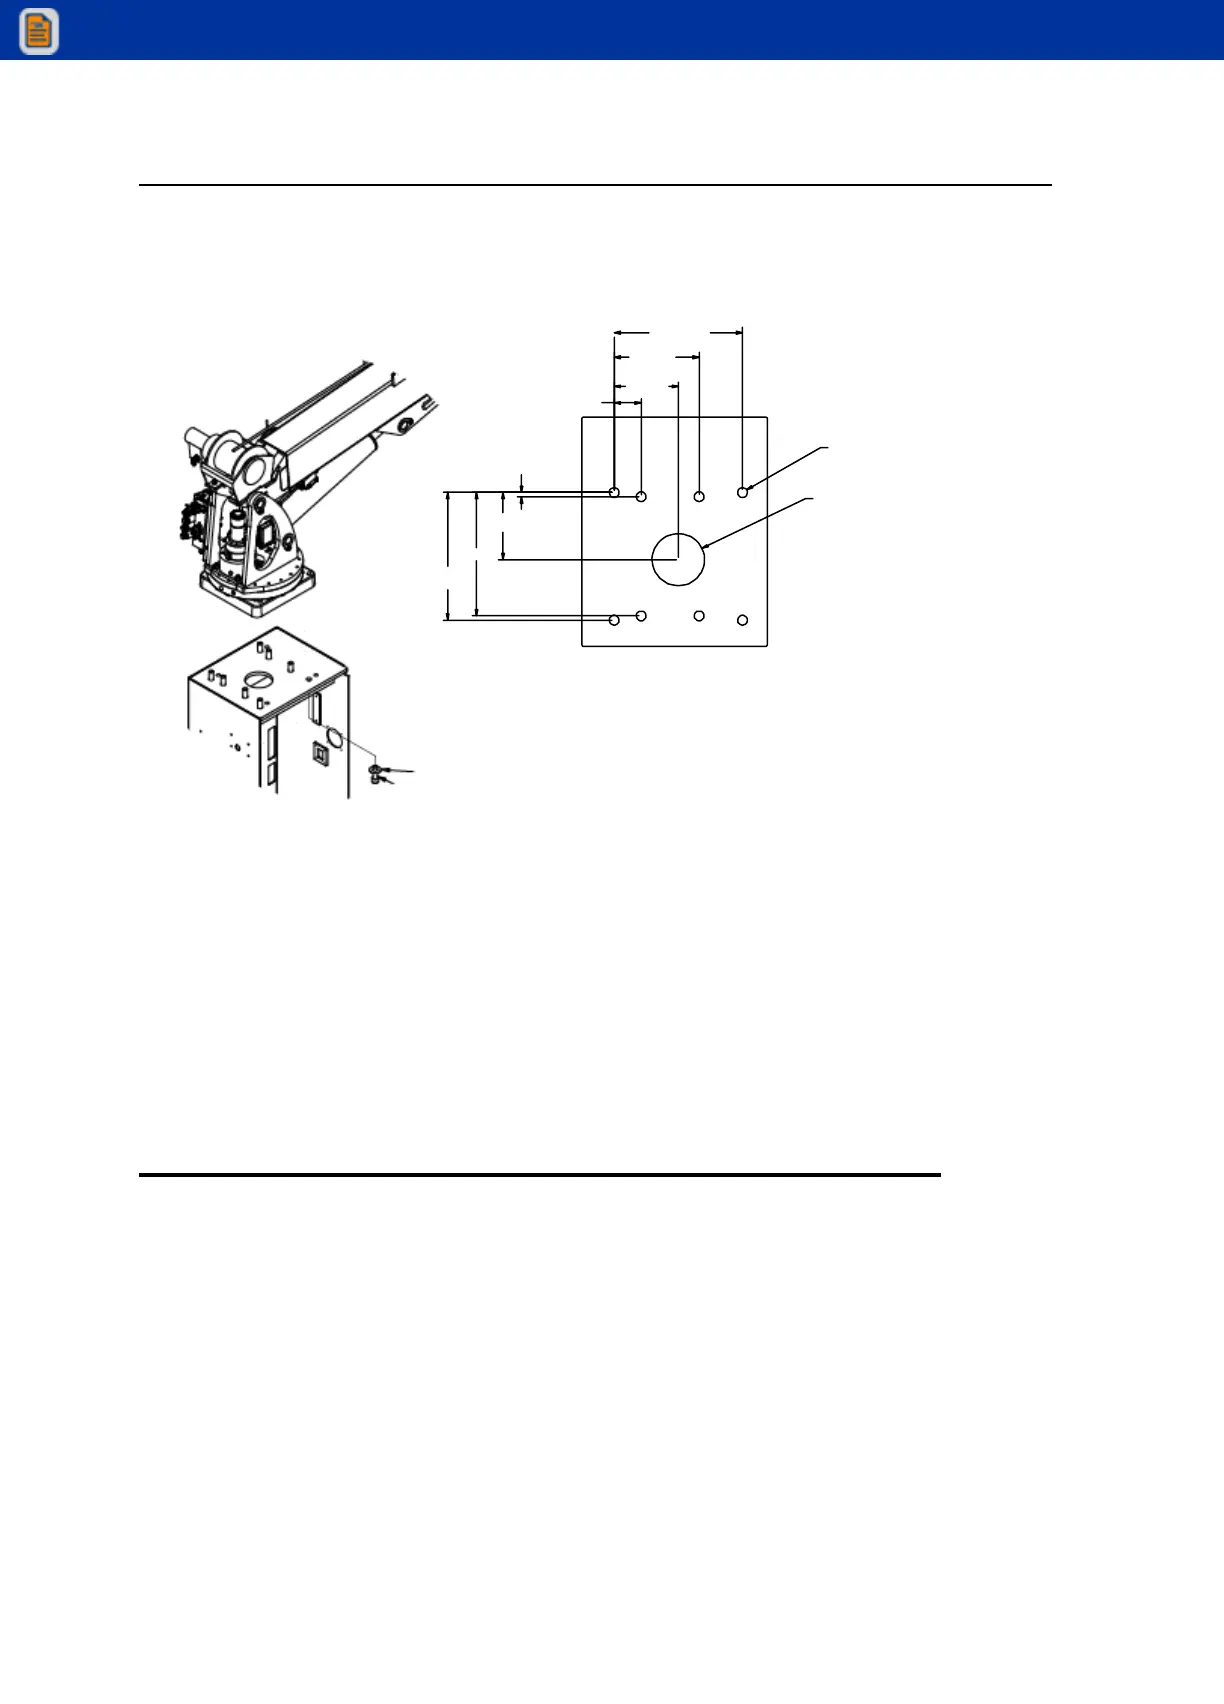
2 Install the mounting cap screws and washers to secure the crane base to the truck body (see
figure). Torque the cap screws to 680 ft-lb (94 kg-m).
1" WASHER (8)
SOCKET-HEAD
CAPSCREW (8)
TORQUE TO 680 FT-LB
8HOLES
(1.13" DIA.)
THROUGH
6.0" DIA. HOLE
THROUGH
MOUNTING HOLES AS VIEWED
FROM TOP OF CRANE
BACK OF CRANE
14.75"
9.75"
7.38"
3.13"
0.50"
7.75"
14.25"
14.75"
CAUTION
THE 3" BOLTS SUPPLIED ARE FOR USE ON BODIES WITH A CRANE BOX TOP PLATE
THICKNESS OF 7/8" TO 1" ONLY. DETERMINE THE CRANE BOX TOP PLATE THICKNESS
PRIOR TO MOUNTING. IF DIFFERENT LENGTH BOLTS ARE REQUIRED, THEY MUST BE
1-8, GRADE 8, ZINC COATED, OF THE PROPER LENGTH. FAILURE TO USE PROPER
LENGTH BOLTS MAY CAUSE THE BOLTS UNDER THE WORM HOUSING TO BOTTOM
OUT BEFORE TORQUEING. INSURE A MINIMUM OF 1-1/2" THREAD ENGAGEMENT.
Hydraulic Installation
Before installation, familiarize yourself with the installation kit drawing in the parts section for
specific hydraulic components used. The figure below is used to show major components and
general hose routings only.
1 Plumb the hydraulic components as shown in the applicable installation kit in the parts
section. Make certain all fittings are securely tightened and that hoses are free of possible
chafing or contact with hot or sharp edges which could cause damage.
2 Refer to Volume 1 for hydraulic oil specifications. Fill the hydraulic reservoir.