Eclipse Additional Information Page 131
6.4 General operation of ASSR
The user interface consists of the Toolbar, the ASSR tab, and the Audiogram tab.
6.4.1 Toolbar
For the toolbar you have the following options:
Test protocol selection form where you can select the default test protocols
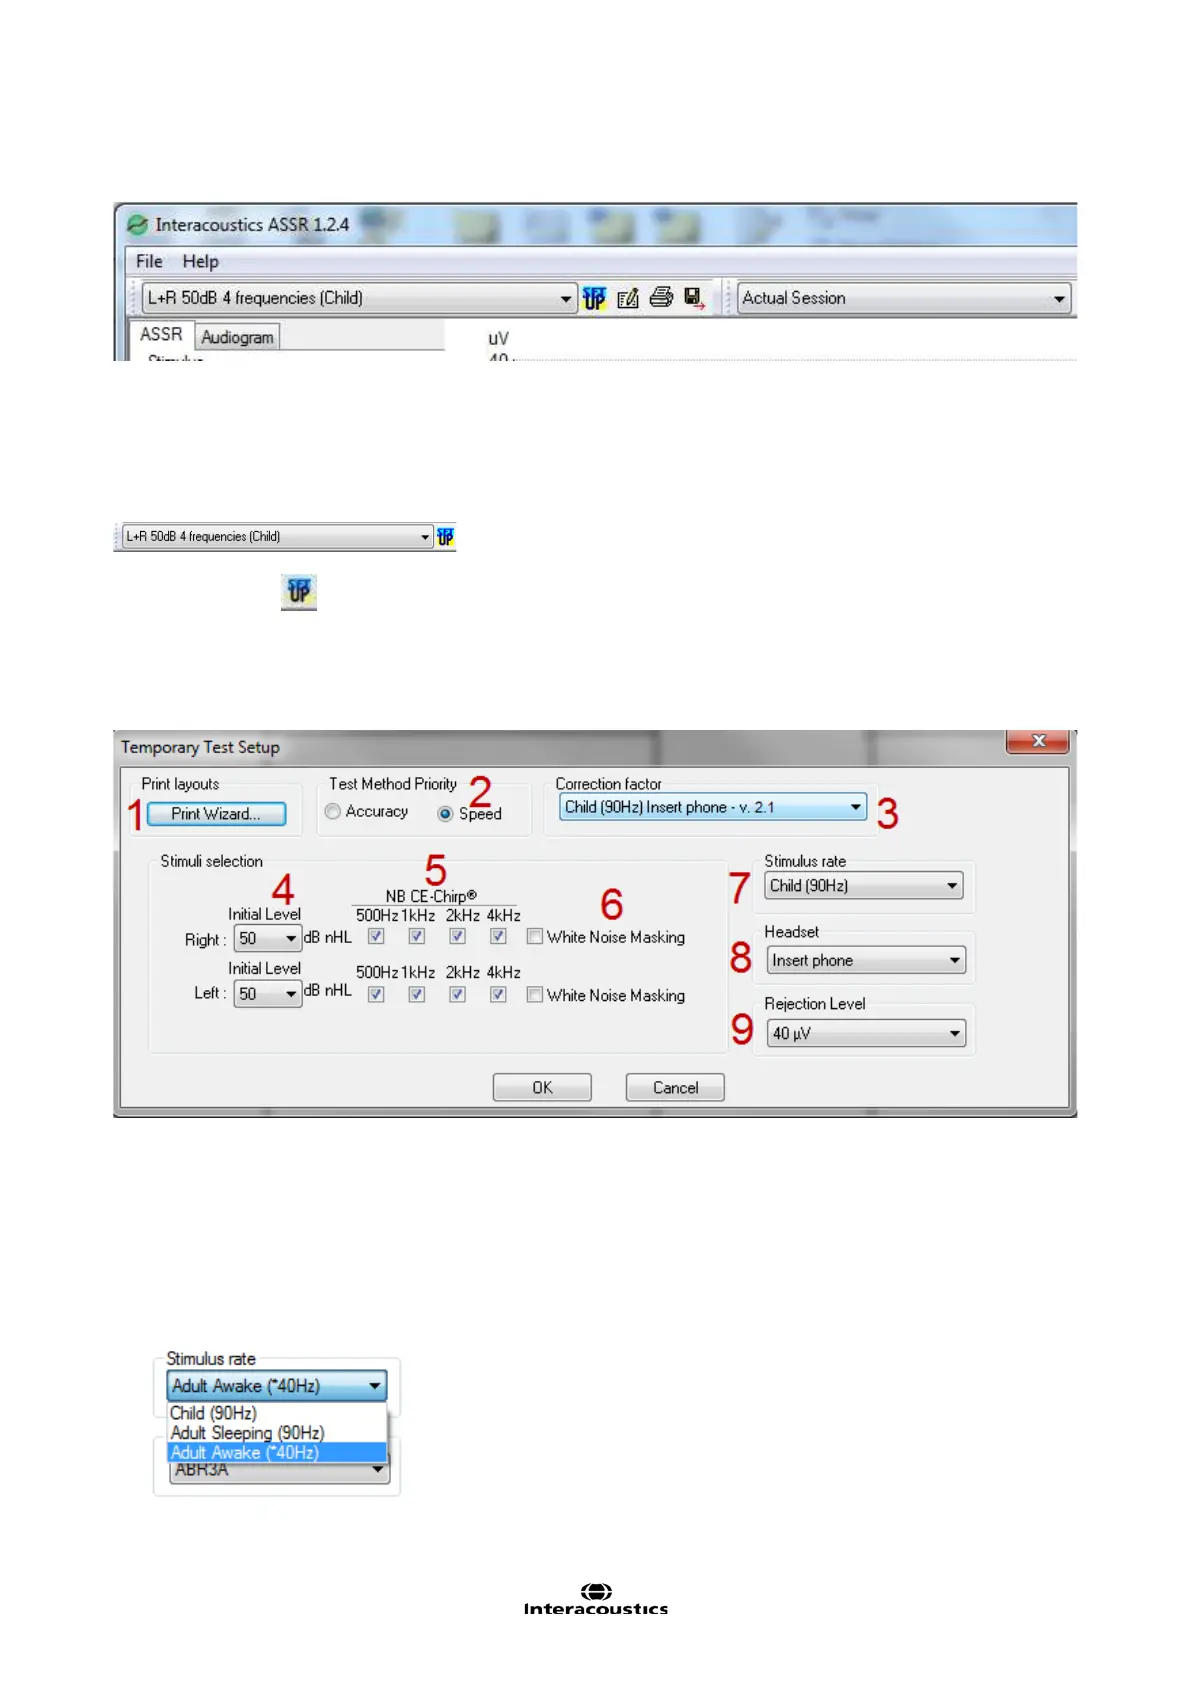
Temporary setup
You may temporarily change the parameters of a pre-programmed test protocol by selecting the Temporary
Setup button and then modify as required. Changes will apply to this session only. The auto test name will
then be followed by an * to indicate modified contents.
Changes are effective in the current session only and will NOT permanently change the test protocol.
1. Make changes in the Print Wizard before printing the particular measurement.
2. Select method priority Accuracy is set for a response confidence of 99% whereas Speed is set for confi-
dence of 95%.
3. Select the wanted correction factor.
4. Select the Intensity levels to start out with for right and left ear respectively.
5. Select the Frequencies that you are interested in testing.
6. Set the Masking ear, when activated the initial level is the level of masking. Note the masking level is in
dB SPL.
7. Select the Stimulus rate from the drop down.
8. Select the transducer from the dropdown (Headphone, Insert Phone, Bone (Msk: Insert Phone), or
Bone(Msk: Headphone).