Installation Guide 31
has started up, hold the RESET button for an additional 20
seconds.
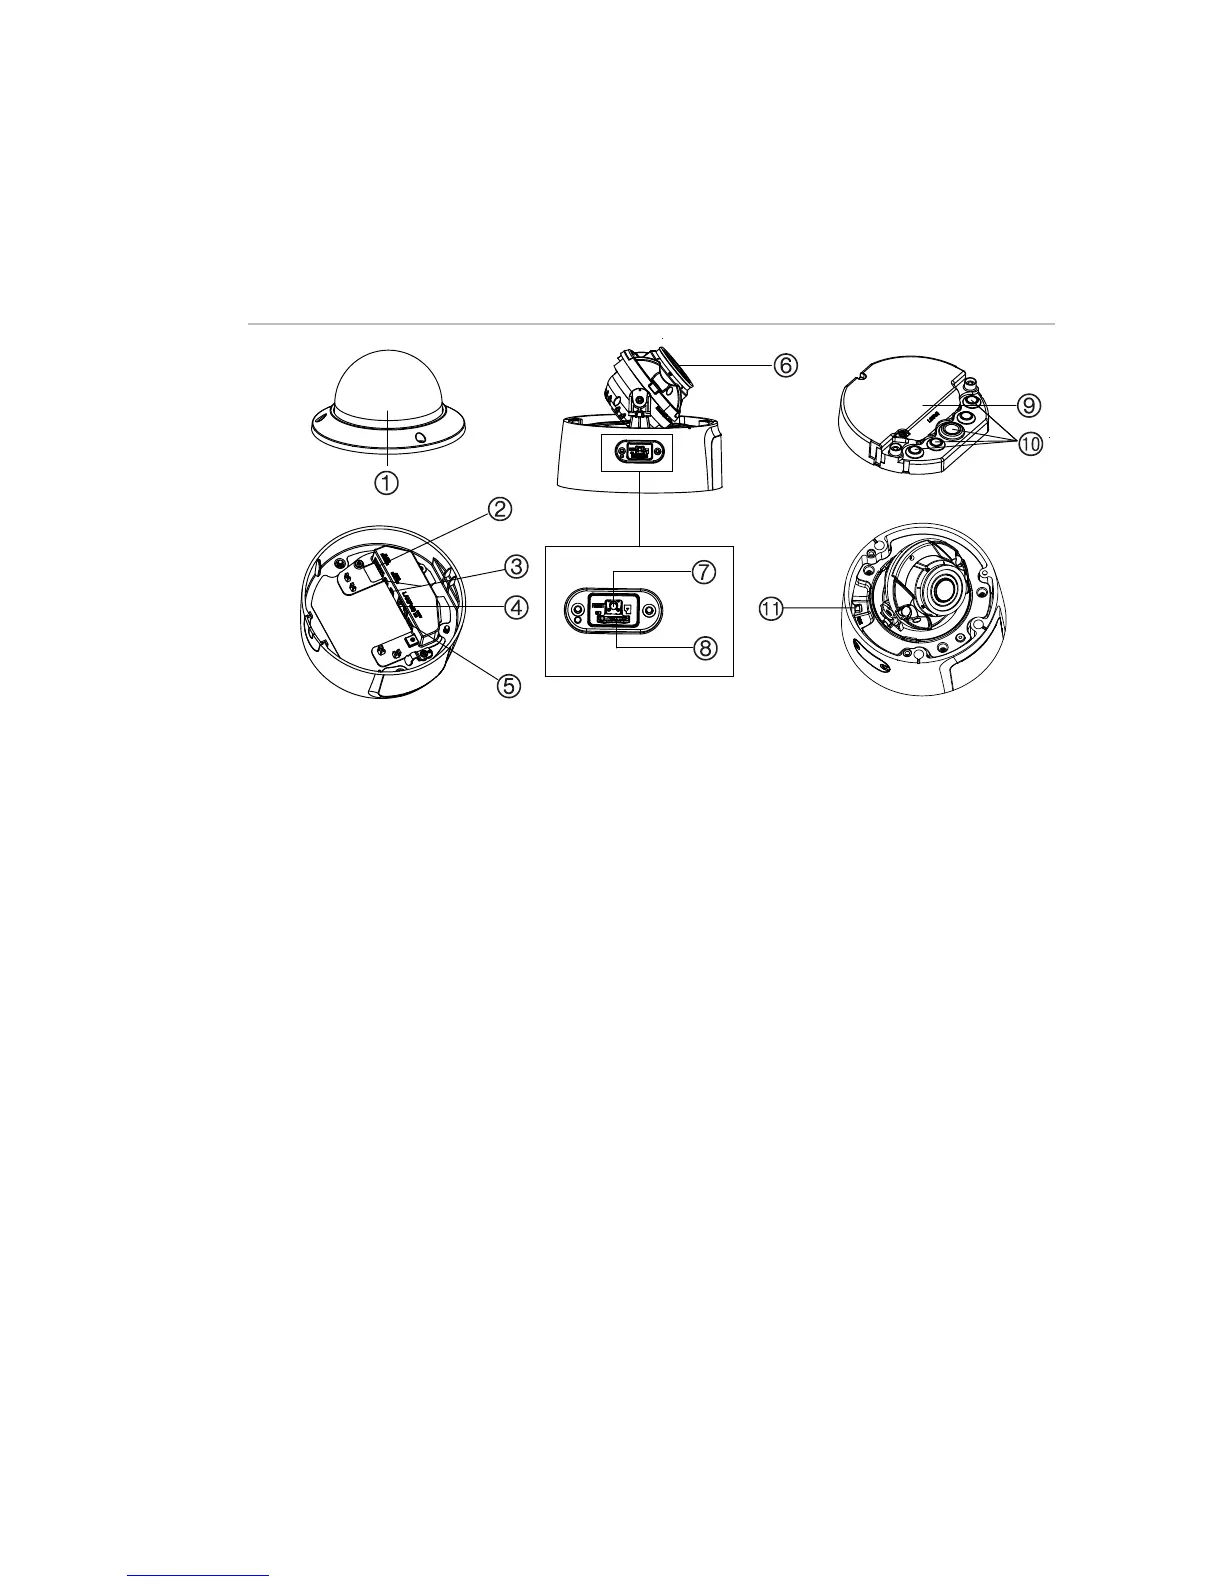
Figure 6: IP motorized lens dome camera IP motorized
lens dome camera parts
1. Housing cover
2. Audio 1 input (line in/mic
in) / 1 output (line out)
3. Alarm 1 input/1 output (up
to 12 VDC, 30 mA)
4. Ethernet RJ45 PoE port
6. Lens assembly
7. Reset button
8. Micro SD card slot
9. Back box
10. Rubber seal
11. 960H output
Note: To reset the camera to default settings, press and hold
the RESET button and power on the camera. After the camera
has started up, hold the RESET button for an additional 20
seconds.
For a proper fit, the access panel to the SD card and Reset
button needs to be installed with the thicker section of the
panel towards the base of the dome.

 Loading...