Invacare
®
Electra Service Manual
Page 24 As at:15.04.02
9.6.3 Preparation for reassembly
• Remove seat unit (see chapter9.1.5).
• Remove clamp and seat tube (see chapter 9.1.6)
• Carefully pull the chassis panelling upwards off the Velcro connectors.
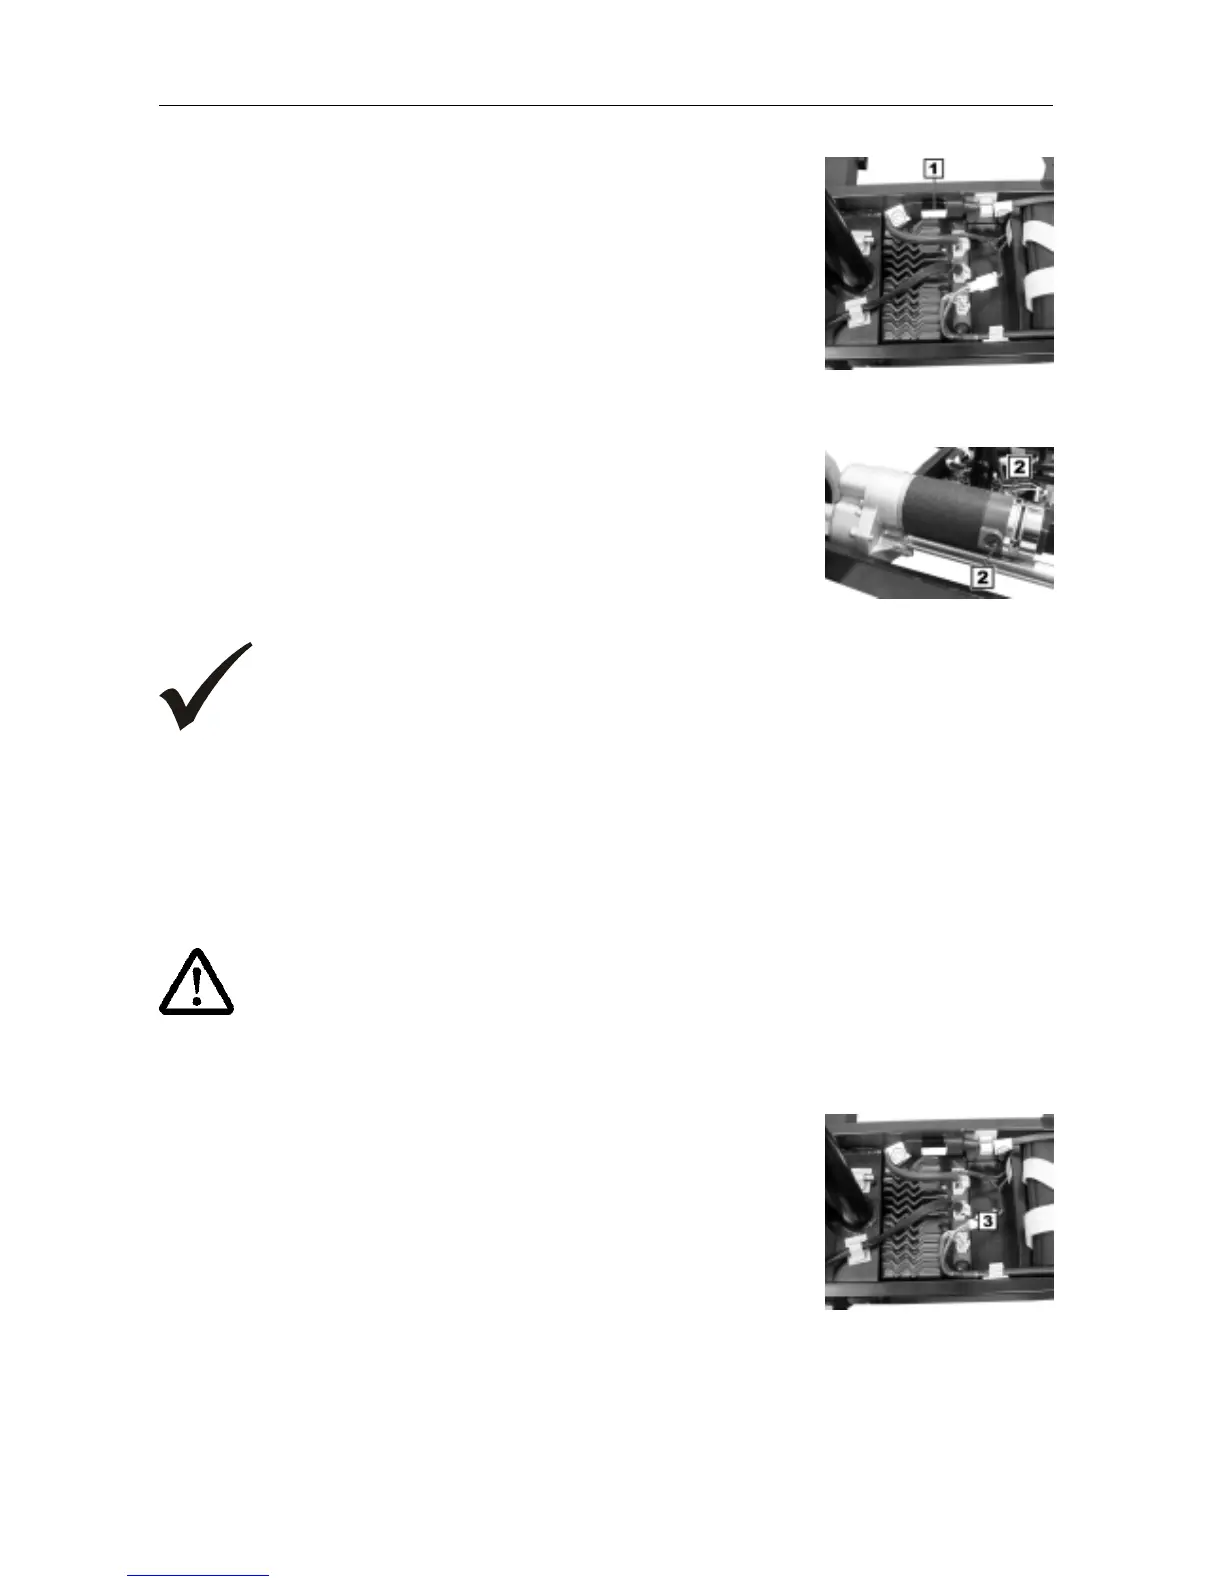
• Interrupt power supply. Battery cable (1).
Battery plug
9.6.4 Reassembly sequence for "replacing carbon brushes"
• Carry out preparations for reassembly.
• Loosen the slotted screw (2) and remove the carbon brushes from the
guide.
Carbon brush position
NOTE:
• Always replace both carbon brushes.
• The carbon brushes may not be tilted when fitting and they must be able to move smoothly
within their guides
9.6.5 Reassembly sequence for "replacing the drive unit"
• Carry out preparations for reassembly.
• Raise the Scooter and place on a suitable support (such as wooden block).
The drive wheels must not be under load.
CAUTION:Danger of crushing!
Secure the raised Scooter against slipping and rolling away.
• Remove the drive unit connecting plug at the controller (3).
• Remove the drive wheels (see chapter 9.6 page: 23).
• Remove the drive unit.
Allen key bolts (size 4 mm) / nuts (size 13 mm).
Drive unit connecting
plug