nano3G AP Installation Manual Commission a nano3G AP
N3G_INST_300 v8.1 for N3G_2.0.5 © ip.access Limited 2011 Page 33
5 Commission a nano3G AP
This procedure configures the nano3G AP with the settings it needs to establish a
connection with its serving AP Management System. Once commissioning is complete, use
the OMC-R Client for any remaining configuration and to bring the AP into service.
An AP can be commissioned either in advance of the site visit via a commissioning
computer or on site via a commissioning laptop. This procedure is identical in both cases.
The term commissioning terminal is used to refer to allow for both of these scenarios.
The nano3G AP must be in the factory reset state for this procedure. If a factory reset is
required, see section 8.2 for instructions.
5.1 Configure a Commissioning Terminal to Connect to the AP
1) Open the Windows Control Panel on the terminal.
2) Go to Network Connections.
3) Right-click the relevant Local Area Connection and select Properties.
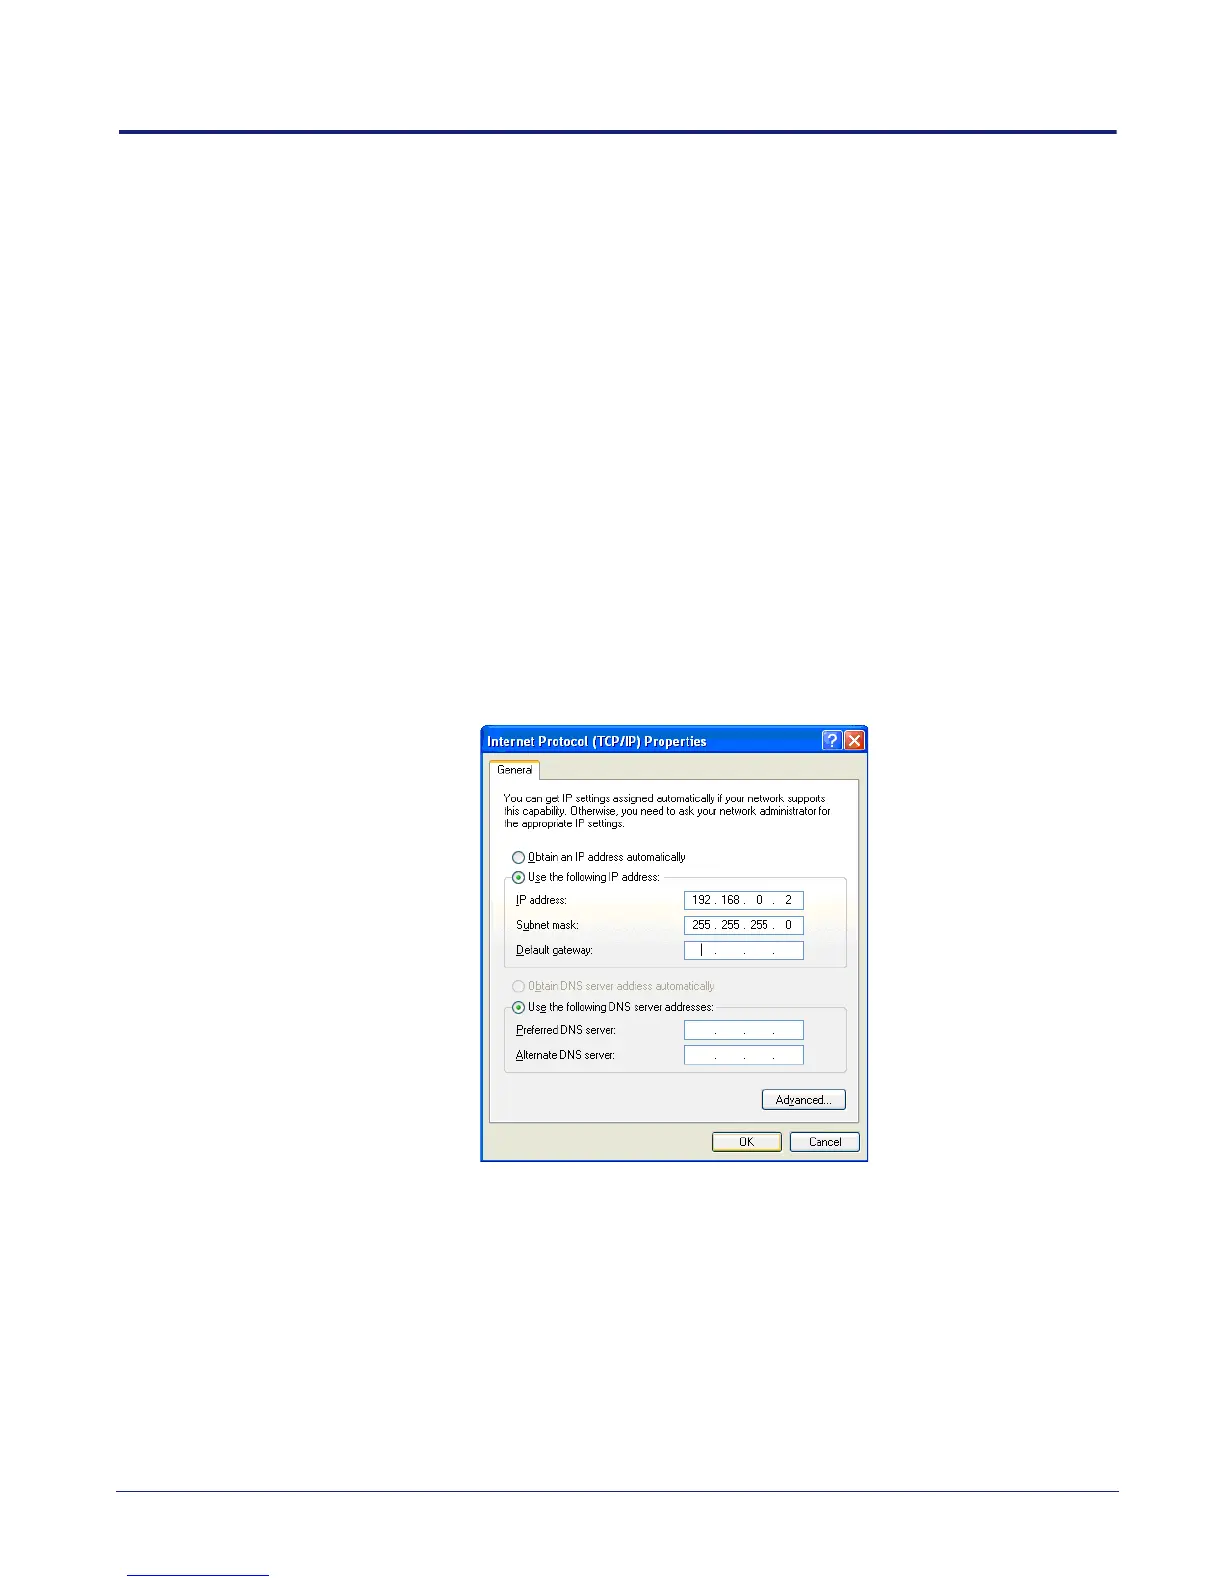
4) In the list of items on the General tab, select Internet Protocol (TCP/IP) and then
click Properties. The following dialogue appears:
5) If it is not possible to leave this network connection permanently configured for AP
commissioning, make a note of the current settings.
6) Click the Use the following IP address radio button.
7) Set the IP Address to 192.168.0.2.
8) Set the Subnet Mask to 255.255.255.0.
9) There is no default gateway, so ensure the default gateway address is cleared.