nano3G AP Installation Manual nano3G AP Hardware Installation
N3G_INST_300 v8.1 for N3G_2.0.5 © ip.access Limited 2011 Page 59
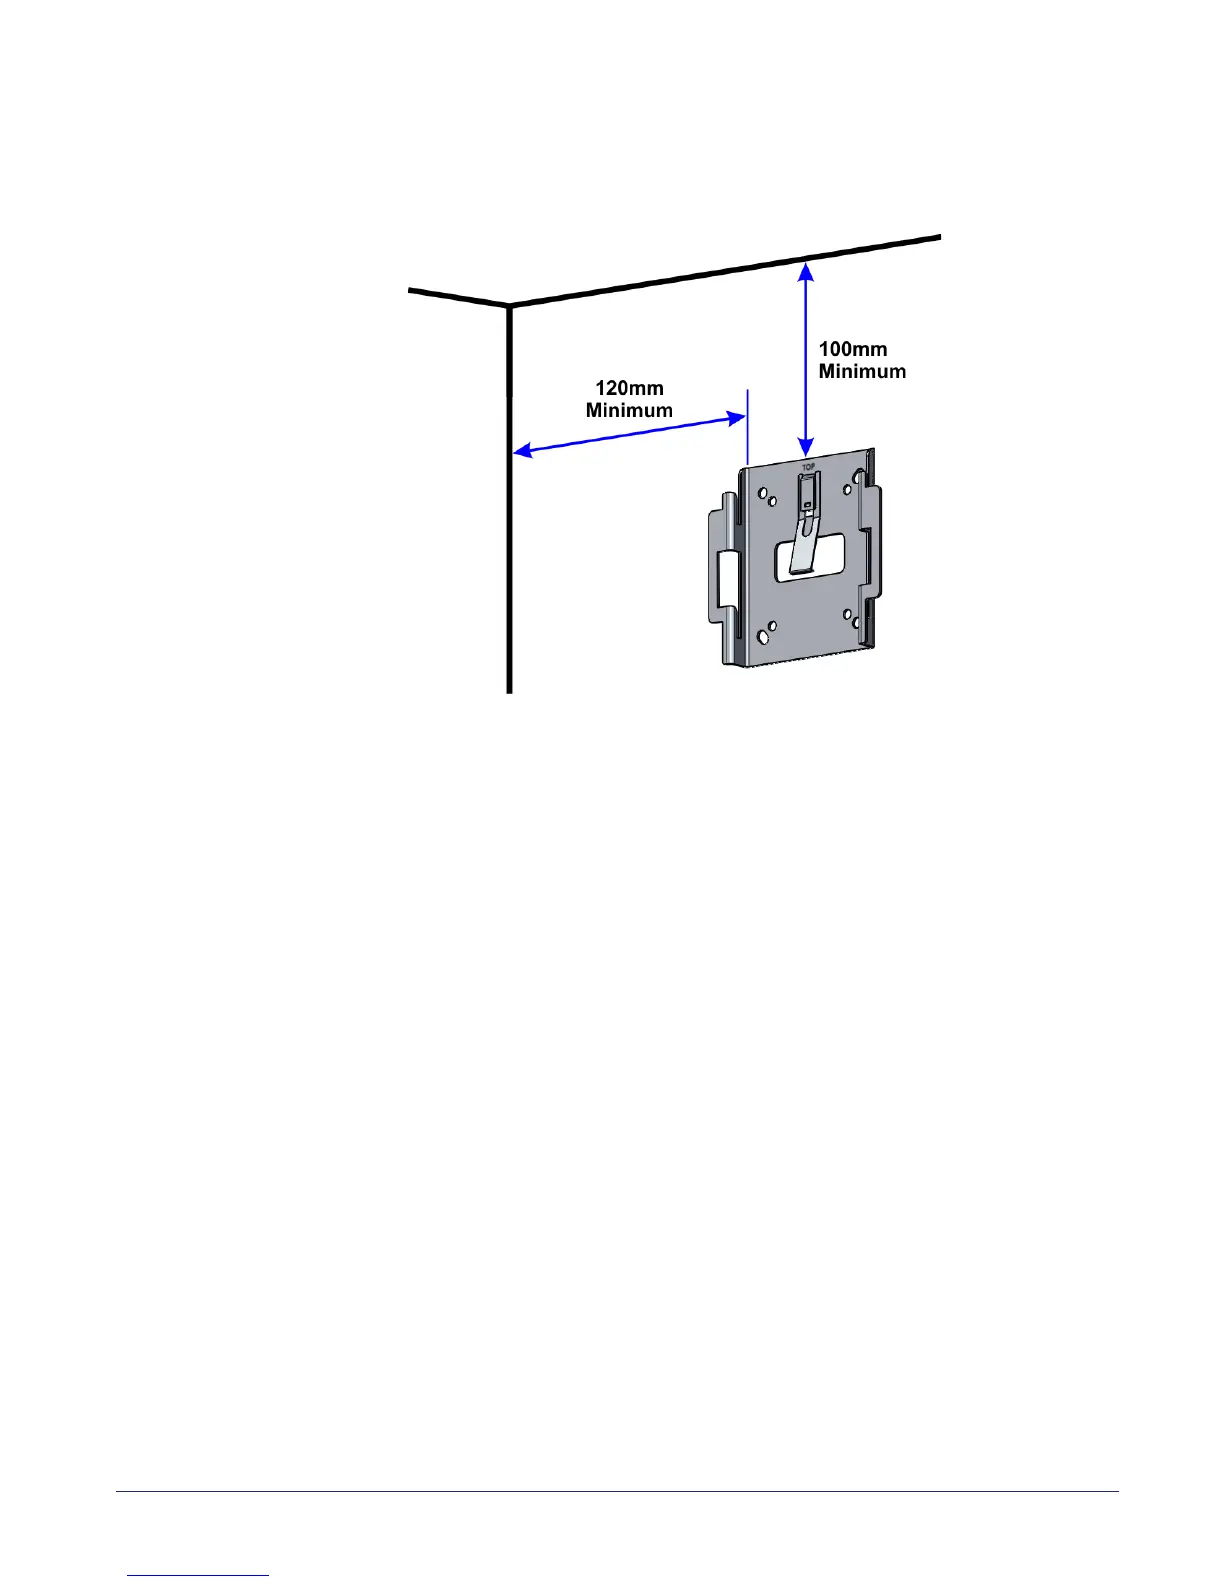
2) Position the bracket on the wall with its flat surface against the wall and the clip
part towards the top. Ensure the bracket is level and sufficient clearance is
maintained to allow the AP to be fitted to the bracket. Allow at least 100mm from
the bracket to the top of wall, and 120mm from the side of the bracket to a side
wall.
3) Mark the position of the four screw holes.
4) Drill the four holes in the positions marked previously and insert wall plugs (if
required) and fix the mounting bracket securely to the wall. The bracket is
designed to allow the nano3G E8 AP unit to be mounted with the connections
either at the top or at the bottom of the unit.