| Operation
62
YLS-K
7.4 TEST mode
For the TEST mode, you require an external computer on which the
LaserNet software is installed in order to control the laser. The commu-
nication between the computer and laser takes place by means of an
Ethernet interface (see supplied technical data).
The LaserNet software is described in detail in section LaserNet soft-
ware [}70] .
1. Follow the steps described in Chapter Switching on/off [}59] to
switch on the laser in TEST mode.
Establishing a
connection to
LaserNet
2. Establish a connection to the laser, if this has not already been
done (Establishing a connection to the laser [}74]).
3. Start the LaserNet software (Starting LaserNet [}76]).
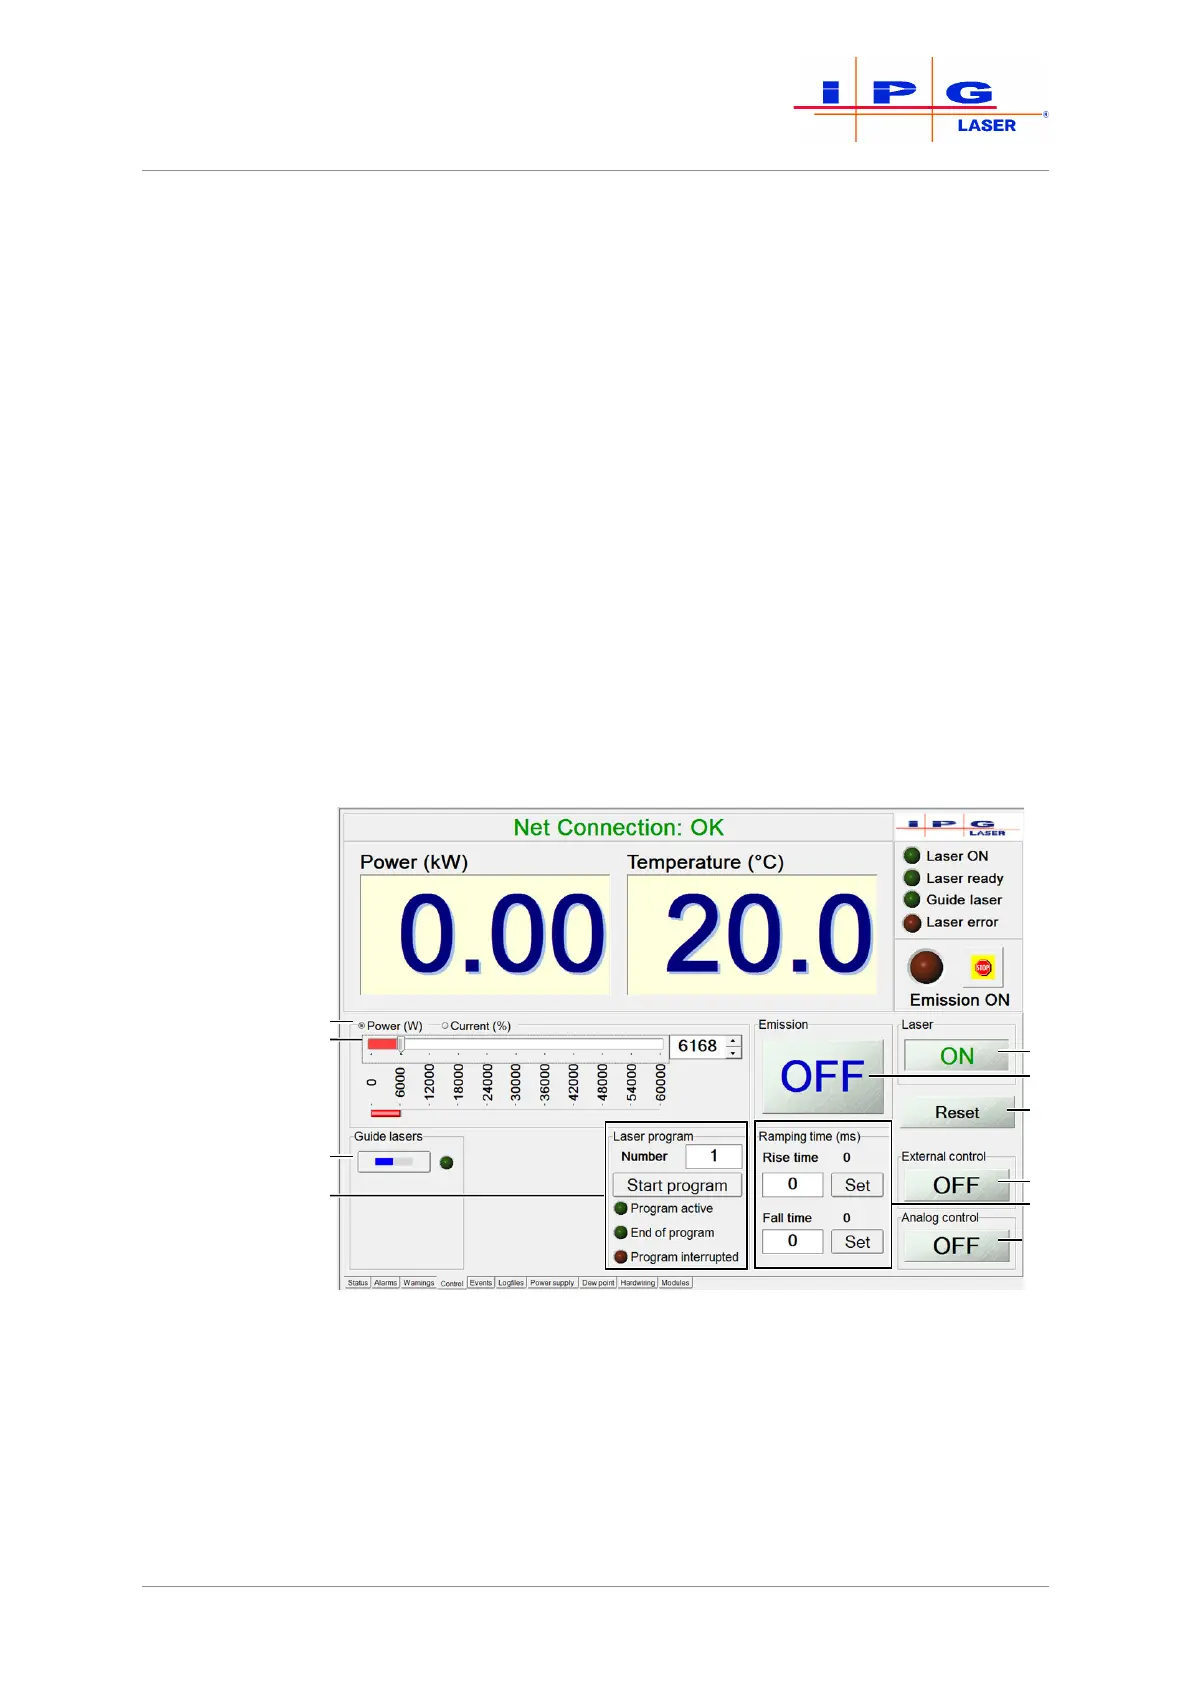
4. Open the Control tab.
The buttons for controlling the laser are found here. The buttons (5),
(6), (8) and (10) always indicate the current operating state. Pressing
the buttons causes a change to the operating state of the laser.
Figure24: Control tab
Checking the
beam path
After maintenance work and a prolonged shutdown of the laser, the
beam path must be checked with the help of the guide laser.
The guide laser switches on. The LED indicator next to the button is activated. On
the Status tab, the status LED indicator “Guide laser ON” lights up green.