9-8 4181384 First Edition
ACCESSORIES AND MISCELLANEOUS REPAIR
9
Figure 9-14
NOTES
• Pull the fuel tank out slightly to gain clearance.
• Label all wires before disconnecting to ensure correct
installation.
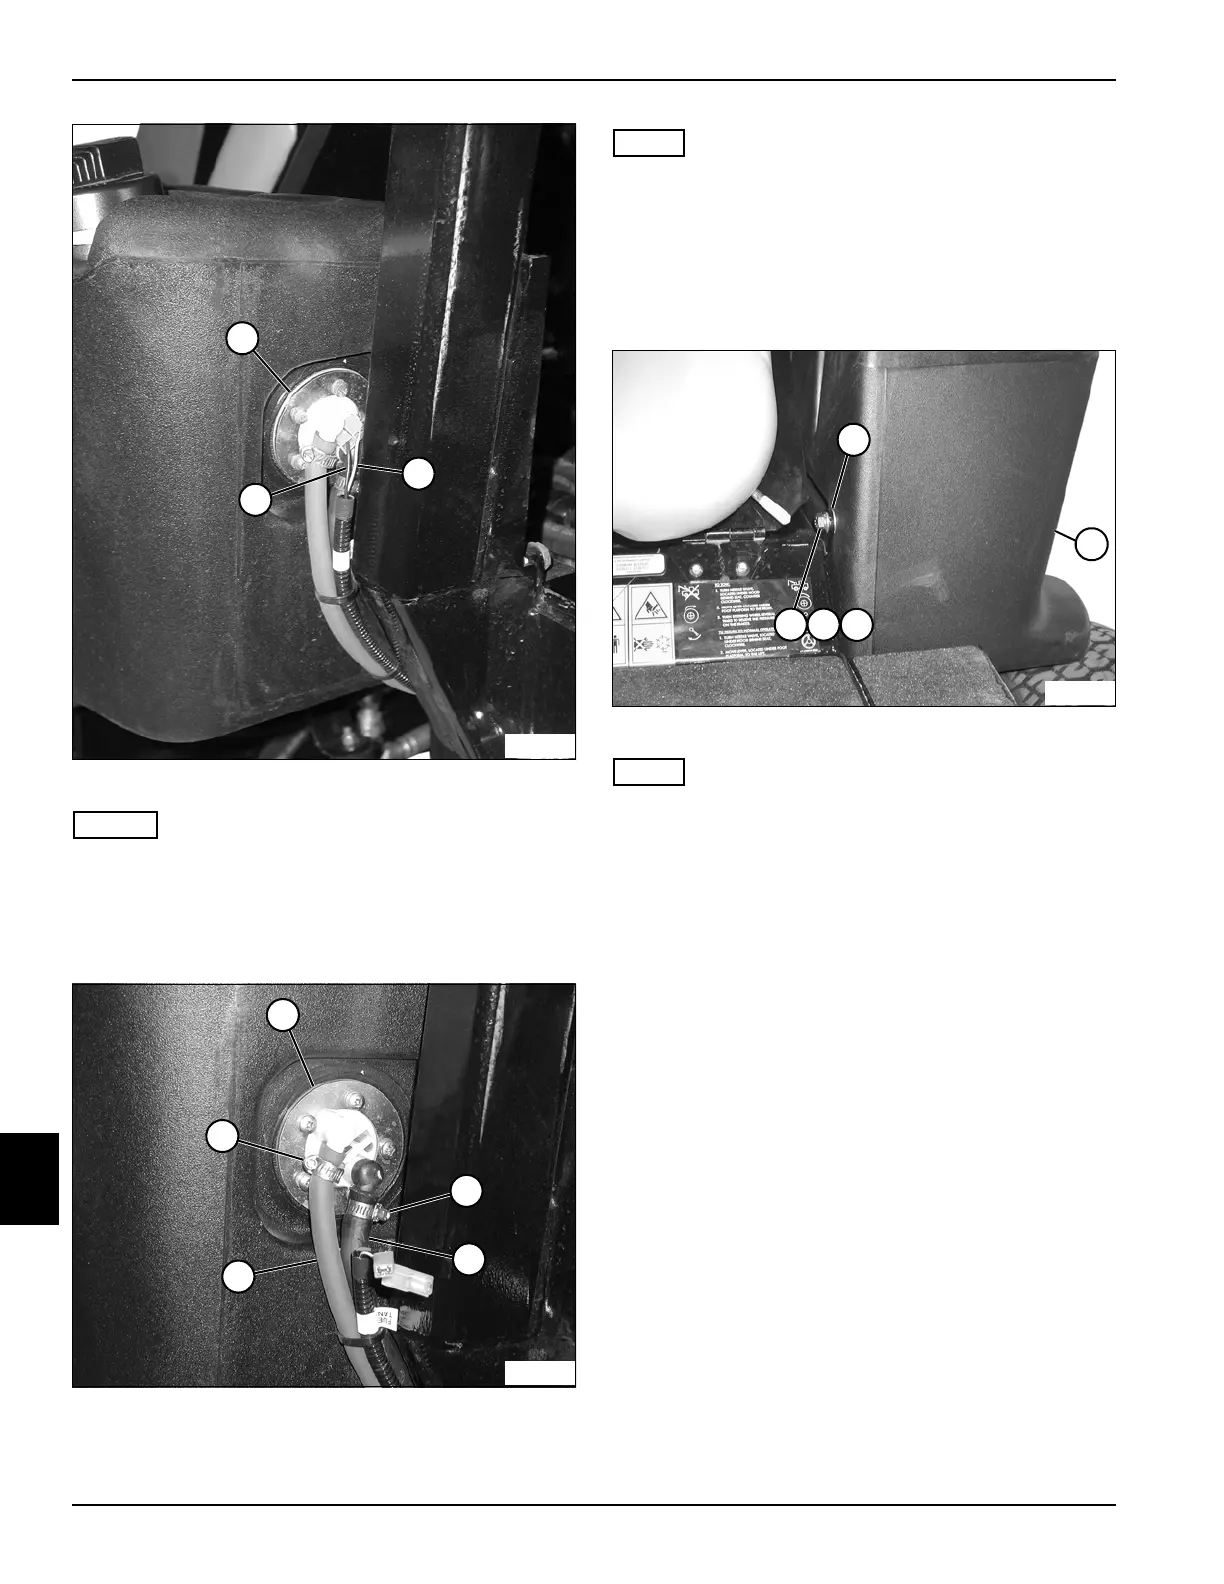
11. Disconnect wires (13 and 14) from fuel sender (12).
Figure 9-15
NOTE
Label all hoses before disconnecting to ensure correct
installation.
12. Loosen hose clamp (19) and disconnect the return
hose (18) from the fuel sender (15).
13. Loosen hose clamp (16) and disconnect the supply
hose (17) from the fuel sender (15).
Figure 9-16
NOTE
One flat washer is placed between the mounting bracket
and the fuel tank.
14. Remove screw (22), lock washer (23), and flat
washers (24 and 20) from the front of the fuel tank
(21).
15. Remove the fuel tank (21).
Installation Note
Install the fuel tank by reversing the order of removal.
12
TN1021
13
14
15
TN1022
16
19
18
17
20
TN1024
22 23
24
21
 Loading...