Page 11
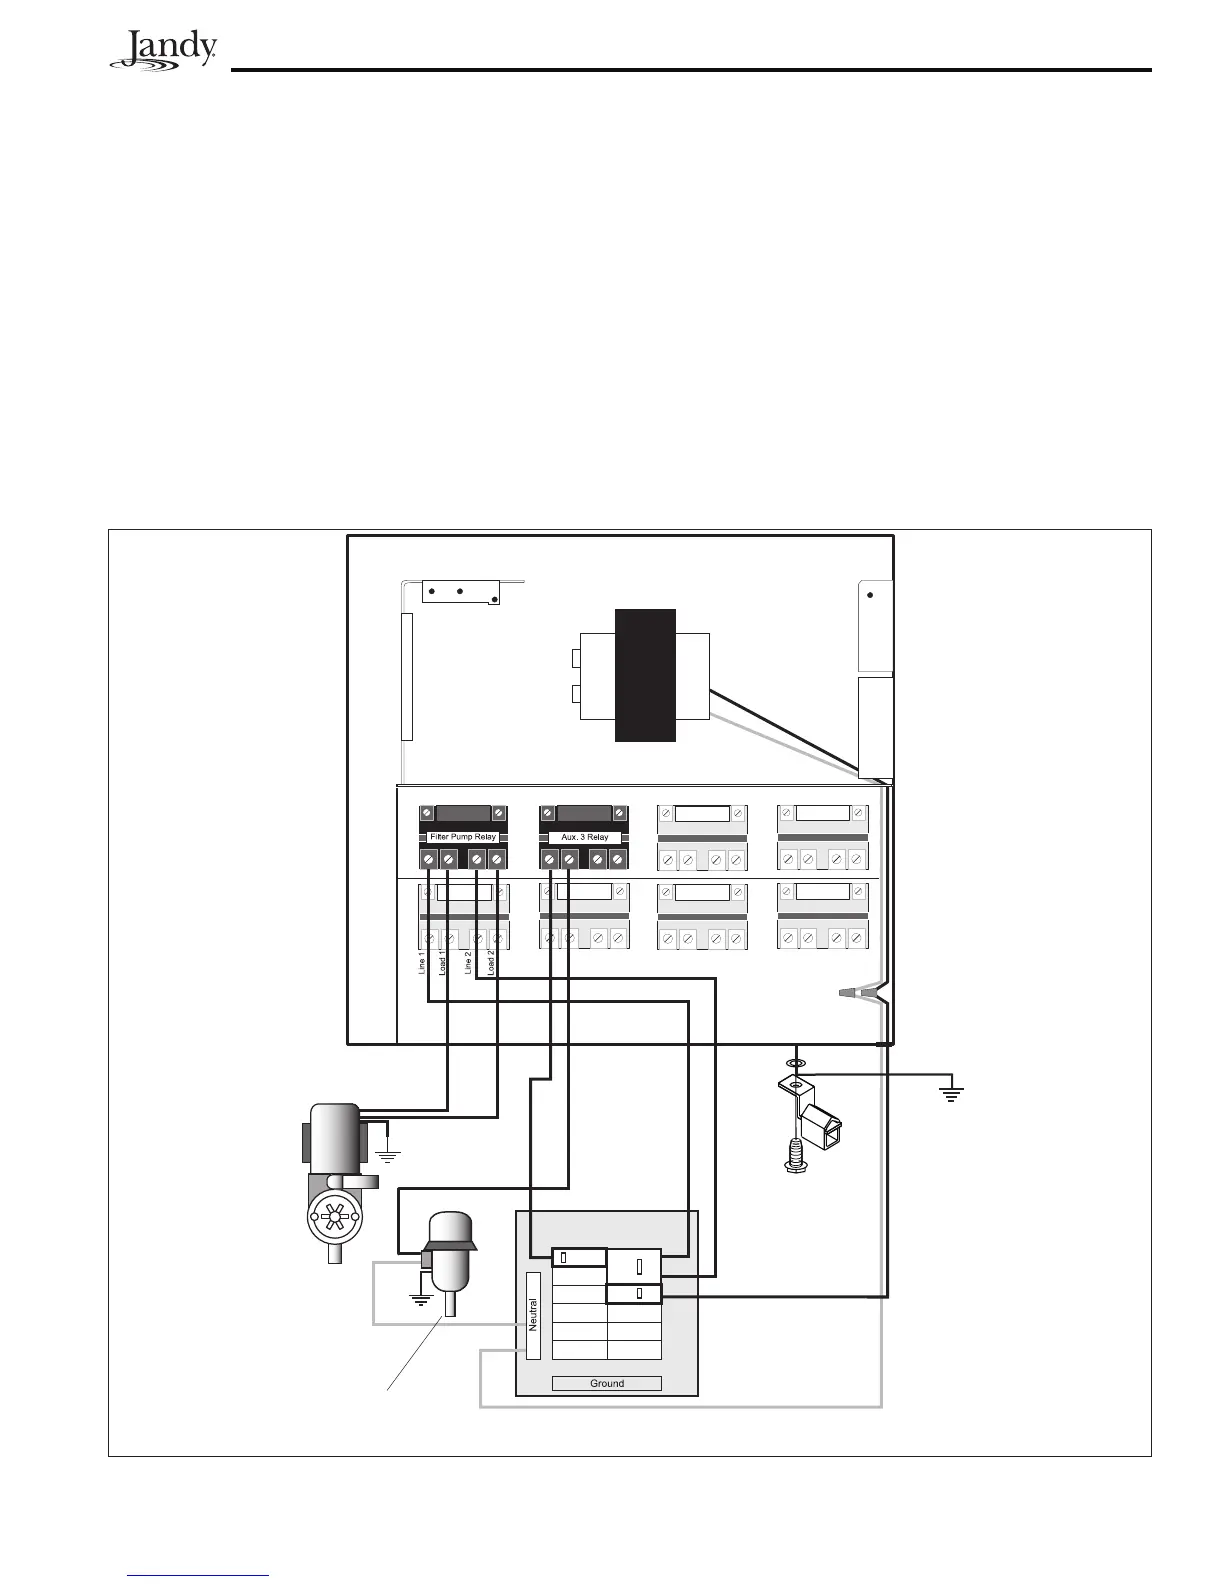
3.2.3 BondingthePowerCenter
Install a bonding lug to the Power Center
enclosure. Connect the bond lug, using a #8 solid
copper core wire, to an approved earth ground (an
approved ground stake, grid, or conducting metal
water pipe buried to a sufficient depth). See Figure
3.
3.2.2 3HP(Standard)Relays
For each piece of 240 volt equipment to be
controlled, connect line power to the two (2) line
terminals and connect equipment power to the two
(2) load terminals on the same relay.
For each piece of 120 volt equipment, connect
power to a line terminal and connect equipment to
a load terminal on the same relay.
NOTE The following are the contact ratings for 3HP
(Standard) Relay. DO NOT exceed any ratings.
3 HP @ 240 VAC; 1½ HP @ 120 VAC; 25
Amps; 1500 Watts.
Figure 3. Standard Power Center - Bonding
Bonding Lug
Earth
Ground
Breaker
Panel
Blower (120
VAC)
Filter
Pump (240
VAC)
Primary
24 VAC
Transformer

 Loading...