29
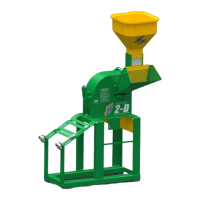
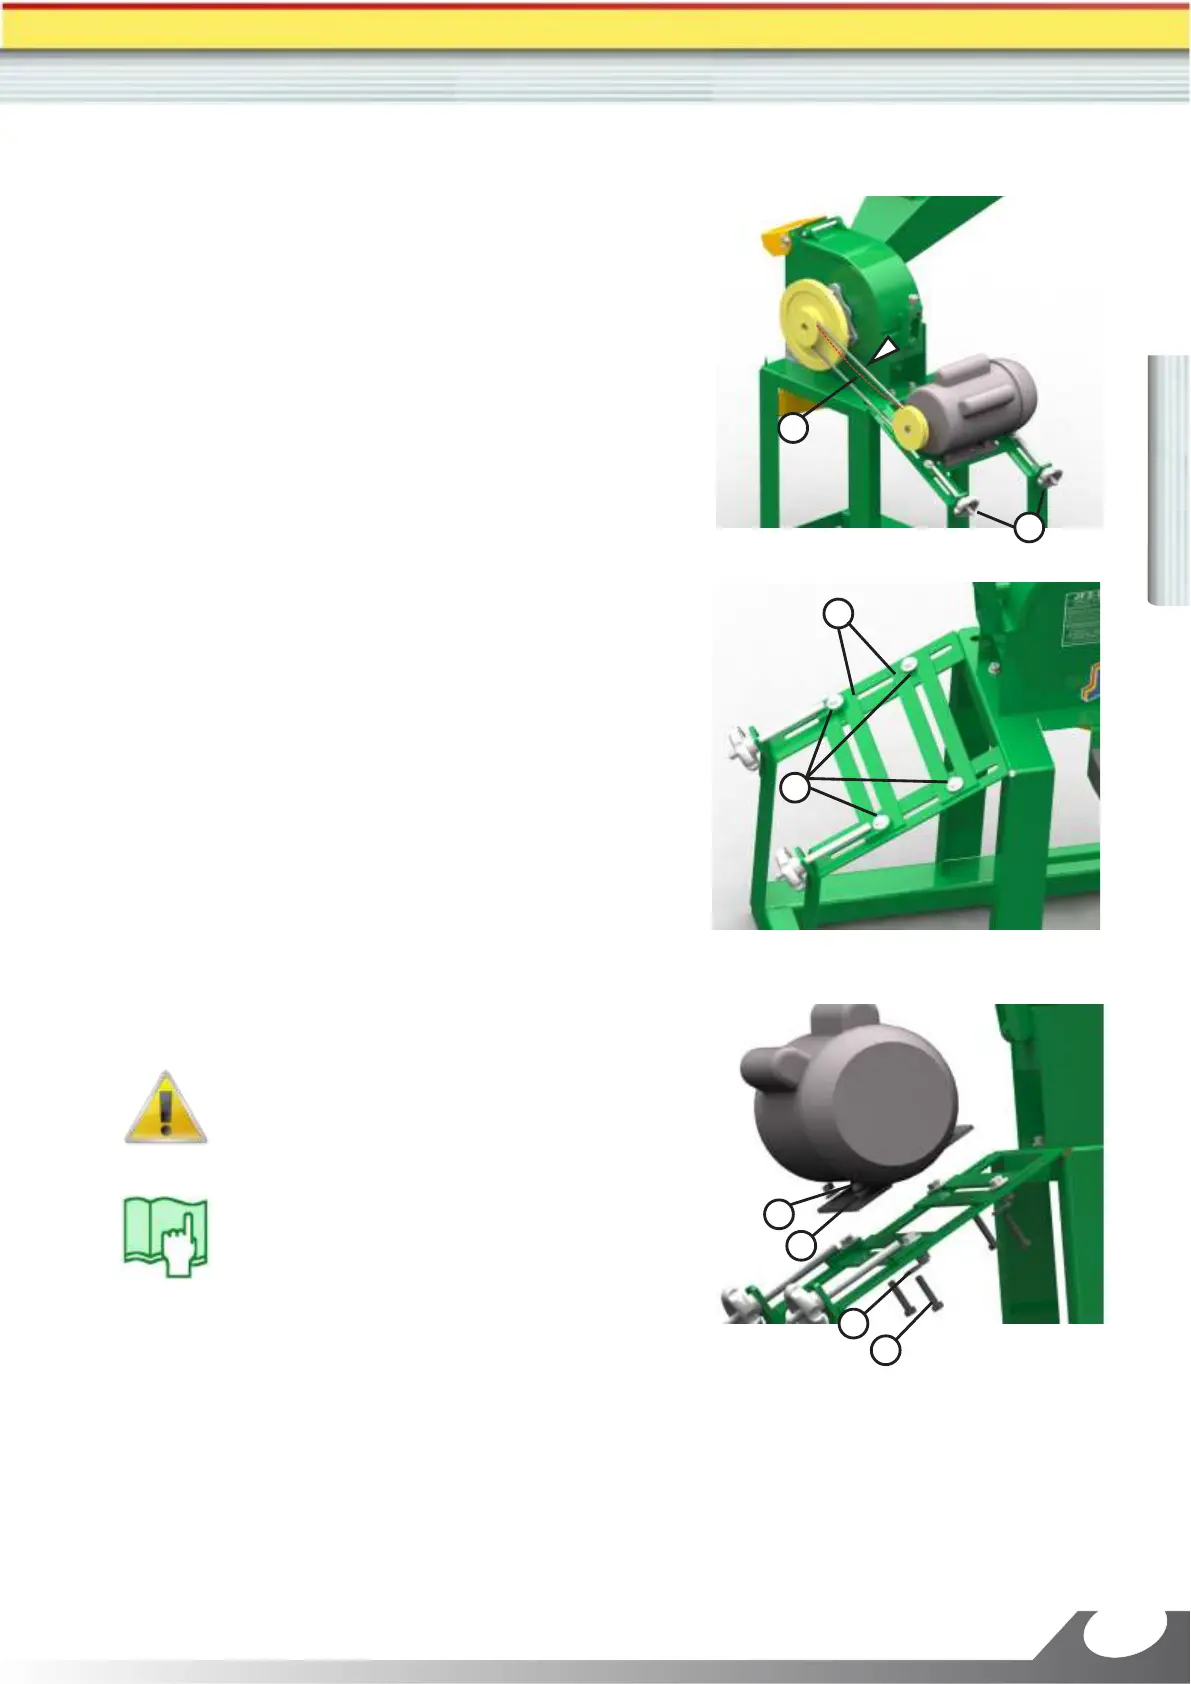
7.7- Belt tension adjustment and replacement
The motor is fixed on a movable base that can be
adjusted by tightening or loosening the sticks (2).
NOTE: Before adjusting the tensioning across the
sticks, must loosen the nuts (B) for the supports (A) can
move easily.
The adjustment is made as follows:
1º- By pushing the sticks, the motor is displaced in the
opposite direction of the machine, thus the belt is
tensioned.
2º- When the sticks is released, the motor is displaced in
the machine direction, thereby the belt tension is
relieved.
NOTE: Do not let the belt completely loose! The
clearance (deflection) should be between 5 and 10 mm.
Check the belt tension (1) each 50 work hours or
weekly and if you assemble a motor, according
instructions on next page.
Motor assembly:
1- Adjust the supports (A) so that the spacing is the
same as the motor base.
2- Next, place the motor in the support, turn the screw
(3) and washer (4) and segure with the washer (5) and
nut (6) in the four extremities of the motor base.
1
2
3
A
4
5
6
Do not forget to re-install the protective
covers. Never operate the machine
without it!
Notes:
1- Grease, oil and dust attack the belt,
generating premature damaging. Therefore,
maintain the belts always very clean.
2- If the belts prevent drying, peeling and/or
free fibers, change them immediately.
B
OPERATION TECHNICAL MANUAL - MILL JF 2D
English