8-33
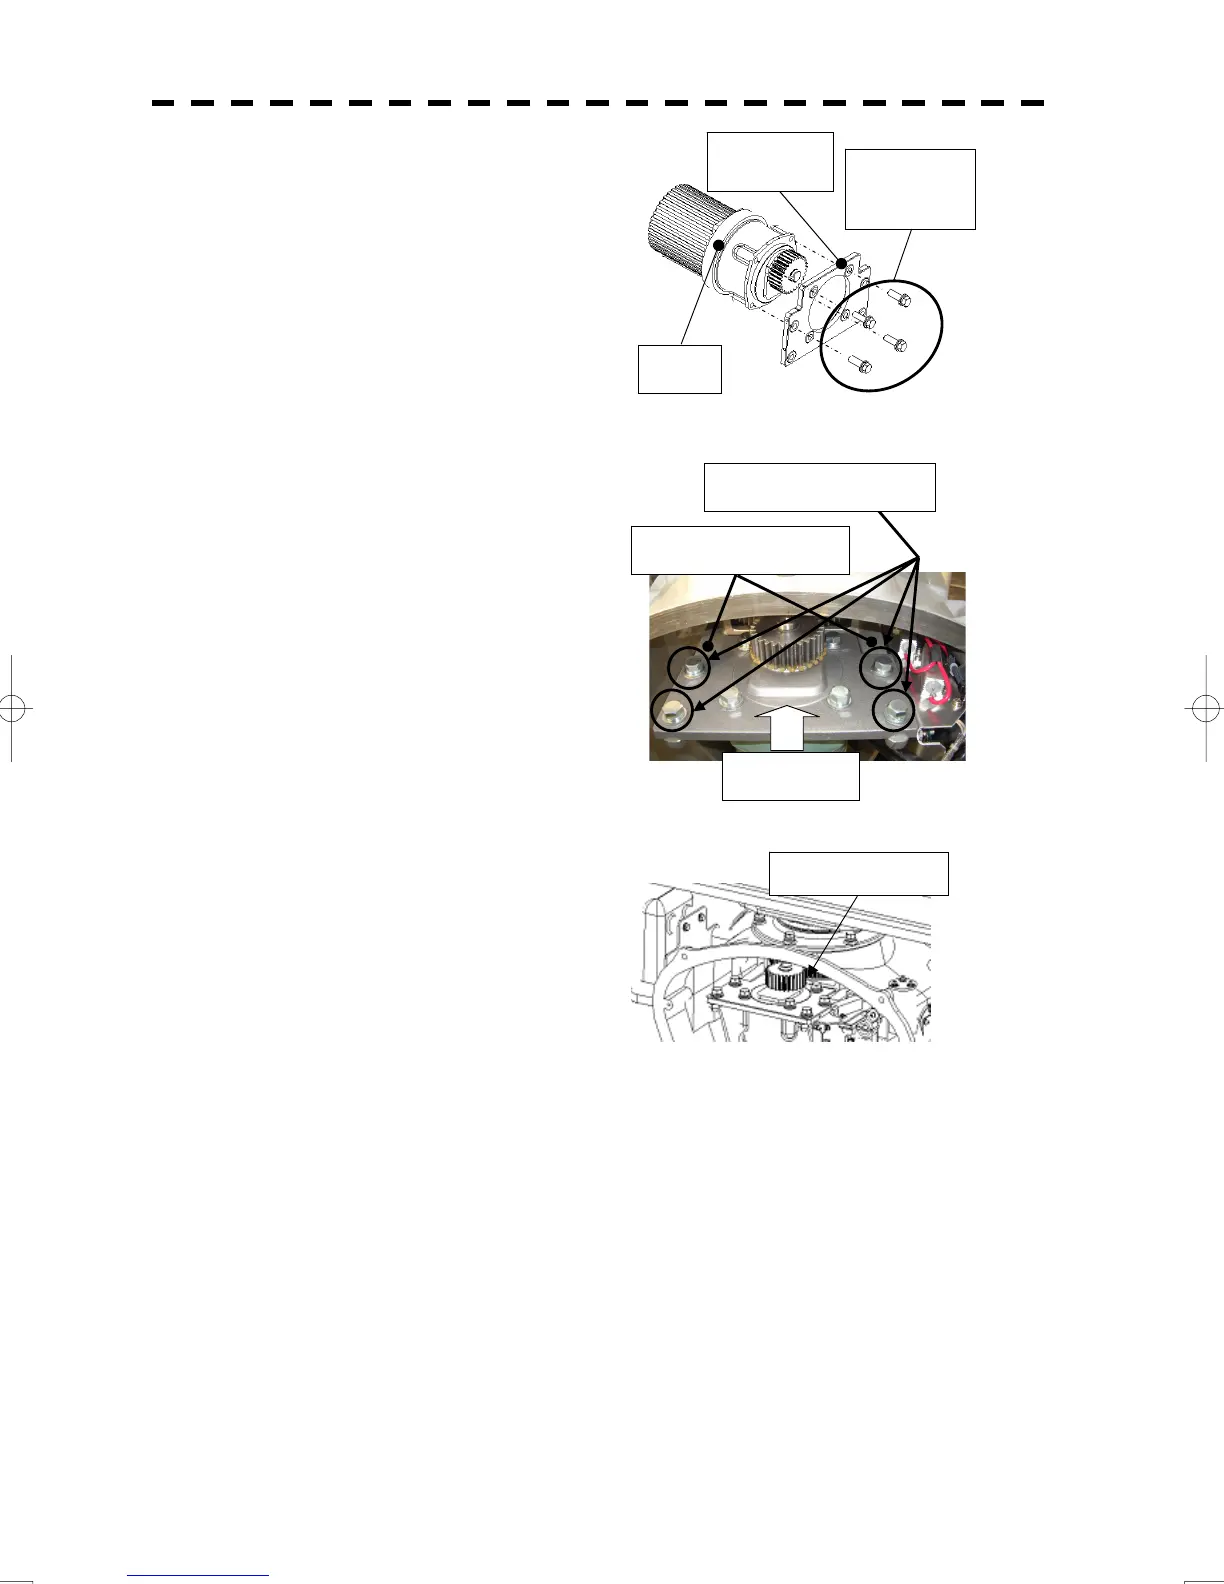
(5) Remove the hexagonal bolts (four M8
bolts) and remove the installation plate
from the motor.
(6) Attach the installation plate to the
replacement motor. Do not forget to
tighten the hexagonal bolts to an
appropriate torque (210 kgf-cm) so they
are free of looseness.
(7) Install the motor into the scanner unit.
Press the motor against the protrusions
of the arm fixed to the motor on which
the arm extends through the wall of the
casing, adjust it to minimize backlash,
and fix it in place.
Do not forget to tighten the hexagonal
bolts, to an appropriate torque (140
kgf-cm) so they are free of looseness.
(8) After having installed the motor, grease
the gear wheel.
(9) After having replaced the motor, reassemble the unit by following the disassembly
procedure in the reverse order.
Do not forget to tighten the bolts and screws, and do not forget to reconnect the
cables.
Make sure that there is no foreign matter or dust adhered to the gasket when you
put the cover on.
(10) Turn on the safety switch (do not forget to put the cover back on).
(11) Turn on the radar power supply and check that the system works properly.
Moto
Motor driver
circuit board
Remove the
four bolts.
Grease here.
Arm protrusions
Press
Tighten the four bolts.
 Loading...