35
© 2017 JTECH Medical MN022_M
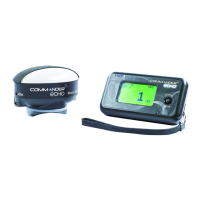
Accessories connued
Features and Benets
• Measures up to 500lb
• Six (6) dierent accessories to create the tests you want
• Auto Direcon (push or pull) selecon aer rst rep
• Determine weight or mass of objects
• Axis Compensaon
TM
“smart” load cell technology. Maintains accuracy even when force is applied o-
center.
General SFG Tesng
To conduct a test, force in excess of the default threshold must be exerted on the gauge. The test begins
when either the ready me expires aer the threshold has been crossed or, if no ready me is set, the default
threshold force must be exceeded. A test ends when test me expires or the force on the gauge drops back
below the threshold. The display then indexes to the next repeon in the series. Aer all repeons for a test
are completed, the display indexes to the next sequenal test number. Connue tesng with this method unl
all tests are recorded in the Console’s memory.
Prior to beginning a test, ensure that the test defaults are set as desired (i.e. unit of measurement, number of
tests, number of repeons, etc.). Once test defaults are set, choose the “Test” opon from the main menu,
and follow these steps:
1. Select “SFG” from the Test Menu (Note: if you have purchased a new instrument and it is not on the list, see
page 18 for instrucons or contact customer service to register your new instrument).
2. Upon selecon, the Commander Echo Console will aempt to connect with the Stac Force Gauge.
3. Press the “On” buon for the corresponding Stac Force Gauge to establish a connecon with the
Commander Echo Console.
4. The Commander Echo Console will require a instrument zeroing prior to starng each exam. With the
instrument in a neutral posion (no pressure applied), press the Control Sck to set the instrument zero.
5. The Commander Echo will automacally advance to the next available test in the series. If no test data is
currently being stored for the instrument, it will begin with Test 1. If all of the selected tests already have
data stored, then the Commander Echo Console will display Message 2 on the LCD and not allow further
tesng unl the data has been erased, or the test sengs have been altered to allow for more tests.
6. Ready the paent and begin the test (Note: see the oponal Mulmedia Help System CD for further
informaon on specic tesng procedures).
7. Once you have completed the pre-set number of repeons for each side/test, the Commander Echo will
automacally advance to the next test in the exam.
8. Once all tests have been completed, the Commander Echo Console will display Message 2 on the LCD to
nofy you that there are no more empty tests available. Pressing the Control Sck will bring you back to the
main menu
Note: In review mode, the Console dierenates between SFG push/pull by designang push values as
negave and pull values as posive. In test mode, SFG displays the magnitude as posive regardless of direcon
unl the value crosses the threshold. For the rest of the test, the values will be posive for the force direcon
that is in direcon of the crossed threshold and negave in the opposite direcon. The Console will only record
posive test values.
12” Cable (9AC007) – The cable can be used for dierent liing, pushing or
pulling, or stac strength tests.
4” Push Disk (9AC004) – The 4” Push Disk can be used for exerng force
against at items. The Push Disk oers more surface area for pushing
acvies, and greater exibility for various tesng applicaons than the Flat
pad. Aaches to the Force Input receptacle.