© 2017 JTECH Medical MN022_M
16
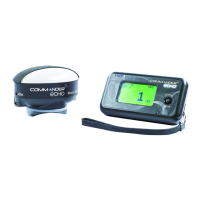
Performing an Exam
Prior to beginning a test, ensure that the test defaults are set as desired (i.e. unit of measurement, number of
tests, number of repeons, etc.). Once test defaults are set, choose the “Test” opon from the main menu,
and follow the instrucons listed under the specic instrument you will be tesng with.
“Wireless Dual Inclinometers (9RF303, 9RF304)” on page 20.
“Wireless Muscle Tester (9RF305)” on page 24.
“Wireless Grip (9RF306)” on page 26.
“Wireless Algometer (9RF307)” on page 28.
“Wireless Goniometer (9RF308)” on page 30.
“Wireless Pinch Gauge (9RF309)” on page 32.
“Wireless Stac Force Gauge (9RF310)” on page 34.
Reviewing and Deleting a Test
Once a test has been completed, it will be stored on the Commander Echo Console unl it is deleted. To view
the completed test data, follow these steps:
1. From the main menu, select “Review.”
2. Move the Control Sck up or down to navigate between the completed tests.
3. Press the Control Sck to view more specic informaon regarding a specic test
(Note: moving the Control Sck up and down while viewing specic test informaon will move between
tests).
4. Move the Control Sck le and right, and press to view more informaon for a specic side, or to exit the
test informaon screen.
5. Hold down the Control Sck to delete individual tests.
Calibraon Sengs
Restoring Factory Calibration
Each instrument has been factory calibrated to ensure accuracy. It is possible that the user calibraon may be
dierent from these pre-set parameters, which may lead to invalid force/angle reading. Prior to performing a
full calibraon, aempt to restore the factory calibraon stored on each instrument. If this does not correct the
problem a full calibraon may be required.
Follow these steps to restore the factory calibraon:
1. Select “Sengs” from the main menu.
2. Select “Instrument” from the Sengs menu.
3. Select the Instrument, for which you wish to restore the factory calibraon.
4. Highlight the “System” opon in the Instrument menu.
5. Move the Control Sck le or right unl you highlight “Restore.”
6. Press the Control Sck to select restore.
7. The LCD screen will display the instrument ID at the top and Disconnected at the boom.
8. Press the “On” buon for the corresponding instrument followed by pressing the Control Sck on the
Console to establish connecon.
9. The LCD Screen will show the device is connecng.
10. If the instrument connects to the Console, the LCD screen will display “RESTORE CALIBRATION.”
i. Select, “No” to return to the Sengs menu.
ii. Select “Yes” to restore the factory calibraon sengs.
Note: restoring the factory calibraon only overwrites the user calibraon data with the factory calibraon
data stored on the instrument.