– 7 –
ENGLISH
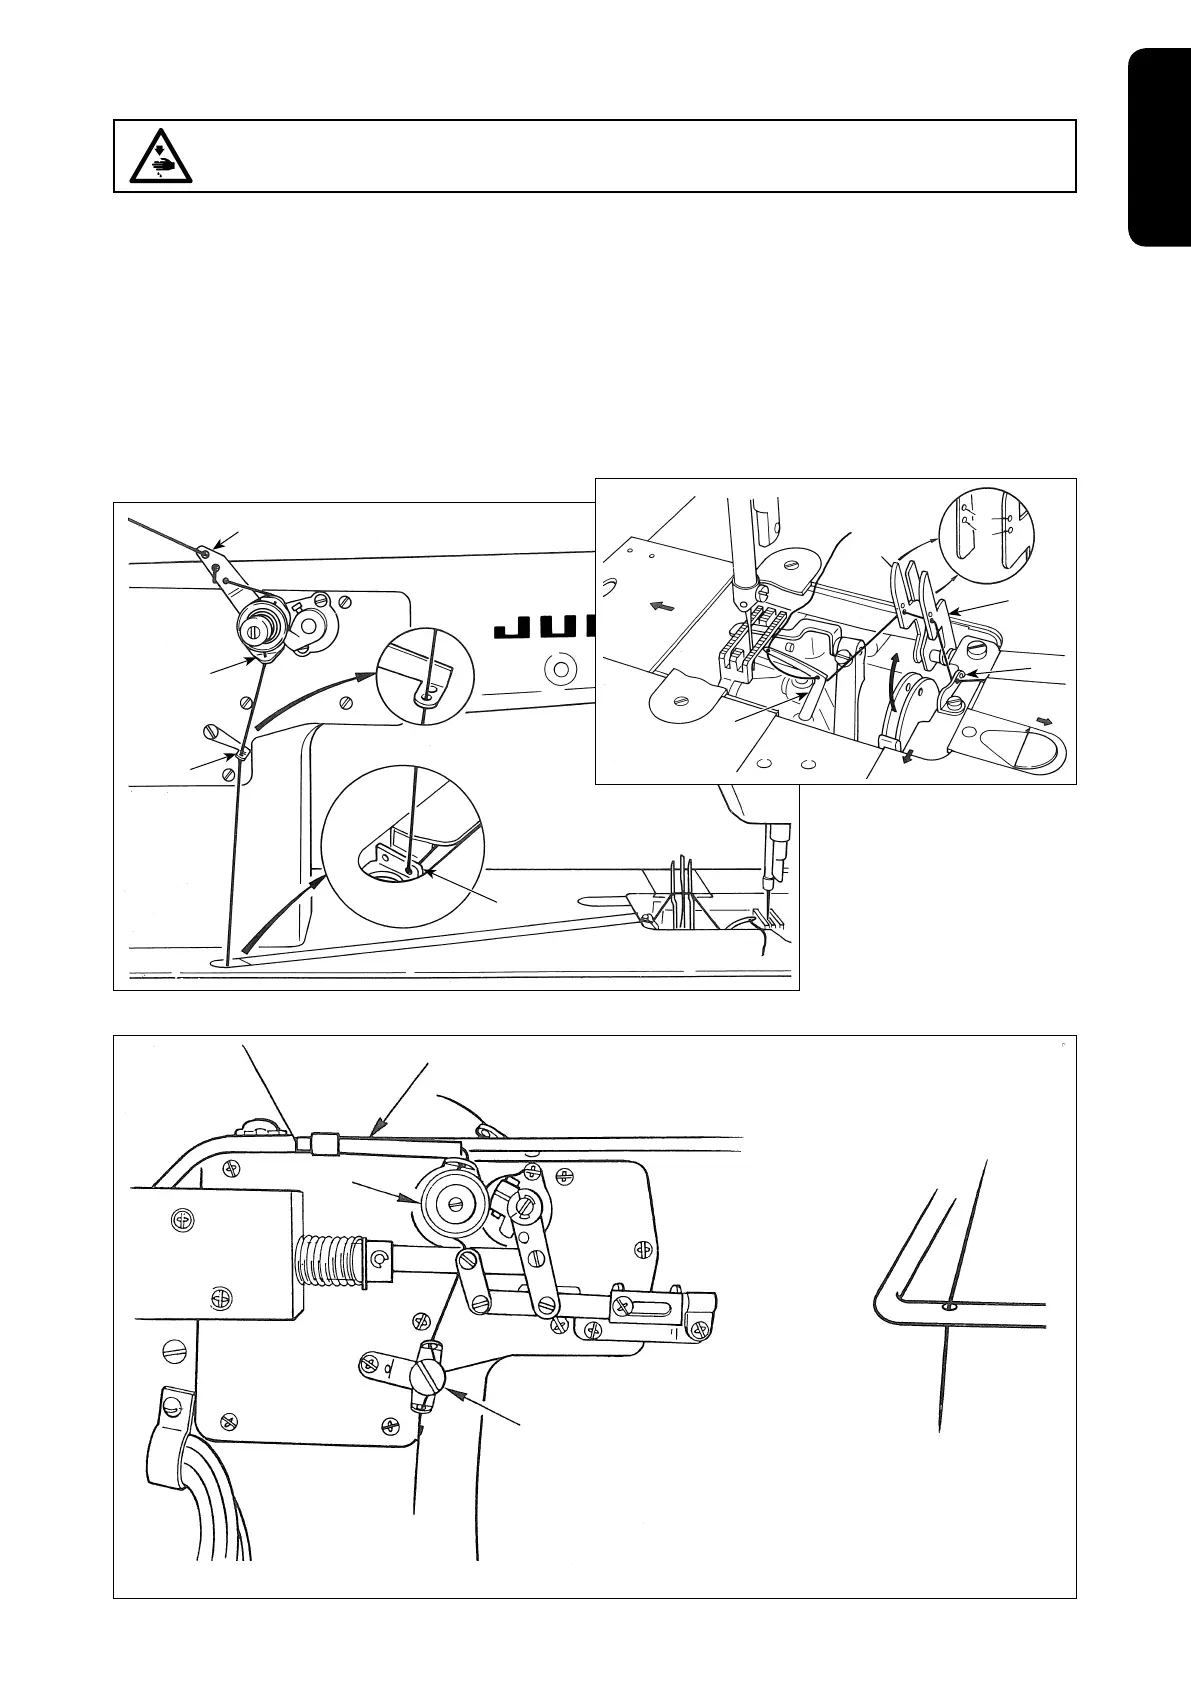
8. THREADING THE LOOPERS
1
2
3
5
A
B
C
6
5
7
[MH-481, MH-484]
Pass the looper thread as shown in the fi gure.
1. Pass the looper thread through the looper thread guide plate as illustrated. When using a hard-twisted thread or
when sewing with a large feed pitch, pass it through 2 holes to form a loop. When sewing fi ne materials which
tend to pucker, pass the thread through only one hole in order to lessen the thread tension.
2. Pull the plate spring in the direction of arrow as shown in the lower fi gure, and the thread guide
A
will come
up. As the close-up fi gure shows, the thread guide
A
has two sets of thread holes; the holes
B
are used when
a stitch is preferably formed with soft looper thread tension, a stretchable thread is used or stitch length is more
than 3 mm (l/8"), and the holes
C
are used when a stitch having a normal thread tension is prefered.
3. In passing the thread to the looper, use a tweezer in the accessory box and after passing, pull it out 5 cm (2")
from the tip of the looper.
(Caution) Detach the throat plate, bed slide and cam cover and remove any dust from the teeth of the
feed dog with a brush.
[MH-481-4, MH-481-5, MH-484-4, MH-484-5]
Do not wind but just pass the thread through the thread
guide (lower) of the thread stand.
WARNING :
To avoid possible personal injury due to abrupt start of the machine, turn off the power to the machine and check to be
sure that the motor has totally stopped rotating in prior.
1
2
3
All other threading procedures are the same as those of model MH-481 and MH-484.