Do you have a question about the JUMO TDA-3000 and is the answer not in the manual?
Overview of the manual's purpose, importance of reading, and feedback request.
Explanation of symbols and formatting used in the manual for clarity and safety.
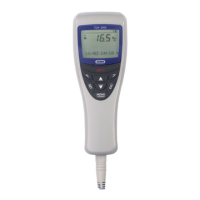
Key capabilities and specifications of the JUMO TDA-300(0) handheld thermometer.
Procedure to verify the instrument and accessories upon receipt.
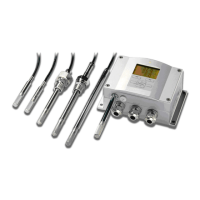
Visual identification of the thermometer's main components, including LCD and operating keys.
Guide to accessing and navigating the instrument's various function menus.
Step-by-step instructions for installing and changing the instrument's battery.
Procedure for configuring the instrument's internal clock for accurate data logging.
Instructions for properly attaching the temperature probe to the device.
How to power on the device and enter the normal operating display mode.
Accessing and utilizing the TAG setup menu for measurement points and limits.
Methods for creating and inputting measurement point designations (TAG names) using character entry.
Procedure for defining upper and lower thresholds for measurements.
Interpreting temperature readings against configured limits using display symbols.
Overview of memory functions, manual, and automatic data recording.
Techniques to find specific data entries using TAG filter or LOG jump.
Methods for removing individual or all stored measurements from memory.
Reclaiming memory space by defragmenting after data deletion.
How to view the highest and lowest temperature readings recorded.
Procedure to clear the stored maximum temperature reading.
Procedure to clear the stored minimum temperature reading.
Setting up and managing user profiles for data acquisition.
Choosing the display language for the instrument's interface.
Setting the preferred display format for dates.
Selecting the connected temperature sensor type for accurate measurements.
Choosing between Celsius (°C) and Fahrenheit (°F) for readings.
Configuring the display of decimal places for measured values.
Adjusting measurements for known temperature deviations.
Setting up the digital filter to reduce display fluctuations.
Configuring the auto-power off feature to save battery.
Protecting settings and menus from accidental changes.
Steps for connecting the instrument to a PC and installing drivers.
Description of CSV files generated and their content for data analysis.
Procedure for safely removing the instrument from the PC.
Instructions for importing and processing instrument data in applications like Excel.
Detailed steps for replacing the battery and its impact on instrument settings.
Guidelines for safely cleaning the thermometer, including water and solvent precautions.
Troubleshooting common problems, interpreting error messages, and finding solutions.
Information directing users to the official data sheet for specifications.
| Type | Pressure transmitter |
|---|---|
| Input | Pressure |
| Output signal | 4 ... 20 mA, 0 ... 10 V |
| Electrical connection | M12 x 1 connector |
| Materials (wetted parts) | Stainless steel |
| Operating temperature | -40 to +85 °C |
| Media temperature | -40 ... 125 °C |
| Protection type | IP67 |
| Display | Optional LCD |
| Communication | HART |