Upgrading Memory on SRP Modules ! 89
Chapter 9: Maintaining E-series Routers
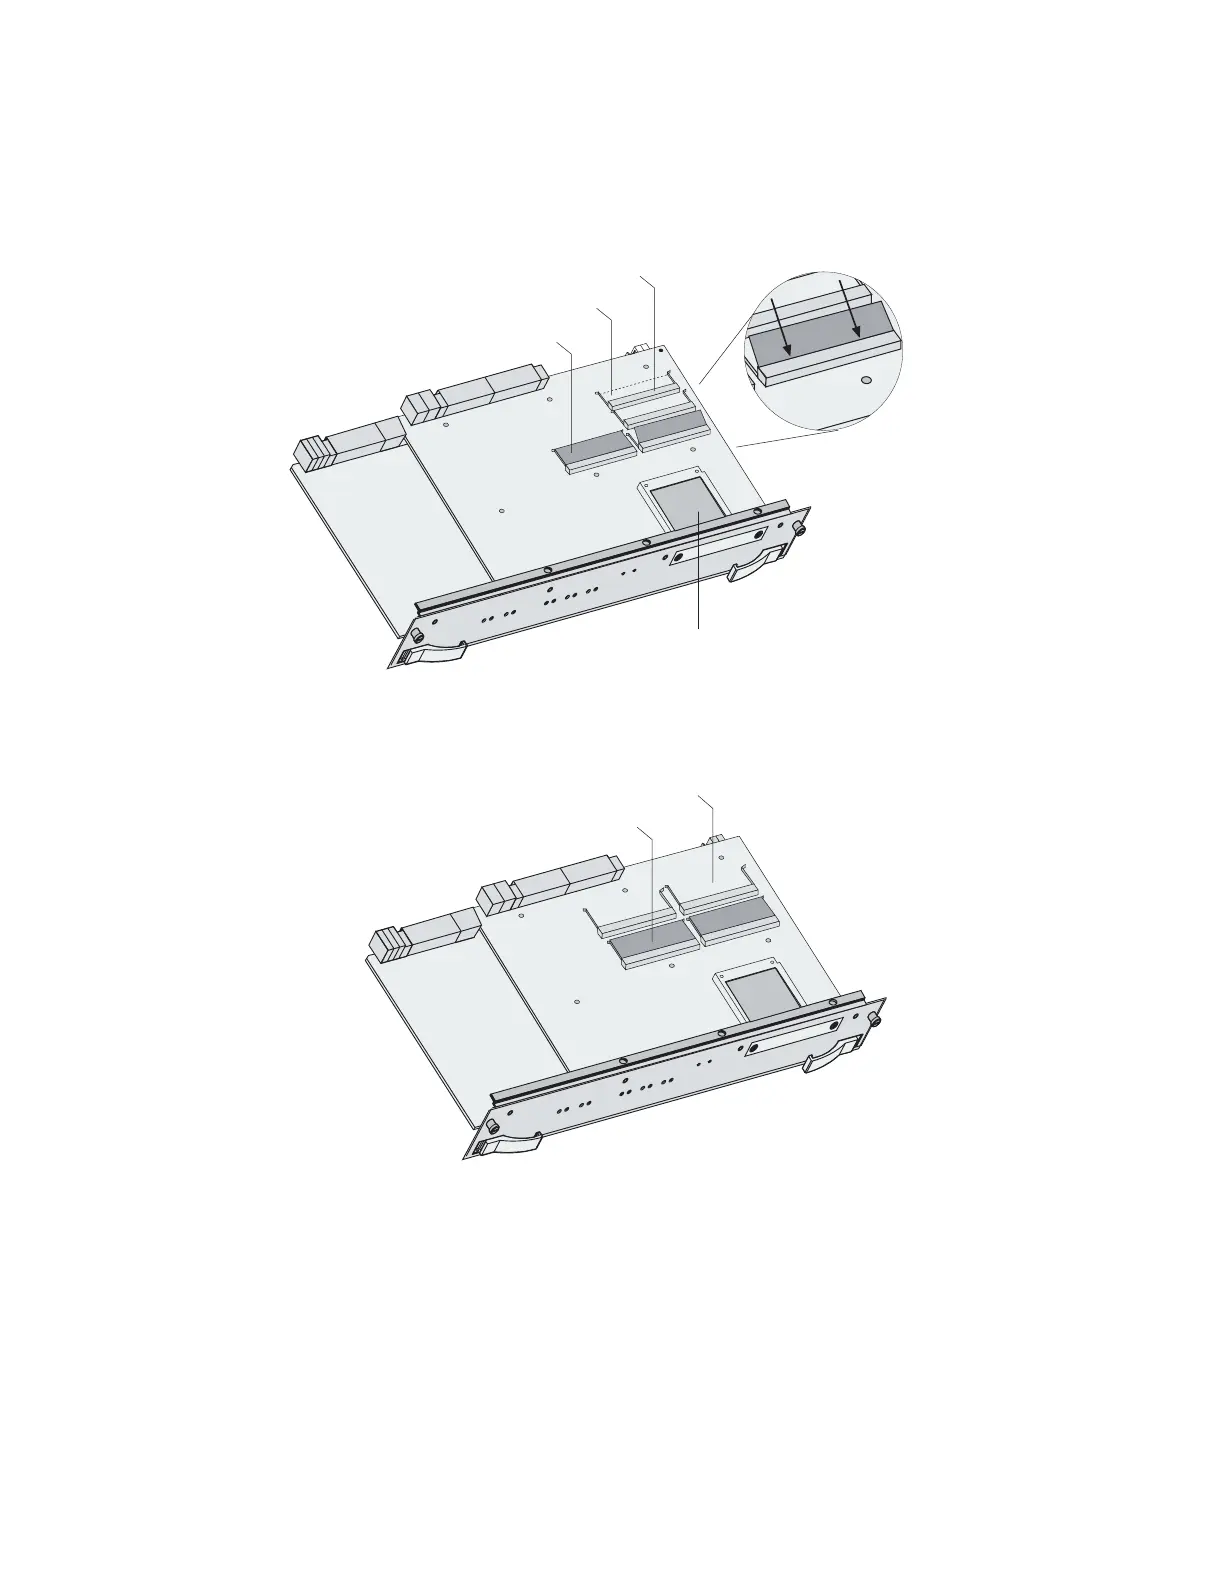
Figure 43: SODIMM sockets on the SRP-5 and SRP-10 module
Figure 44: SODIMM sockets on the SRP-40 module
2. Insert a SODIMM from the upgrade kit at an angle of approximately 45 degrees
into an empty ceramic connector, so that the notch in the long gold edge of the
SODIMM aligns with the notch in the connector.
The notch on the long gold edge will no longer be visible when the SODIMM is
pressed in far enough.
3. Press the top surface downward into the socket until the socket spring snaps
into place and holds it.
4. Repeat steps 2 through 3 with the other SODIMM.
5. Repeat steps 1 through 4 for the other SRP module, if present.
SODIMM
Cream ceramic connector
Empty SODIMM socket
NVS card
3. Push down on back edge
of SODIMM until it snaps
into socket.
2. Push SODIMM into
connector at an angle of
approximately 45 degrees.
1. Align notches in
SODIMM and connector.
g013451
SODIMM
Empty SODIMM socket
g013452