DN112-06v02
JYE Tech - 34 - www.jyetech.com
11) Right after clicking on the “Dn” icon enter Menu on
DSO112A and touch the button “Reboot” immediately.
This is to make the oscilloscope enter bootloader.
12) You should see AVRUBD communicating with DSO112A.
If the communication is successful the firmware writing
starts. You can see a progress bar at the lower-right corner
of AVRUBD window.
13) After the writing finish DSO112A reboots. Firmware
upgrading is done.
Upgrade Firmware by Programmer
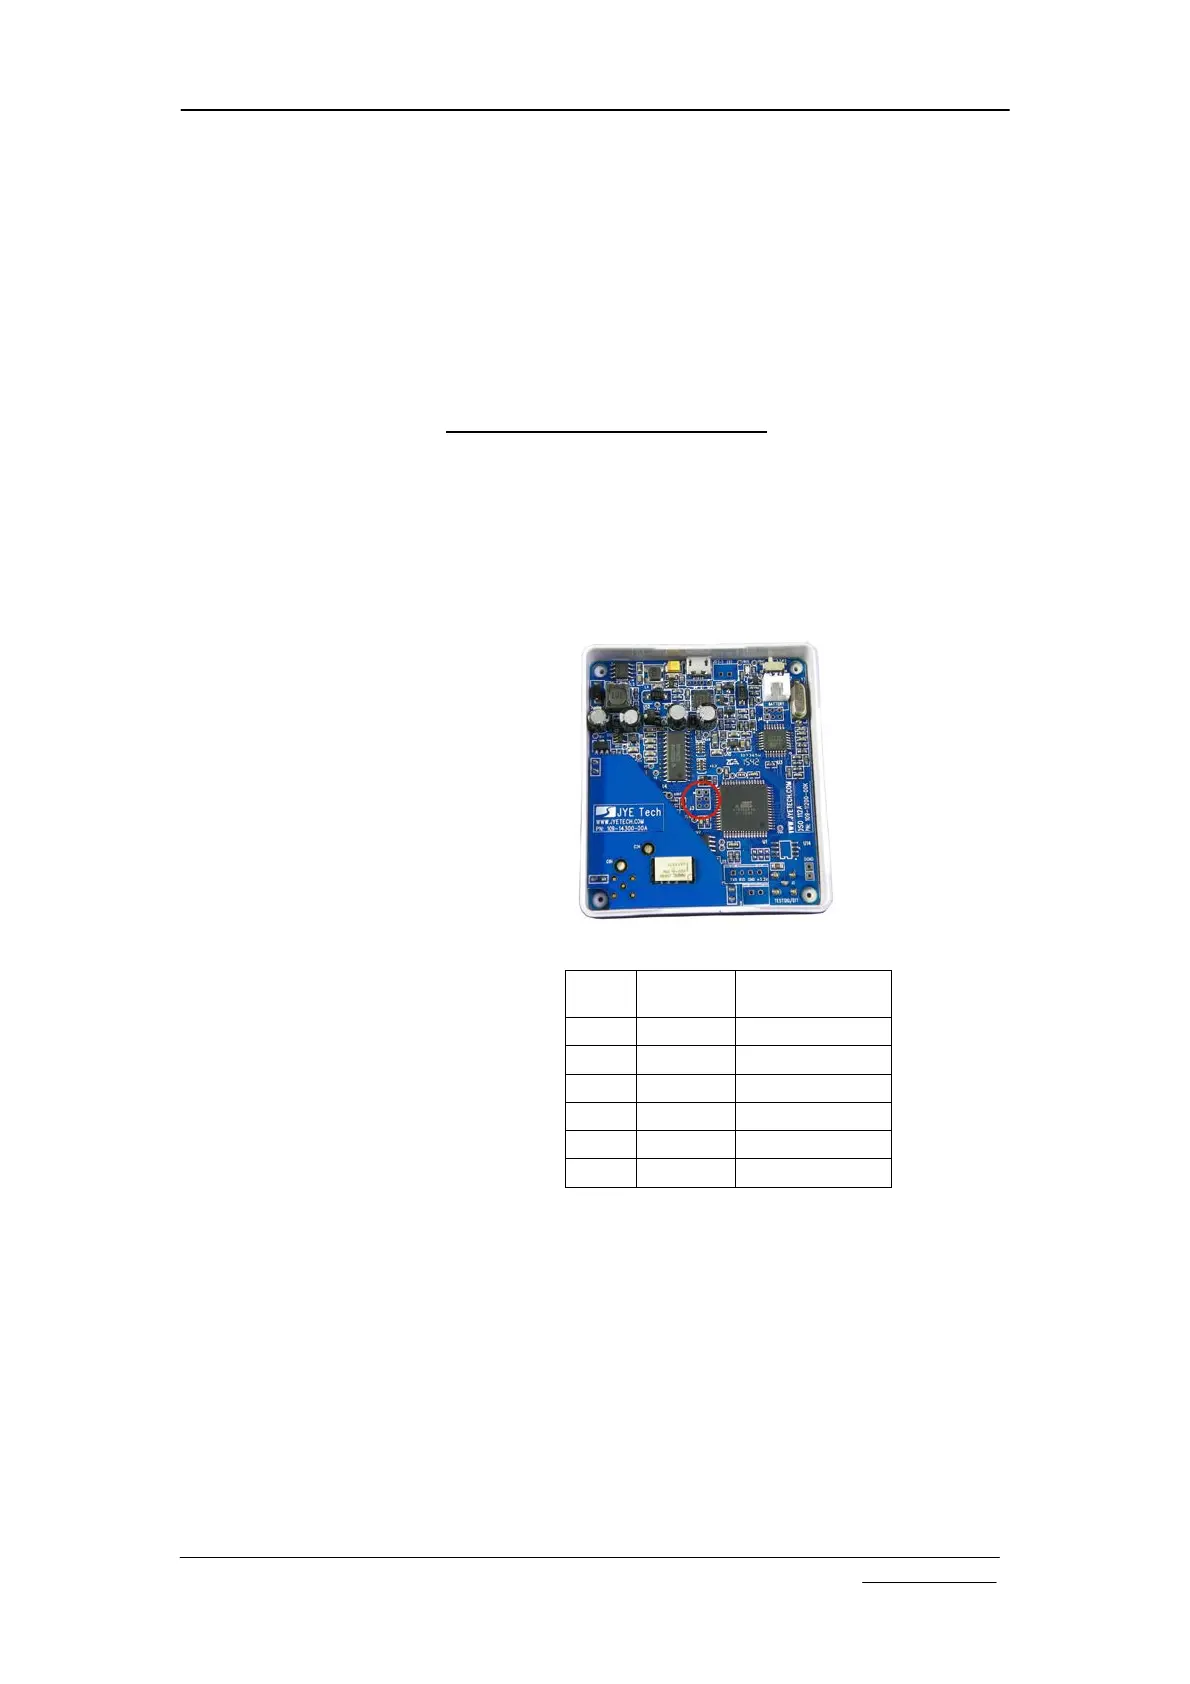
Firmware can be upgraded by an AVR programmer through
programming port J3 on DSO112A main PCB (see photo
below). There are many such programmer available on the
market (for example, sku# 07302 from JYE Tech). It is
important to make sure that the connection between
programmer and J3 on DSO112A is correct. The table below
describes the signal names on J3.
J3 Pin-out Description
Pin#
Signal
Name
I/O
1 MISO O
2 +5V PWR
3 Sync I
4 MOSI I
5 nRST I
6 GND PWR
Please do not attempt to change the fuse bits inside the
micro-controller. In case these bits are unintentionally changed
you need to restore them to the following values.
Extended Fuse Byte: 0b11111111 ( 0xFF )
High Fuse Byte: 0b11000000 ( 0xC0 )
Low Fuse Byte: 0b11010000 ( 0xD0 )
For detailed descriptions of how to write firmware into
micro-controller you need to refer to instructions for the
programmer and software you use.