Maintenance
9 --- 49
20
20
20
20
14
17
19
25 15
16
21
21
23
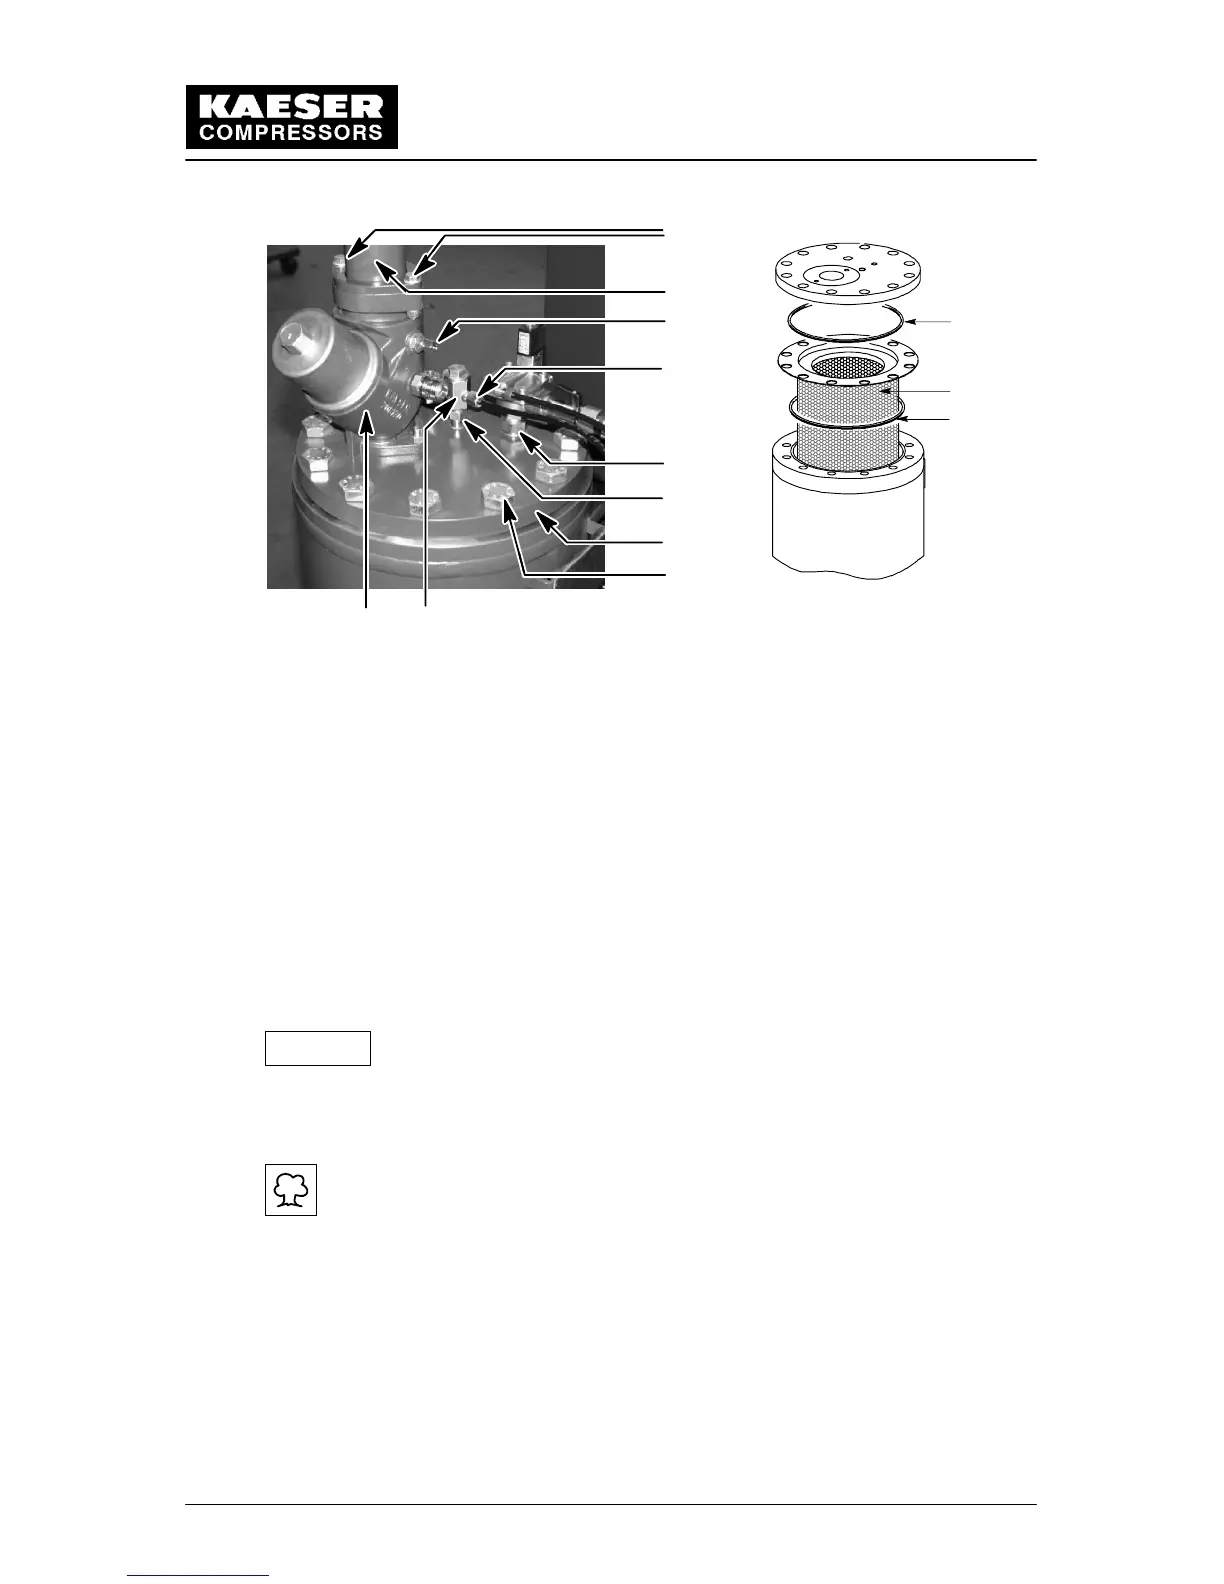
14 Cover 16 Air pipe 20 Union nut
15 Dirt trap 17 Hexagonal screw 21 Gasket
(with copper pipe) 19 Self---locking nut 23 Oil separator cartridge
25 Minimum pressure/check valve
Remove cover panel (3, siee chapter 9.2).
Loosen the union nuts (20) and lay the parts with connections carefully to the side ---
pull out the copper pipe at position (15).
Unscrew the self locking nuts (19) on both ends of the air pipe (16).
Withdraw the air pipe (16) from the minimum pressure/check valve (25) and push
carefully to one side.
Unscrew the bolts (17) holding down the cover plate (14) and carefully remove the
cover plate.
Remove the old oil separator cartridge (23), with gaskets (21).
When cleaning the sealing surfaces take care that no particles fall into
the oil separator tank.
The oil separator cartridge is a disposable item and cannot be
cleaned.
Dispose of the used oil separator cartridge according to environmental
regulation.
Insert the new oil separator cartridge (23) with the new gaskets (21), fit and tighten
down the cover plate (14) with the bolts (17).
Replace the strainer and the O---ring of the dirt trap (15) when the oil separator car-
tridge is replaced.
Reassemble in the reverse order.
Close all maintenance doors and reattach all cover panels.
Open the isolation shut---off valve between the compressor and the compressed air
system.
Attention!