Model 2750 Multimeter/Switch System Service Manual Calibration 2-19
Model 2750 Calibration
AC current calibration
Follow these steps for AC current calibration:
1. Connect the calibrator to the AMPS and INPUT LO terminals of the Model 2750
as shown in Figure 2-3.
2. Perform the calibration steps summarized in Table 2-12. For each step:
• Set the calibrator to the indicated current and frequency, and make sure the
unit is in operate. (You must use the stated current and frequency.)
• Send the indicated programming command.
• Wait until the Model 2750 completes each step before continuing.
Programming calibration dates
Program the present calibration date and calibration due date by sending the following
commands:
:CAL:PROT:DATE <year>, <month>, <day>
:CAL:PROT:NDUE <year>, <month>, <day>
For example, the following commands assume calibration dates of 3/5/2001 and
3/5/2002 respectively:
:CAL:PROT:DATE 2001, 3, 5
:CAL:PROT:NDUE 2002, 3, 5
Saving calibration constants
After completing the calibration procedure, send the following command to save the new
calibration constants:
:CAL:PROT:SAVE
NOTE Calibration constants will not be saved unless the :CAL:PROT:SAVE command
is sent.
Locking out calibration
After saving calibration, send the following command to lock out calibration:
:CAL:PROT:LOCK
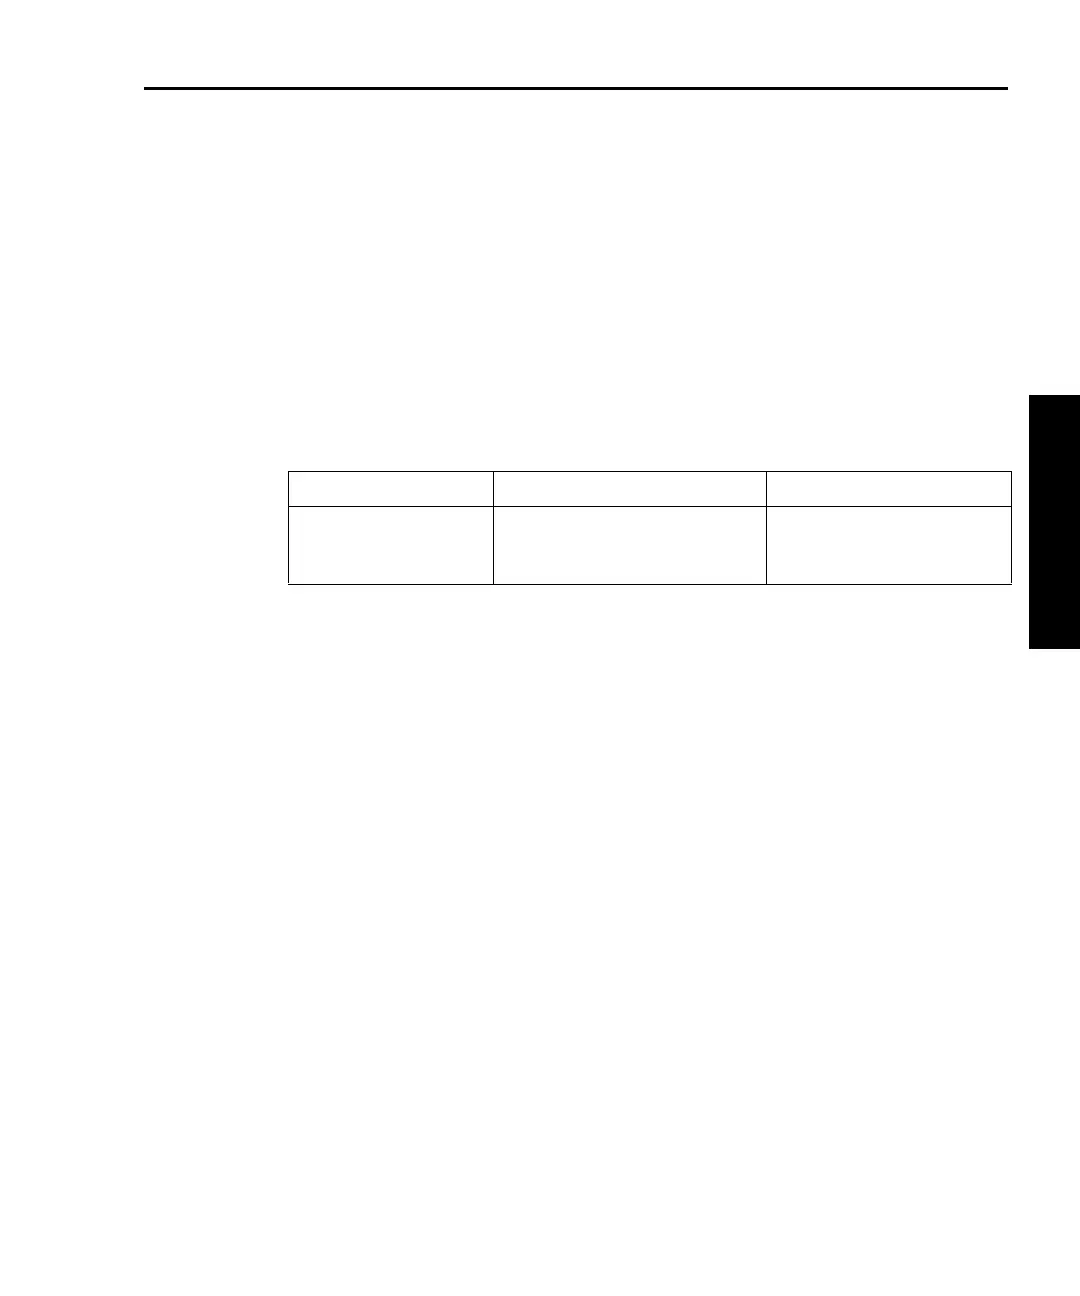
Tab le 2- 12
AC current calibration programming steps
Calibration Step Calibrator Current, Frequency Calibration Command
100mA at 1kHz
1A at 1kHz
2A at 1kHz
100.0000mA, 1kHz
1.000000A, 1kHz
2.000000A, 1kHz
:CAL:PROT:AC:STEP11
:CAL:PROT:AC:STEP12
:CAL:PROT:AC:STEP13