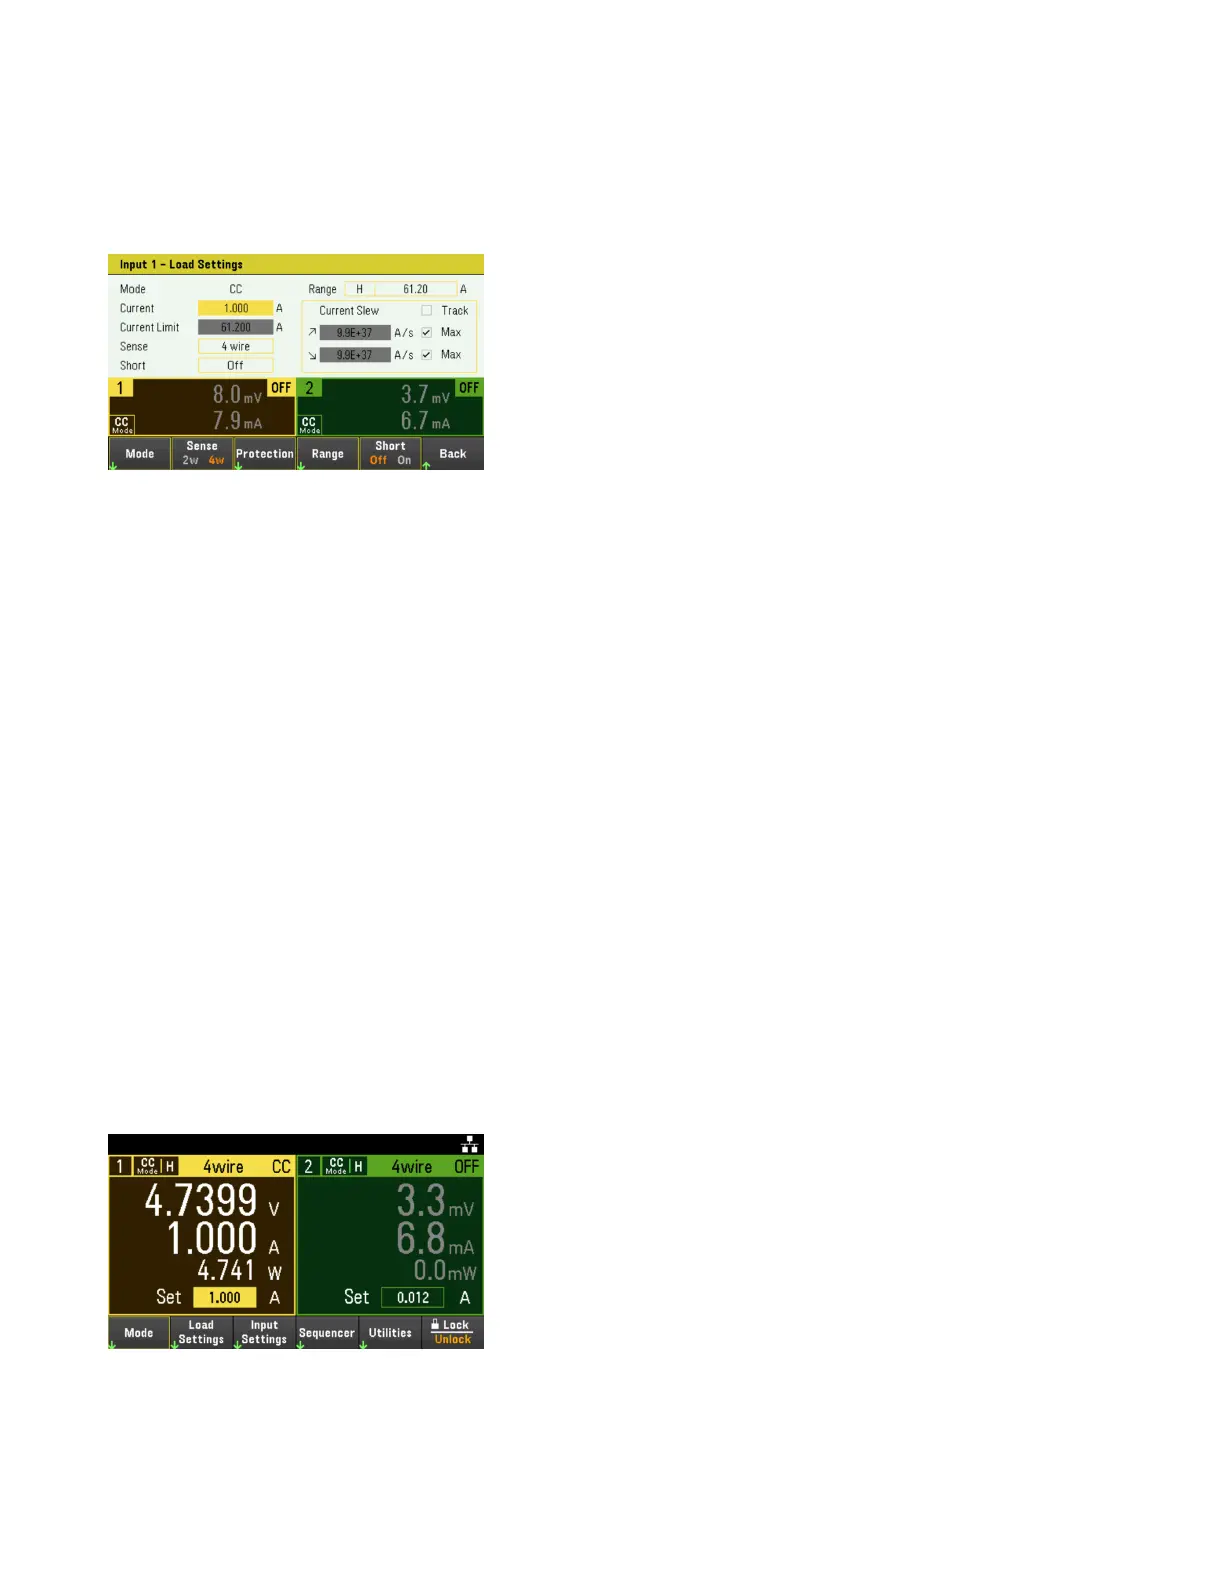
Lastly, you can press the Load Settings key to access the Load Settings window. Use the navigation keys to
highlight the voltage, current, resistance, or power fields. Then enter the input values with the numeric keys. You
can also use the knob to adjust the values in the value fields for Channel 1/Channel 2 input accordingly.
Press [Enter] to enter the value. Press Back to return to the meter-view display.
Refer to Programming Ranges for the load input range and its default value.
Step 4 - Enable the input
Press the color-coded [On] key to enable an individual load input. When an input is on, the [On] key for that input is
lit. When an input is off, the [On] key is not lit.
EL34243A only: The [All On/Off] key turns all inputs on or off simultaneously.
The state of a disabled input (input off) is a condition of zero input voltage and zero source current.
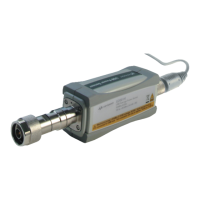
Step 5 - View the input voltage and current
Press [Meter View] to view the input voltage and current. When an input is enabled, the front panel meters
continuously measure and display the voltage and current either input or sense terminal.
No matter which operating mode you are operating in, the front panel meter view returns the voltage and current
measurement from either input or sense terminal. Power measurements are displayed along with voltage and
current in single-channel view.
The following meter view applies to CC mode. CV, CP, and CR mode views are similar. All measurements have an
over-range capability of 10% above the maximum range limit. If the measurement exceeds this limit, “Data Out of
Range” error will occur
Keysight EL30000 Series User's Guide 65